Android Tutorial MansionOfMadnessDiceRoller Part1
1.0.0
使用基本的Android构建体构建最小可行的产品骰子Android应用。
VectorRelativeLayout , ConstraintLayout , LinearLayout ]ListView和ArrayAdapter列表ListView和Adapter逻辑不久前,我进入了这个疯狂的棋盘游戏大厦。该游戏有点像经典的线索,玩家在房子周围漫游,试图解决一些谜。我强烈推荐这是一款很棒的游戏。无论如何,游戏使用骰子掷骰来解决动作和其他游戏事件。奇怪的是,玩家有时必须比游戏包括(6)更多的骰子掷骰子!我认为这是构建自定义骰子辊应用程序的绝佳机会。在本教程中,我将使用基本的Android组件来建造疯狂骰子滚筒的豪宅。
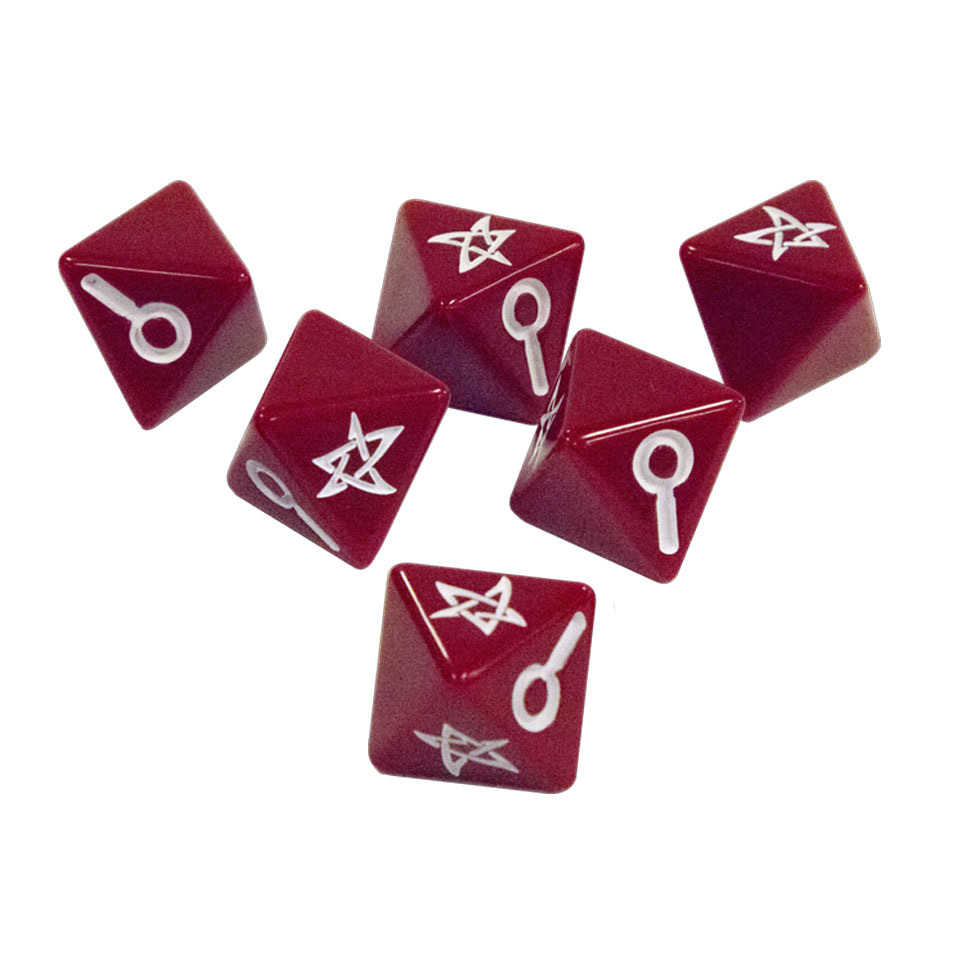
这个骰子应用是专门为疯狂游戏玩法的豪宅而设计的,因此首先我将概述游戏如何使用骰子。
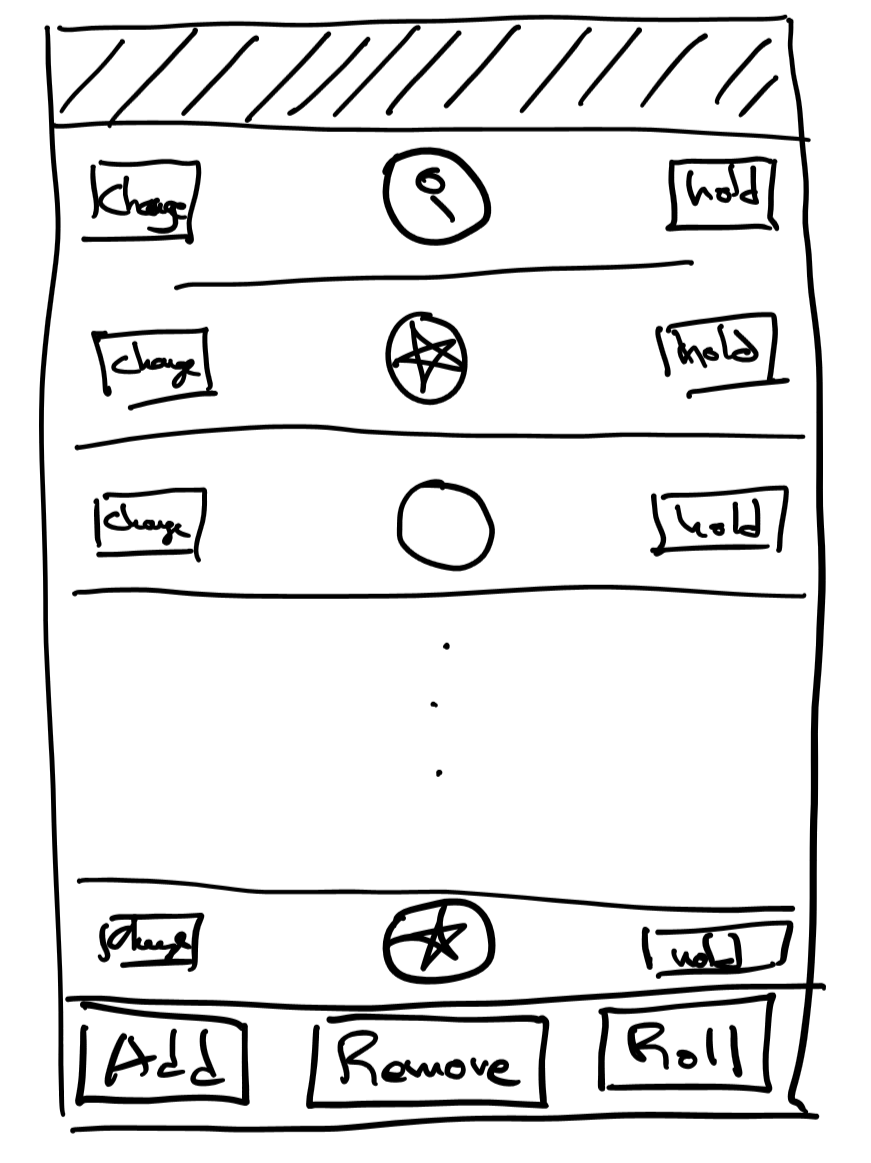
为了保持简单,该应用将是垂直滚动的骰子列表。该应用程序将具有3个按钮来触发功能“滚动骰子”,“添加骰子”和“删除骰子”。每个骰子将具有相应的“持有”和“更改”。
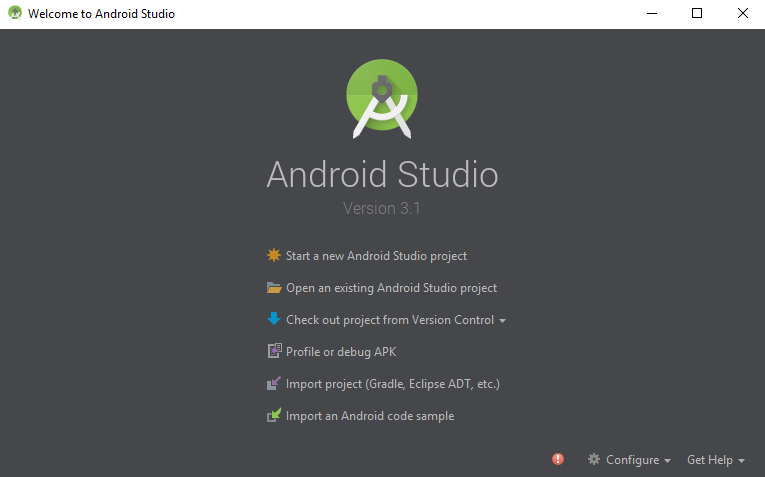
Android平台总是在变化,随着时间的流逝,这些教程过时了。作为参考,我的开发环境:
Android环境

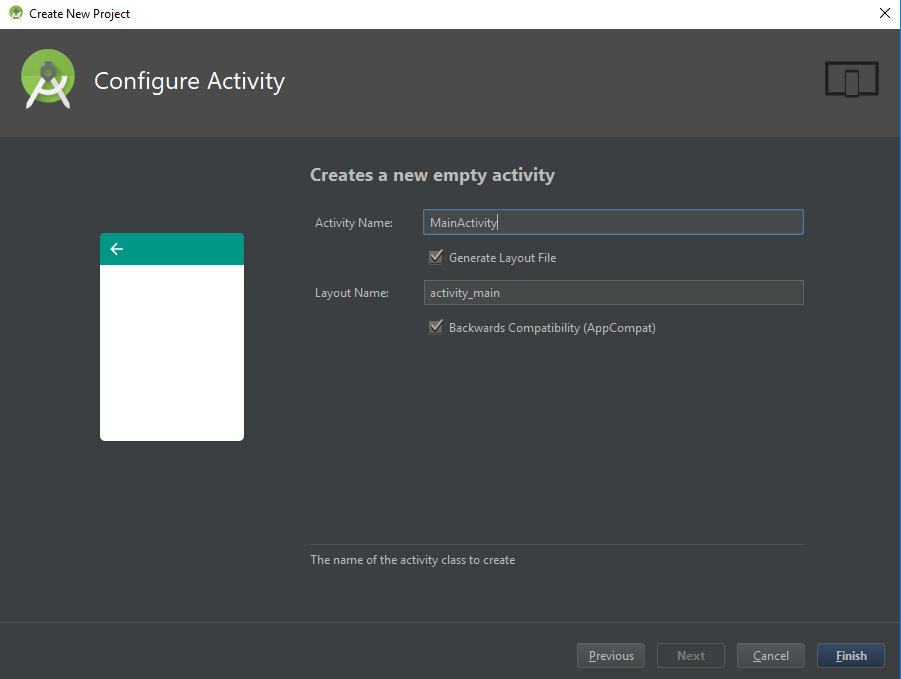
在项目创建后,所有这些名称都可以更改,尽管如果项目变得复杂,它可能会很麻烦地追逐所有名称引用。
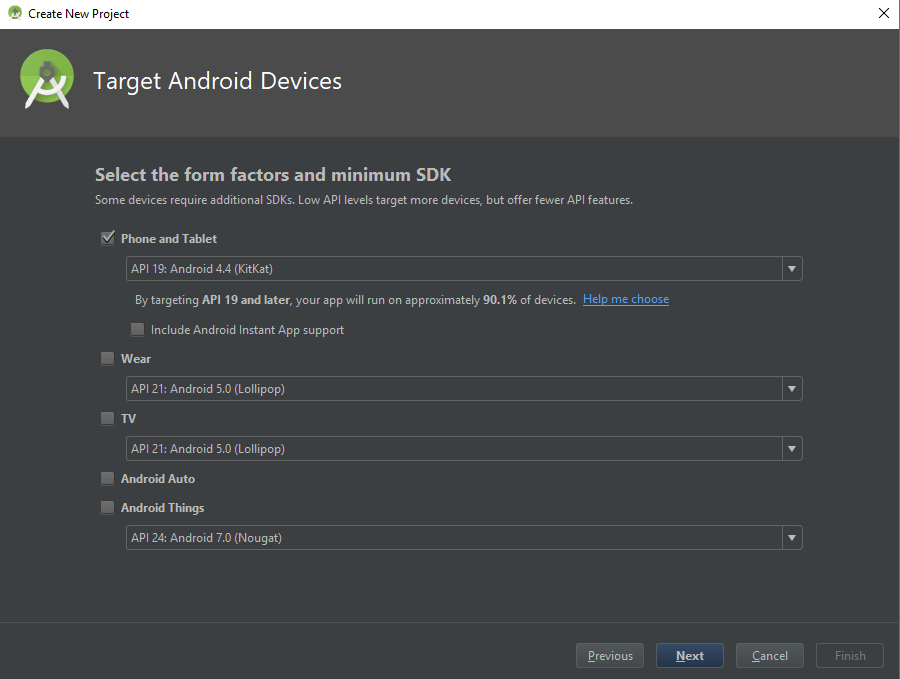
Android有许多版本。每个版本都会更改平台。这基本上意味着世界上有很多具有不同版本的Android设备。这对于应用程序开发人员来说是头痛,因为根据应用程序使用的库,该应用可能与某些设备不相容。这里的权衡是使用新Android库的应用程序无法在旧设备上运行。如果该应用必须在较旧的设备上运行,则该应用必须使用一些较旧的Android构造。
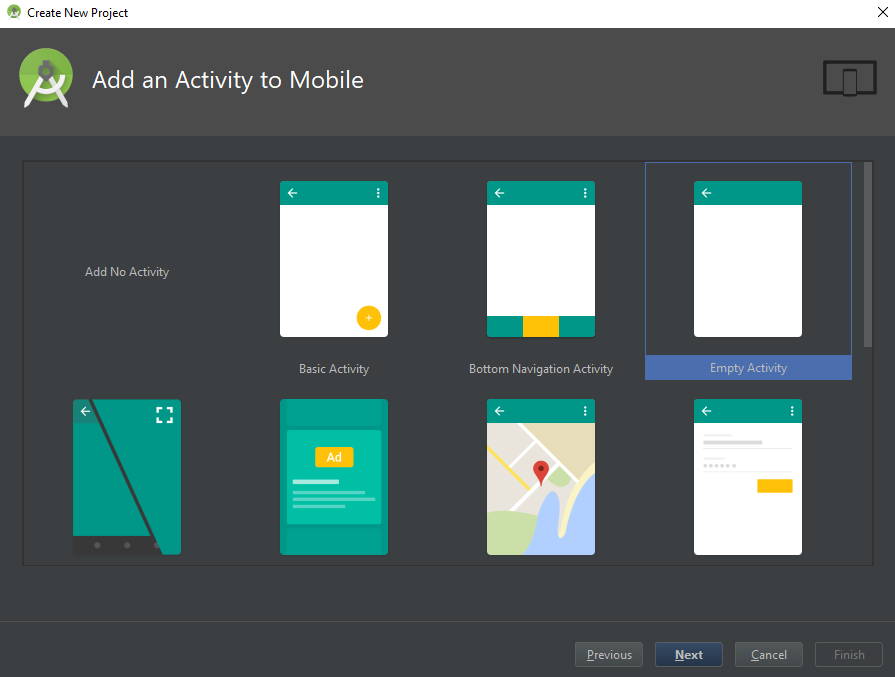
对于此应用程序,最初的模板实际上并不重要。模板代码有时很有用,因为它使用某些代码在布局和初始类中进行了预言。由于我不会使用任何这些,所以我选择了空的活动。
Android Project创建对话框用基本构造来初始化项目:
Gradle是一个促进建筑项目的框架。在维基百科
Android清单将该应用描述为Android。应用属性,例如权限和激活物。详细信息可以在Android文档页面上找到。
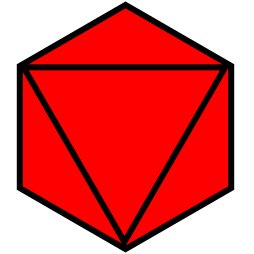
首先,我使用一个名为Clker的简单在线SVG编辑器作为SVG绘制骰子面。
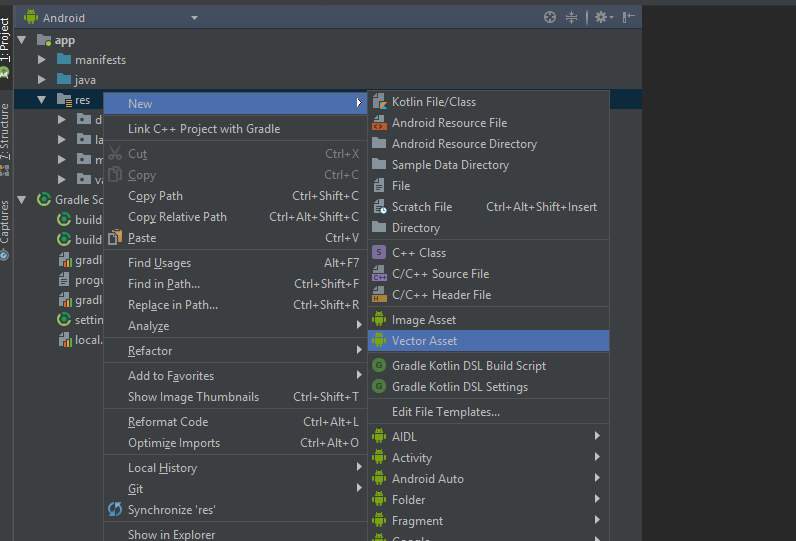
接下来,我使用Android Studio的资产工作室将它们导入我的项目。

设备具有不同的分辨率和尺寸。很难预测应用程序运行的设备的分辨率和尺寸。缩放JPEG会导致模糊或粒状图形。解决此问题的一种方法是使用SVG。在线讨论SVG的文章有许多文章,但请参考,请查看Wikipedia SVG文章以获取更多信息。
Android提供了两种描述布局的方法:程序化和XML布局。编程描述复杂的布局非常困难,因此大多数人通常避免这种情况。编写XML可能并不是那么有趣,但是Android Studio确实提供了几种减轻痛苦的工具。预览工具和Wsywig布局编辑器。但是,即使有编辑,潜入XML也几乎是不可避免的。
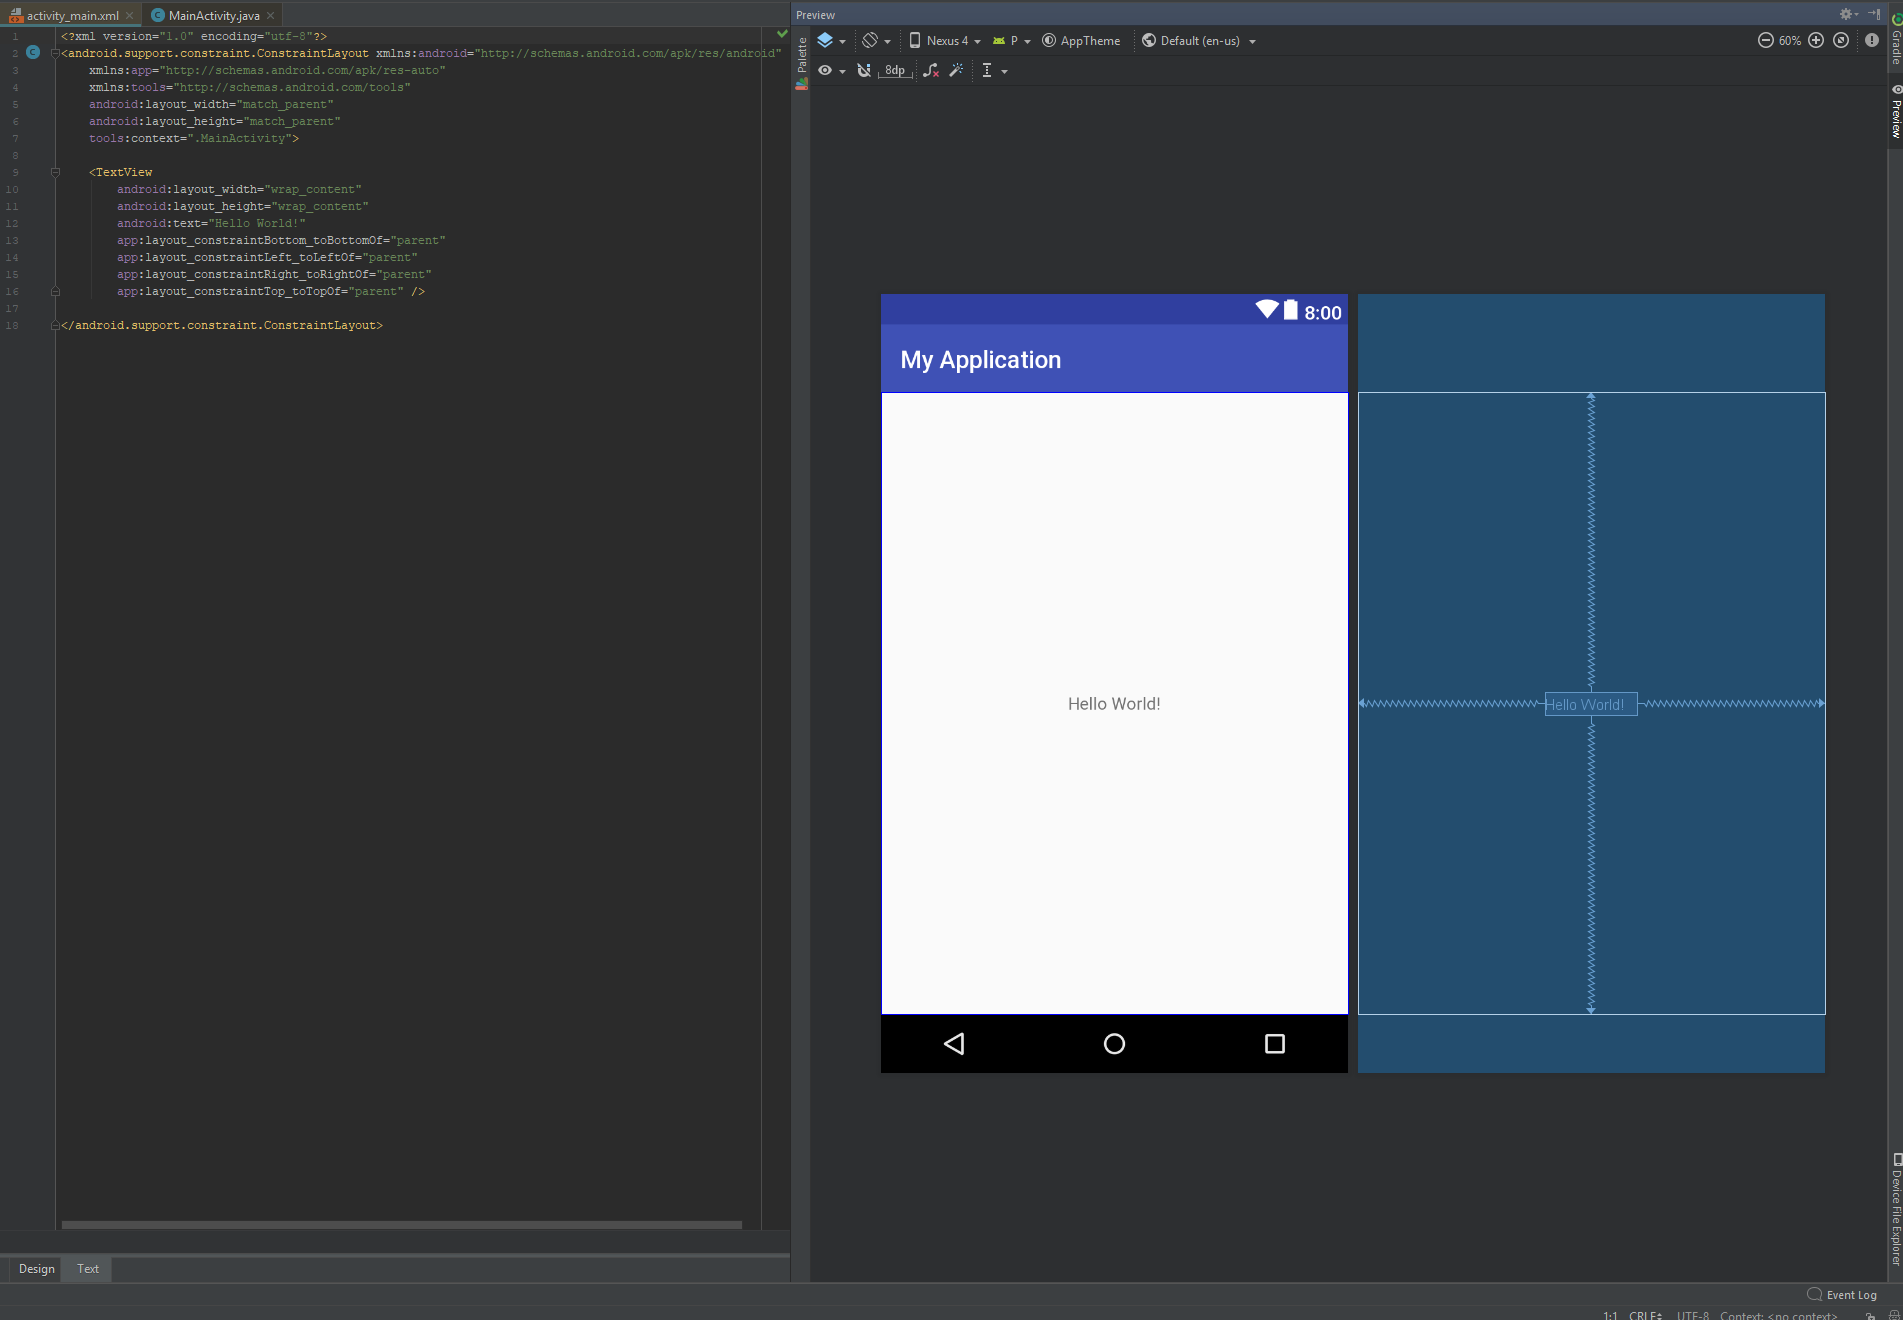
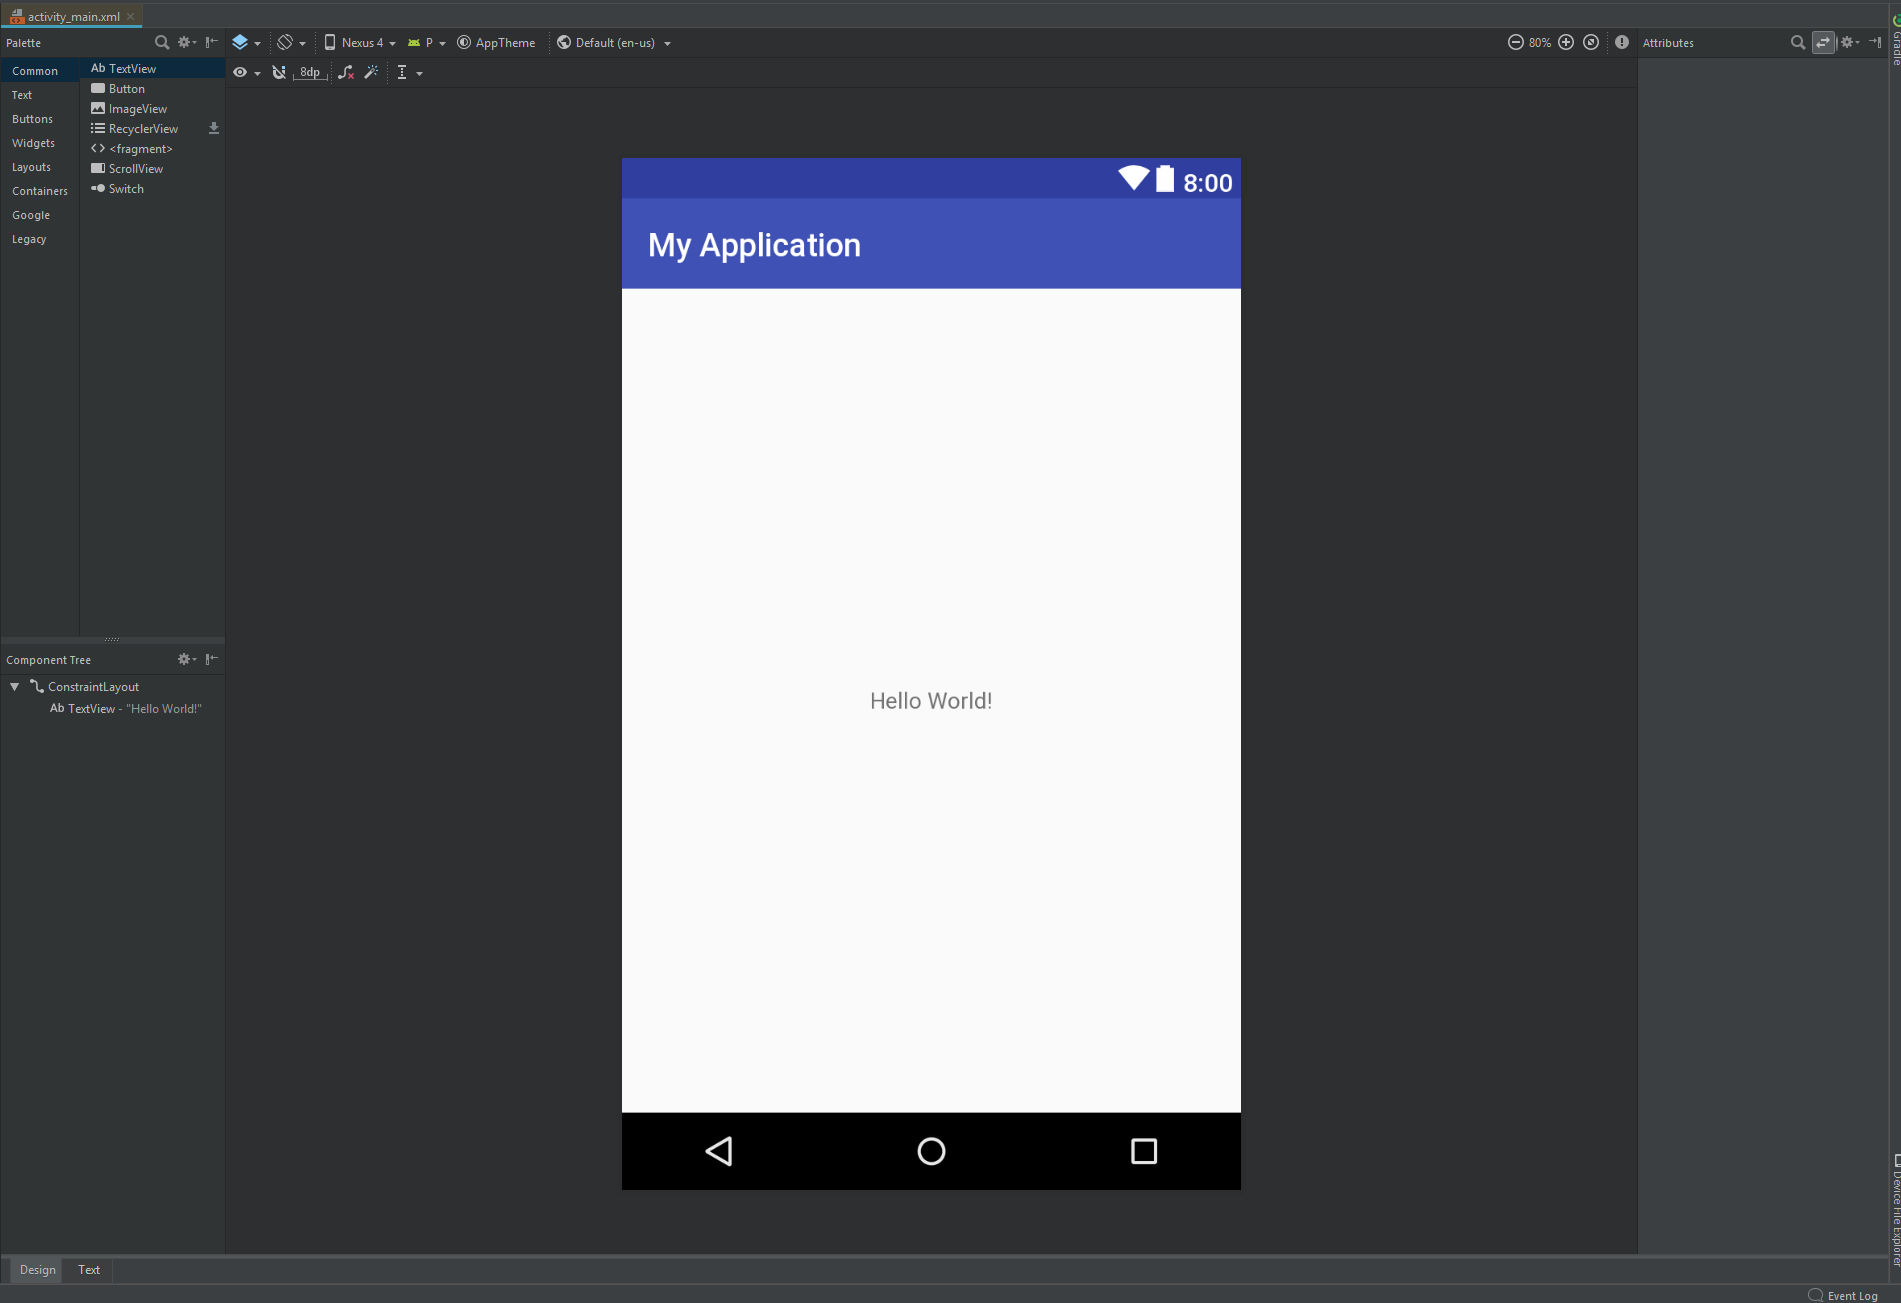
Android Studio空的活动模板从ConstraintLayout root布局元素开始。我们在此应用中需要两个组件:骰子区域和控制器区域。骰子区域将是可滚动的骰子列表,控制器将是3个按钮“添加”“删除”“滚动”。
activity_main.xml <?xml version="1.0" encoding="utf-8"?>
<android.support.constraint.ConstraintLayout xmlns:android="http://schemas.android.com/apk/res/android"
xmlns:app="http://schemas.android.com/apk/res-auto"
xmlns:tools="http://schemas.android.com/tools"
android:layout_width="match_parent"
android:layout_height="match_parent"
tools:context=".MainActivity">
<ListView
android:id="@+id/dice_list"
android:layout_height="0dp"
android:layout_width="match_parent"
app:layout_constraintBottom_toTopOf="@id/button_bar"
app:layout_constraintLeft_toLeftOf="parent"
app:layout_constraintRight_toRightOf="parent"
app:layout_constraintTop_toTopOf="parent">
</ListView>
<LinearLayout
android:id="@+id/button_bar"
android:layout_width="match_parent"
android:layout_height="@dimen/control_bar_height"
android:orientation="horizontal"
android:weightSum="3"
app:layout_constraintBottom_toBottomOf="parent"
app:layout_constraintLeft_toLeftOf="parent"
app:layout_constraintRight_toRightOf="parent"
app:layout_constraintTop_toBottomOf="@id/dice_list">
<Button
android:id="@+id/add_dice_button"
android:layout_gravity = "center"
android:layout_weight="1"
android:layout_width="wrap_content"
android:layout_height="wrap_content"
android:text="@string/add_button_label"
android:onClick="addDice"/>
<Button
android:id="@+id/rem_dice_button"
android:layout_gravity = "center"
android:layout_weight="1"
android:layout_width="wrap_content"
android:layout_height="wrap_content"
android:text="@string/rem_button_label"
android:onClick="removeDice"/>
<Button
android:id="@+id/roll_dice_button"
android:layout_weight="1"
android:layout_gravity = "center"
android:layout_width="wrap_content"
android:layout_height="wrap_content"
android:text="@string/roll_button_label"
android:onClick="rollDice"/>
</LinearLayout>
</android.support.constraint.ConstraintLayout>
对于那些不熟悉XML的人,以上可能看起来像Gibberish。解释XML不在本教程的范围之内,但是Google,YouTube和Wikipedia是寻找更多信息的人的绝佳资源。对于这种布局,我正在使用ListView , Button , LinearLayout和ConstraintLayout 。有关其属性的详细信息可以在Android文档页面上找到。
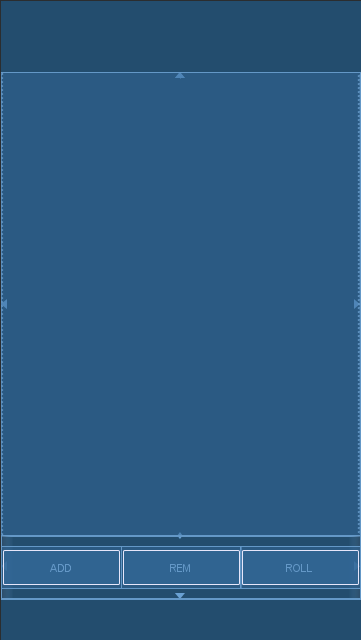
我正在寻找一个Layout ,该布局很容易描述固定的高度底部区域(用于按钮)和一个填充可用屏幕空间的顶部区域(用于骰子)。使用权LinearLayout使其子元素排出其子元素,使其不合适。 RelativeLayout不能提供“填充剩余空间”的能力,也使其不合适。
从视觉上讲, LinearLayout看起来非常接近我的需求。但是, LinearLayout用于静态列表,而不是动态列表。对于此应用程序,骰子列表可以在0到25个骰子之间,使ListView是一个更好的候选人。
0dp值是特定于ConstraintLayout的,这表明它应该填充父的剩余空间。
如上所述,每个骰子行包括2个按钮和一个骰子图像。

row.xml <?xml version="1.0" encoding="utf-8"?>
<RelativeLayout
xmlns:android="http://schemas.android.com/apk/res/android"
android:layout_width="match_parent"
android:layout_height="@dimen/row_height">
<FrameLayout
android:layout_width="wrap_content"
android:layout_height="@dimen/row_height"
android:layout_alignParentStart="true"
android:layout_centerVertical="true"
android:padding="@dimen/row_padding">
<Button
android:id="@+id/dice_change_button"
android:layout_width="wrap_content"
android:layout_height="wrap_content"
android:text="@string/change_button_label">
</Button>
</FrameLayout>
<ImageView
android:id="@+id/dice_icon"
android:layout_centerInParent="true"
android:layout_width="@dimen/image_width"
android:layout_height="@dimen/image_height"
android:src="@drawable/blank_dice"/>
<FrameLayout
android:layout_width="wrap_content"
android:layout_height="@dimen/row_height"
android:layout_alignParentEnd="true"
android:layout_centerVertical="true"
android:padding="@dimen/row_padding">
<Button
android:id="@+id/dice_hold_button"
android:layout_width="wrap_content"
android:layout_height="wrap_content"
android:text="@string/hold_button_label">
</Button>
</FrameLayout>
</RelativeLayout>
按钮位于行的垂直中心,距每个边缘一定距离。我觉得,如果设计将实际按钮元素分开及其在布局中的位置,则该设计将更加干净。因此,对于我的应用程序,我使用FrameLayout来指定位置并将按钮中心在该布局中。
字符串和尺寸值允许我们不将配置字符串和整数直接写入代码。对于我们的小应用程序,也许没什么大不了的。
string.xml <resources>
<string name="app_name">DiceRoller</string>
<string name="hold_button_label">Hold</string>
<string name="change_button_label">Change</string>
<string name="add_button_label">ADD</string>
<string name="rem_button_label">REM</string>
<string name="roll_button_label">ROLL</string>
</resources>
dimens.xml <?xml version="1.0" encoding="utf-8"?>
<resources>
<dimen name="row_height">72dp</dimen>
<dimen name="row_padding">16dp</dimen>
<dimen name="control_bar_height">72dp</dimen>
<dimen name="image_width">72dp</dimen>
<dimen name="image_height">72dp</dimen>
</resources>
ListView和ArrayAdapter在这一点上,我已经用空的主动脉初始化了我们的Android项目,并嘲笑了一些布局。接下来,我将进入逻辑和代码。首先,我想参加更多特定于Android的Java课程。 ListView是用于渲染视觉列表的基本布局类。 Android框架通过采用适配器模式将视觉组件( ListView )和数据组件( List<Dice> )分开。在我们的情况下,适配器所做的就是将数据( Dice )映射到某些视觉布局( dice_row.xml )。在这种情况下,布局XML文件描述了布局。
MainActivity.java public class MainActivity extends AppCompatActivity {
DiceAdapter diceAdapter;
List <Dice> diceList = new ArrayList<>();
@Override
protected void onCreate(Bundle savedInstanceState) {
super.onCreate(savedInstanceState);
//associating activity to layout
setContentView(R.layout.activity_main);
//Setup ListView and Adapter
ListView listView = findViewById(R.id.dice_list);
diceAdapter = new DiceAdapter(this, R.layout.dice_row, diceList);
listView.setAdapter(diceAdapter);
//Initialize Data
diceAdapter.add(new Dice());
}
public class DiceAdapter extends ArrayAdapter<Dice> {
public DiceAdapter(@NonNull Context context, int resource, List<Dice> list) {
super(context, resource, list);
}
@Override
public View getView(final int position, View convertView, ViewGroup parent) {
if (convertView == null) {
convertView = LayoutInflater.from(getContext()).inflate(R.layout.dice_row, parent, false);
}
return convertView;
}
}
}
该应用将用骰子对象表示骰子状态。骰子对象具有两种属性:骰子值[空白,放大,恒星],以及骰子是否被“持有”。从功能上讲,骰子的掷骰方法将随机选择骰子面。最后,我添加了一种将骰子值更改为列表中下一个方法的方法。
MainActivity.java ....
public static class Dice {
public enum Face {
BLANK,
MAGNIFY,
STAR
}
public static Random random = new Random();
boolean hold = false;
Face diceVal;
Dice() {
roll();
}
public void roll() {
int num = random.nextInt(4);
if(num == 0) { //25% magify
this.diceVal = Face.MAGNIFY;
} else {
//37.5% star, 37.5% blank
if(random.nextBoolean()) {
this.diceVal = Face.BLANK;
} else {
this.diceVal = Face.STAR;
}
}
}
public void toggleHold() {
hold = !hold;
}
public void nextValue() {
int index = diceVal.ordinal();
index = (index+1) % Face.values().length;
diceVal = Face.values()[index];
}
}
在此步骤中,i映射按钮点击逻辑。 Android平台提供了几种做到这一点的方法。一种方法是从布局文件指定属性。另一个是编程设置onClickListener 。在我们的应用程序中,对三个顶级按钮使用属性方法,并通过编程方式设置行按钮的侦听器。
addDice如果骰子计数小于25,则将新的骰子对象添加到骰子列表中。
设计
activity_main.xml ....
<Button
android:id="@+id/add_dice_button"
android:layout_gravity = "center"
android:layout_weight="1"
android:layout_width="wrap_content"
android:layout_height="wrap_content"
android:text="@string/add_button_label"
android:onClick="addDice"/>
....
逻辑
MainActivity.java ....
public void addDice(View view) {
if(diceList.size()< MAX_DICE_COUNT) {
diceAdapter.add(new Dice());
}
}
....
removeDice骰子列表没有空,请从列表中删除最后的骰子
设计
activity_main.xml ....
<Button
android:id="@+id/rem_dice_button"
android:layout_gravity = "center"
android:layout_weight="1"
android:layout_width="wrap_content"
android:layout_height="wrap_content"
android:text="@string/rem_button_label"
android:onClick="removeDice"/>
....
逻辑
MainActivity.java ....
public void removeDice(View view) {
if(!diceList.isEmpty()) {
int lastIndex = diceList.size() - 1;
diceAdapter.remove(diceAdapter.getItem(lastIndex));
}
}
....
rollDice重新重新列出了He List上每个骰子的价值,这些价值尚未标记为持有。
设计
activity_main.xml ....
<Button
android:id="@+id/roll_dice_button"
android:layout_weight="1"
android:layout_gravity = "center"
android:layout_width="wrap_content"
android:layout_height="wrap_content"
android:text="@string/roll_button_label"
android:onClick="rollDice"/>
....
逻辑
MainActivity.java ....
public void rollDice(View view) {
//roll all dice
for(Dice dice : diceList) {
if(!dice.hold)
dice.roll();
}
//notify adapter to update view
diceAdapter.notifyDataSetChanged();
}
....
notifyDataSetChanged ?滚动按钮更改了相应的骰子对象的置换值。由于视图/数据适配器模式分离,除非触发,否则骰子行布局不会自动重新渲染。呼叫notifyDataSetChanged redraws视图。
单击按钮将设置骰子的持有标志。
MainActivity.java ....
Button holdButton = convertView.findViewById(R.id.dice_hold_button);
holdButton.setOnClickListener(new View.OnClickListener() {
@Override
public void onClick(View v) {
Dice dice = diceList.get(position);
dice.toggleHold();
}
});
....
单击“保持”按钮将更改骰子的值并更新接口。
MainActivity.java ....
Button changeButton = convertView.findViewById(R.id.dice_change_button);
changeButton.setOnClickListener(new View.OnClickListener() {
@Override
public void onClick(View v) {
Dice dice = diceList.get(position);
dice.nextValue();
diceAdapter.notifyDataSetChanged();
}
});
....


