Android Tutorial MansionOfMadnessDiceRoller Part1
1.0.0
การสร้างแอป Android ลูกเต๋าลูกเต๋าขั้นต่ำที่ทำงานได้โดยใช้การสร้าง Android พื้นฐาน
Vector AndroidRelativeLayout , ConstraintLayout , LinearLayout ]ListView และ ArrayAdapter ListView และ Adapter Logicเมื่อไม่นานมานี้ฉันได้เข้าสู่ Mansions of Madness เกมดังกล่าวเป็นเหมือนเบาะแสคลาสสิกที่ผู้เล่นเดินเตร่ไปรอบ ๆ บ้านที่พยายามจะแก้ปริศนา มันเป็นเกมที่ยอด เยี่ยม ที่ฉันขอแนะนำ อย่างไรก็ตามเกมใช้ลูกเต๋าม้วนเพื่อแก้ไขการกระทำและกิจกรรมเกมอื่น ๆ บางครั้งผู้เล่นต้องม้วนลูกเต๋ามากกว่าเกมรวมถึง (6)! ฉันตัดสินใจว่านี่เป็นโอกาสที่สมบูรณ์แบบในการสร้างแอพลูกกลิ้งลูกเต๋าแบบกำหนดเอง ในบทช่วยสอนนี้ฉันจะใช้ส่วนประกอบ Android พื้นฐานเพื่อสร้างคฤหาสน์ของ Madness Dice ลูกกลิ้ง
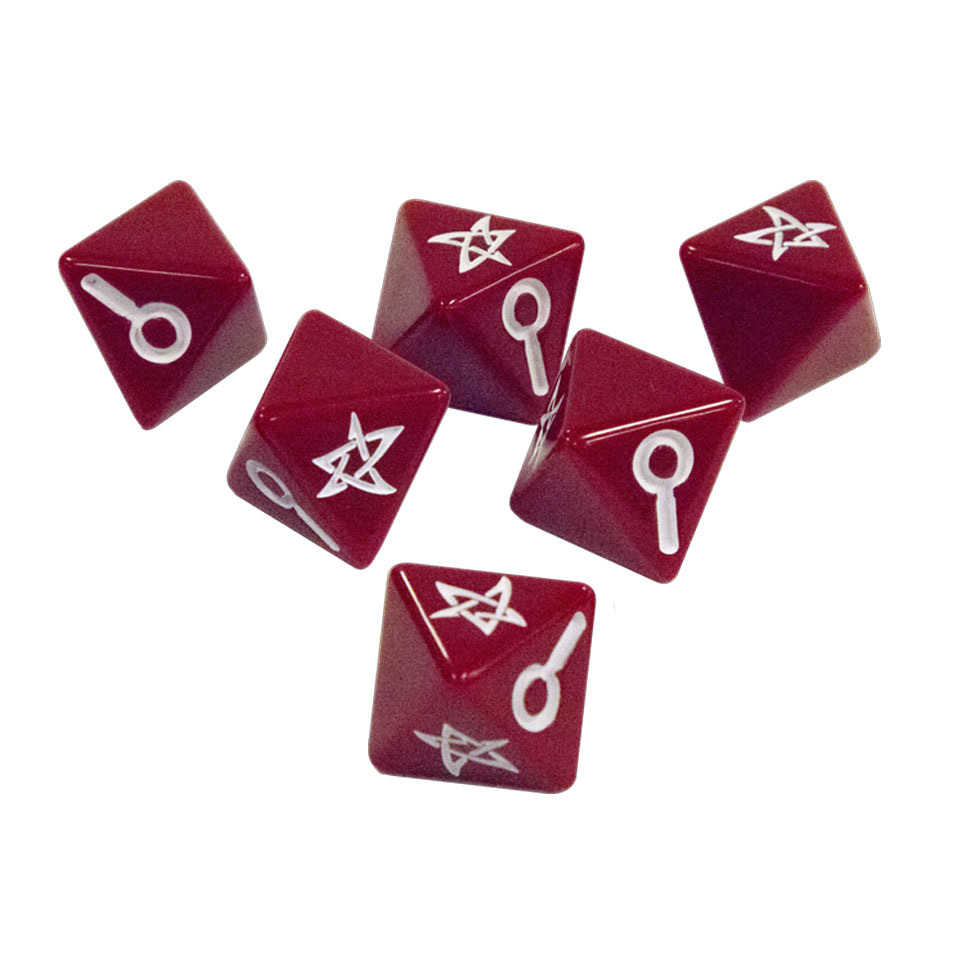
แอพลูกเต๋านี้ได้รับการออกแบบมาโดยเฉพาะสำหรับการเล่นเกม Mansions of Madness ดังนั้นก่อนอื่นฉันจะร่างว่าเกมใช้ลูกเต๋าอย่างไร
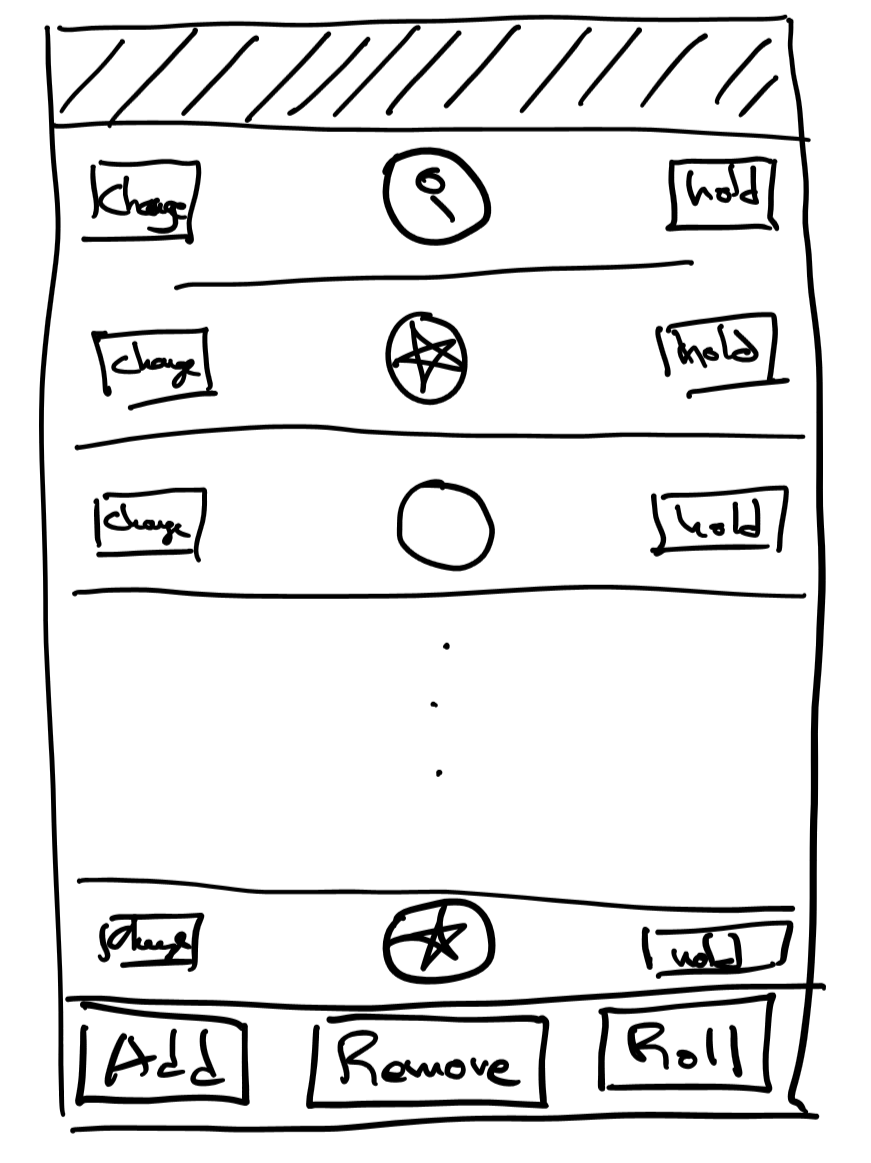
เพื่อให้สิ่งต่าง ๆ ง่ายขึ้นแอพจะเป็นรายการแนวตั้งของลูกเต๋า แอพจะมี 3 ปุ่มในการเรียกใช้ฟังก์ชันทริกเกอร์ "Roll Dice", "เพิ่มลูกเต๋า" และ "ลบลูกเต๋า" ลูกเต๋าแต่ละตัวจะมี 'hold' และ 'เปลี่ยน' ที่สอดคล้องกัน
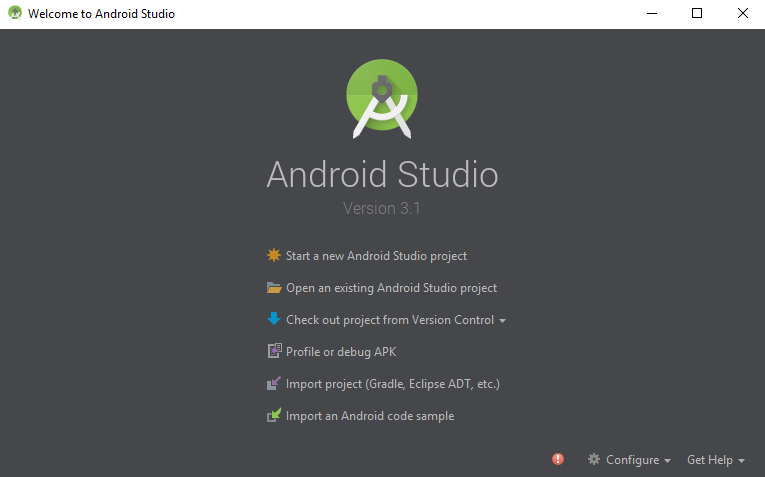
แพลตฟอร์ม Android มีการเปลี่ยนแปลงอยู่เสมอทำให้การสอนเช่นล้าสมัยเหล่านี้เมื่อเวลาผ่านไป สำหรับการอ้างอิงสภาพแวดล้อมของฉัน:
สภาพแวดล้อม Android

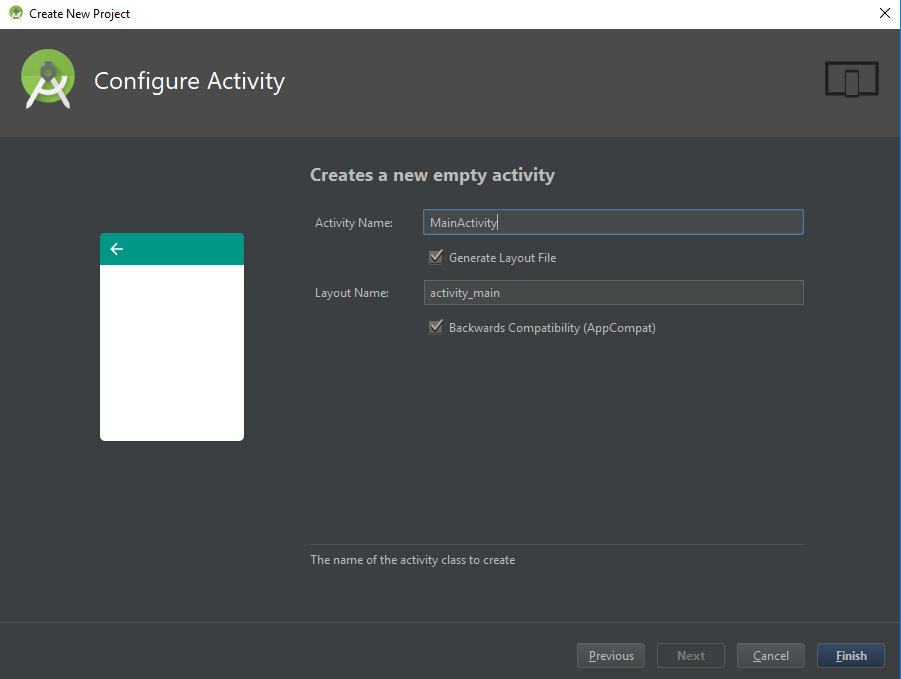
ชื่อทั้งหมดเหล่านี้สามารถเปลี่ยนแปลงได้ หลังจาก การสร้างโครงการแม้ว่าจะเป็นเรื่องยุ่งยากในการไล่ล่าการอ้างอิงชื่อทั้งหมดหากโครงการมีความซับซ้อน
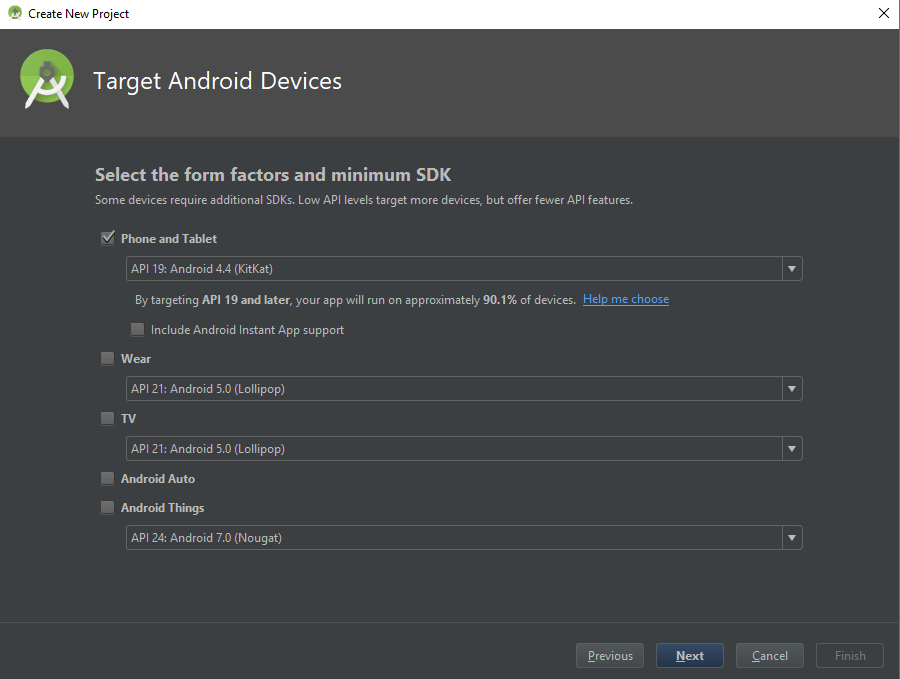
Android มีหลายรุ่น ในแต่ละรีลีสแพลตฟอร์มจะเปลี่ยนไป โดยทั่วไปหมายความว่ามีอุปกรณ์ Android จำนวนมากในโลกที่มีรุ่นต่าง ๆ สิ่งนี้กลายเป็นปวดหัวสำหรับนักพัฒนาแอพเพราะขึ้นอยู่กับว่าแอปใช้ไลบรารีใดแอปอาจไม่เข้ากันกับอุปกรณ์บางอย่าง การแลกเปลี่ยนที่นี่คือแอพที่ใช้ไลบรารี Android ใหม่ไม่สามารถทำงานบนอุปกรณ์เก่าได้ หากแอพต้องทำงานบนอุปกรณ์เก่าแอปจะต้องใช้โครงสร้าง Android รุ่นเก่า
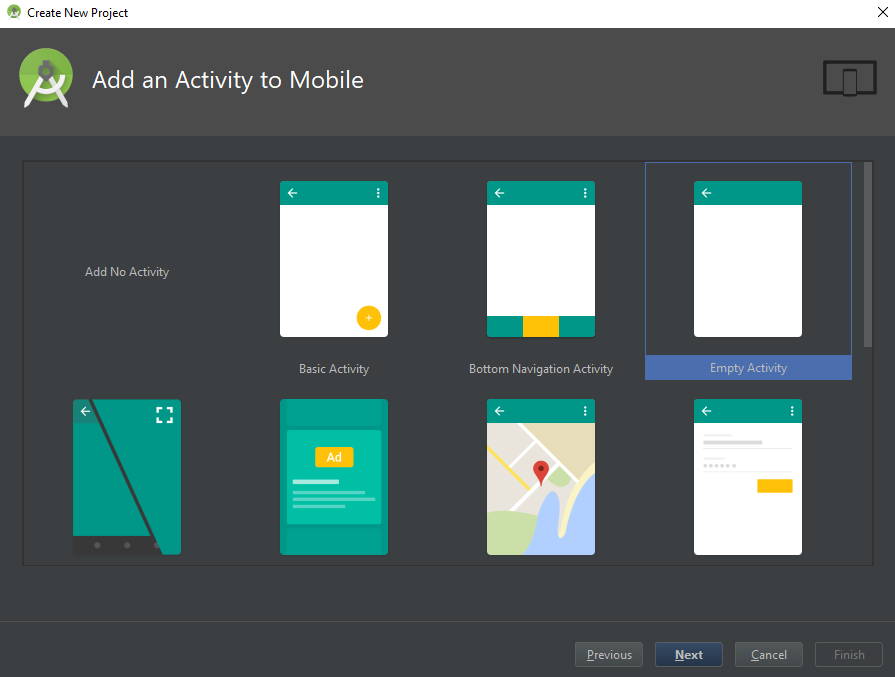
เทมเพลตเริ่มต้นไม่สำคัญสำหรับแอพนี้มากเกินไป บางครั้งรหัสเทมเพลตมีประโยชน์เนื่องจากเตรียมการจัดวางและคลาสเริ่มต้นด้วยรหัสบางส่วน เนื่องจากฉันจะไม่ใช้สิ่งนี้ฉันจึงเลือกกิจกรรมที่ว่างเปล่า
กล่องโต้ตอบการสร้างโครงการ Android เริ่มต้นโครงการด้วยโครงสร้างพื้นฐาน:
Gradle เป็นกรอบในการอำนวยความสะดวกในการสร้างโครงการ บนวิกิพีเดีย
รายการ Android อธิบายแอพไปยัง Android คุณสมบัติแอปพลิเคชันเช่นการอนุญาตและกิจกรรม รายละเอียดสามารถพบได้ในหน้าเอกสาร Android
ในการเริ่มต้นฉันใช้ตัวแก้ไข SVG ออนไลน์ง่าย ๆ ชื่อ Clker เพื่อดึงหน้าลูกเต๋าออกเป็น SVG
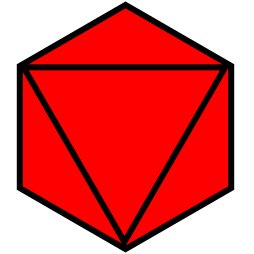
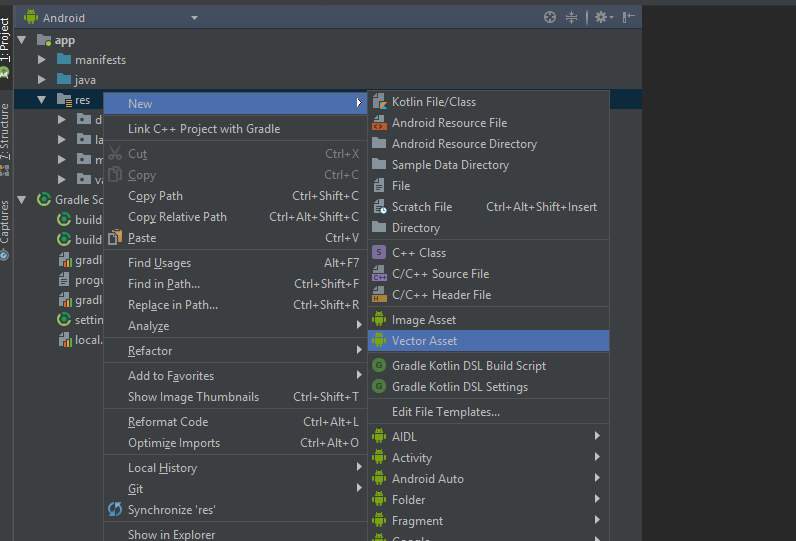
ต่อไปฉันนำเข้าสู่โครงการของฉันโดยใช้สตูดิโอสินทรัพย์ของ Android Studio

อุปกรณ์มีความละเอียดและมิติที่แตกต่างกัน การทำนายความละเอียดและมิติของอุปกรณ์แอปทำงานเป็นเรื่องยาก การปรับขนาด JPEGs อาจส่งผลให้กราฟิกเบลอหรือเป็นเม็ดเล็ก วิธีหนึ่งในการแก้ไขปัญหานี้คือกราฟิกคือการใช้ SVG มีบทความมากมายออนไลน์ที่พูดถึง SVG แต่สำหรับการอ้างอิงโปรดตรวจสอบบทความ Wikipedia SVG สำหรับข้อมูลเพิ่มเติม
Android เสนอสองวิธีในการอธิบายเลย์เอาต์: เลย์เอาต์โปรแกรมและ XML การอธิบายเลย์เอาต์ที่ซับซ้อนเป็นโปรแกรมค่อนข้างยากดังนั้นคนส่วนใหญ่มักหลีกเลี่ยงสิ่งนั้น การเขียน XML อาจไม่ใช่ความสนุกทั้งหมด แต่ Android Studio มีเครื่องมือหลายอย่างเพื่อบรรเทาความเจ็บปวด เครื่องมือดูตัวอย่างและตัวแก้ไขเค้าโครง Wsywig แต่ถึงแม้จะมีบรรณาธิการการดำน้ำใน XML ก็แทบจะหลีกเลี่ยงไม่ได้
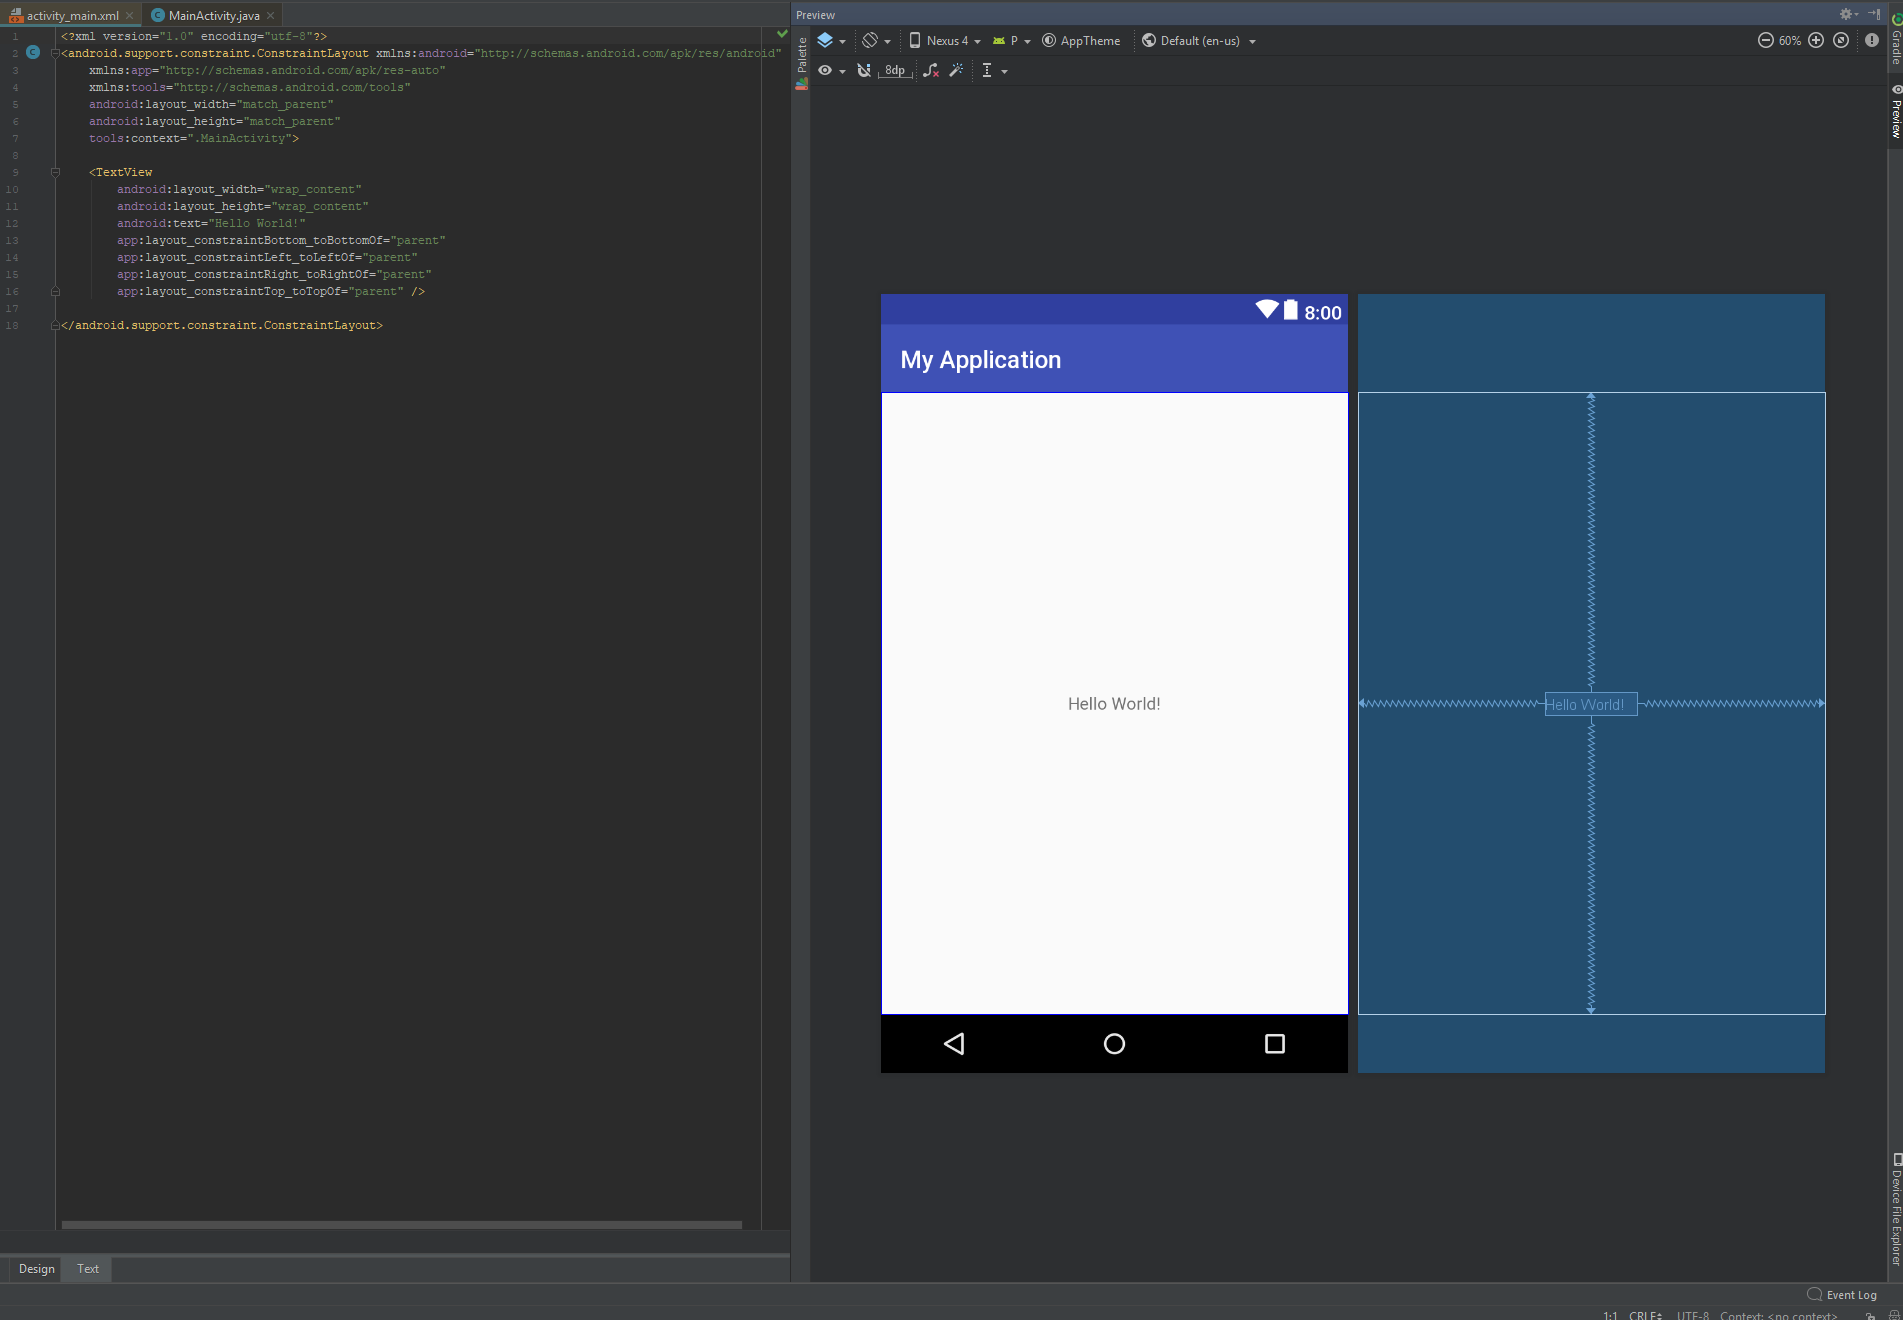
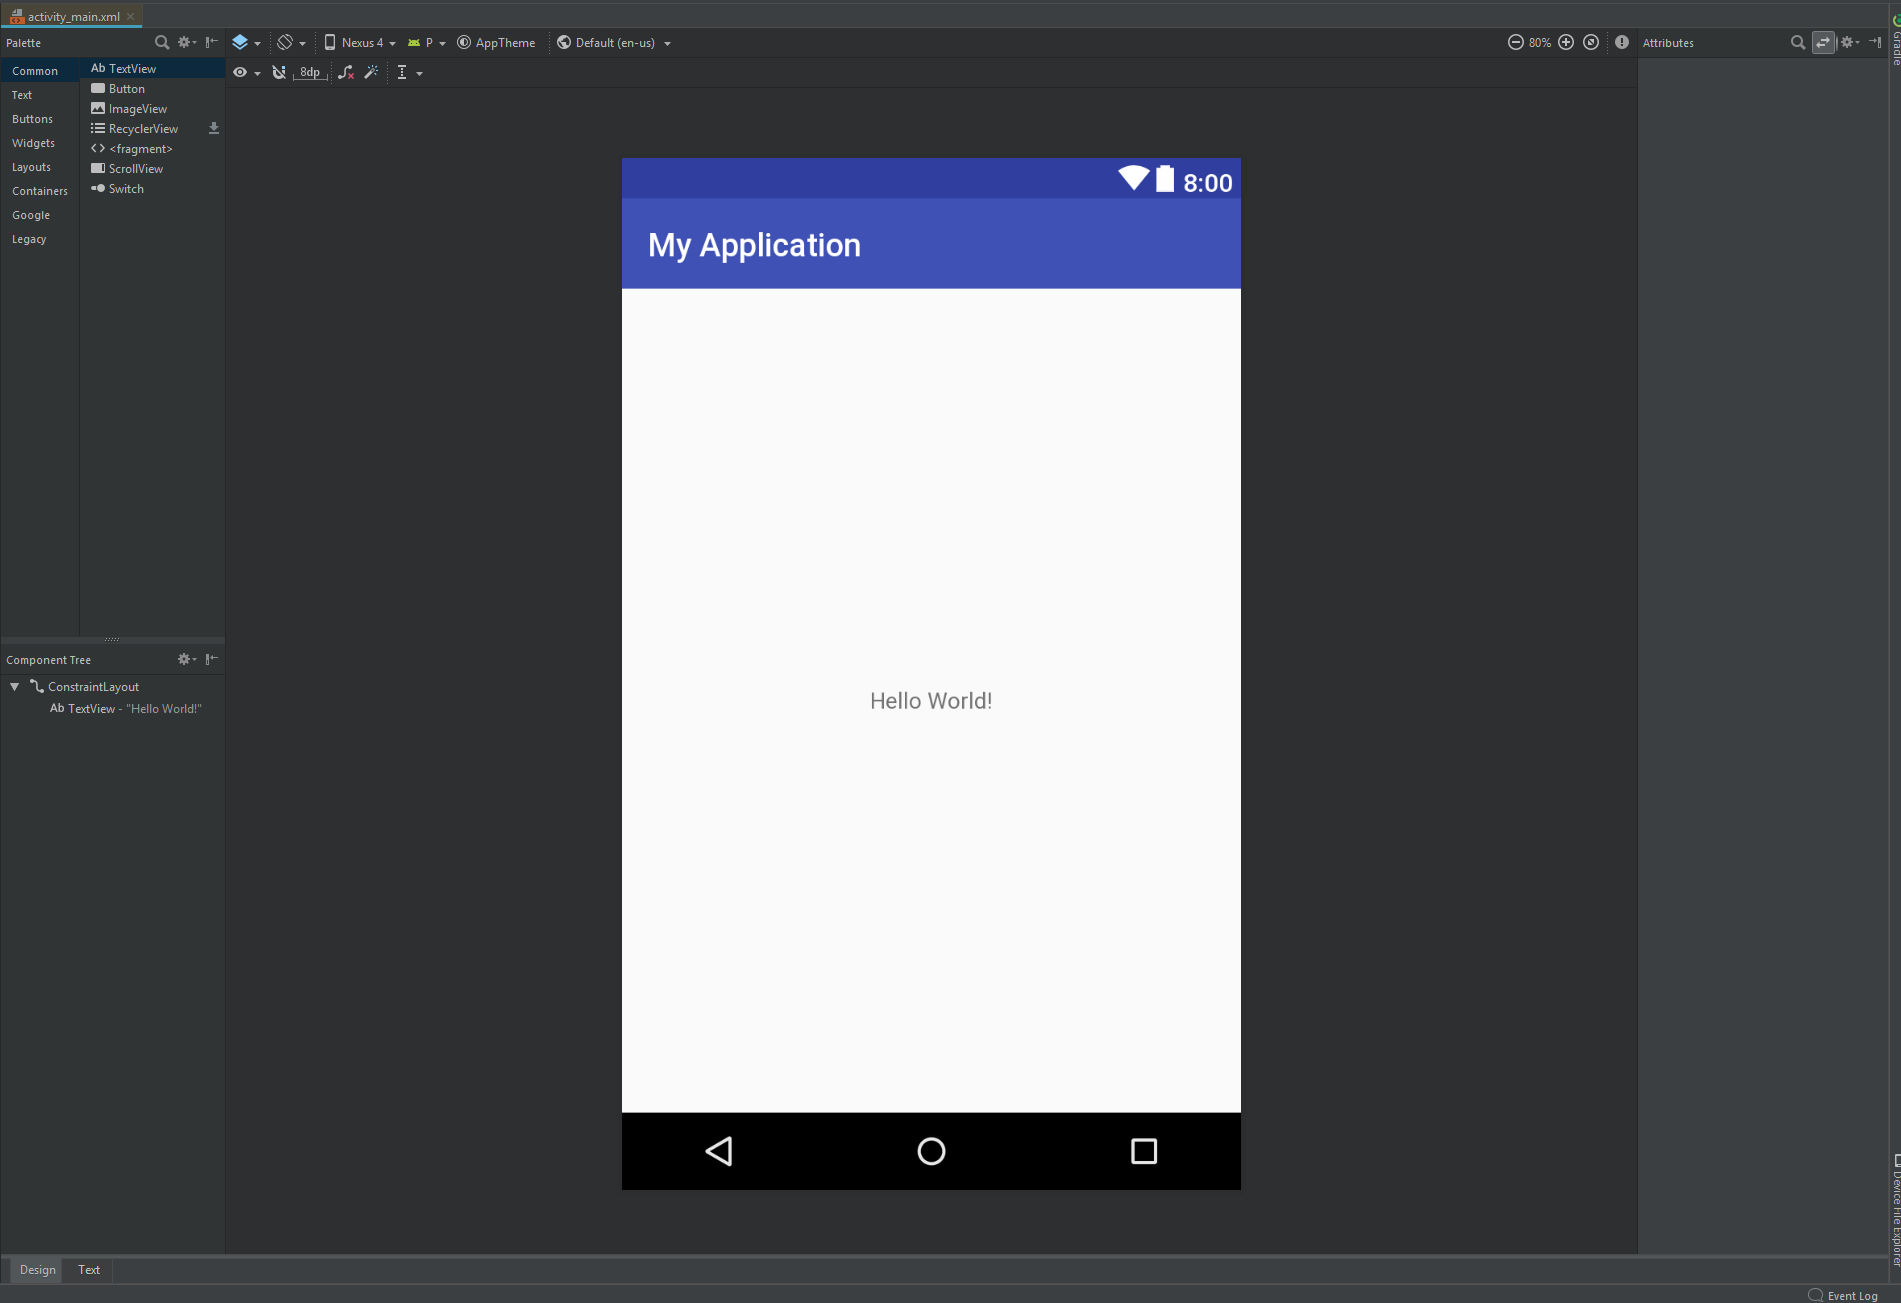
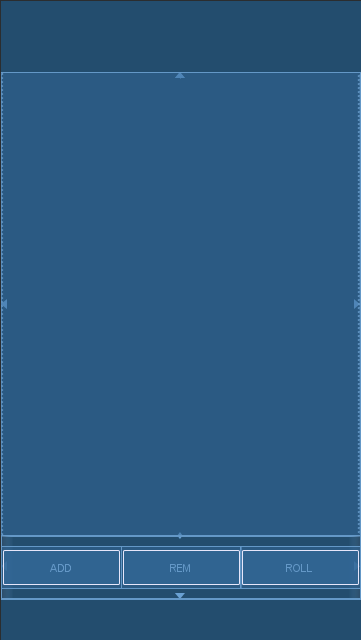
เทมเพลตกิจกรรมที่ว่างเปล่าของ Android Studio เริ่มต้นเราด้วยองค์ประกอบเค้าโครงรูท ConstraintLayout เราจะต้องมีสององค์ประกอบในแอพนี้: พื้นที่ลูกเต๋าและพื้นที่คอนโทรลเลอร์ พื้นที่ลูกเต๋าจะเป็นรายการลูกเต๋าที่เลื่อนได้และคอนโทรลเลอร์จะเป็นปุ่ม 3 ปุ่ม "เพิ่ม" "ลบ" "ม้วน"
activity_main.xml <?xml version="1.0" encoding="utf-8"?>
<android.support.constraint.ConstraintLayout xmlns:android="http://schemas.android.com/apk/res/android"
xmlns:app="http://schemas.android.com/apk/res-auto"
xmlns:tools="http://schemas.android.com/tools"
android:layout_width="match_parent"
android:layout_height="match_parent"
tools:context=".MainActivity">
<ListView
android:id="@+id/dice_list"
android:layout_height="0dp"
android:layout_width="match_parent"
app:layout_constraintBottom_toTopOf="@id/button_bar"
app:layout_constraintLeft_toLeftOf="parent"
app:layout_constraintRight_toRightOf="parent"
app:layout_constraintTop_toTopOf="parent">
</ListView>
<LinearLayout
android:id="@+id/button_bar"
android:layout_width="match_parent"
android:layout_height="@dimen/control_bar_height"
android:orientation="horizontal"
android:weightSum="3"
app:layout_constraintBottom_toBottomOf="parent"
app:layout_constraintLeft_toLeftOf="parent"
app:layout_constraintRight_toRightOf="parent"
app:layout_constraintTop_toBottomOf="@id/dice_list">
<Button
android:id="@+id/add_dice_button"
android:layout_gravity = "center"
android:layout_weight="1"
android:layout_width="wrap_content"
android:layout_height="wrap_content"
android:text="@string/add_button_label"
android:onClick="addDice"/>
<Button
android:id="@+id/rem_dice_button"
android:layout_gravity = "center"
android:layout_weight="1"
android:layout_width="wrap_content"
android:layout_height="wrap_content"
android:text="@string/rem_button_label"
android:onClick="removeDice"/>
<Button
android:id="@+id/roll_dice_button"
android:layout_weight="1"
android:layout_gravity = "center"
android:layout_width="wrap_content"
android:layout_height="wrap_content"
android:text="@string/roll_button_label"
android:onClick="rollDice"/>
</LinearLayout>
</android.support.constraint.ConstraintLayout>
สำหรับผู้ที่ไม่คุ้นเคยกับ XML ข้างต้นอาจดูเหมือนพูดพล่อยๆ การอธิบาย XML อยู่นอกขอบเขตของบทช่วยสอนนี้ แต่ Google, YouTube และ Wikipedia เป็นแหล่งข้อมูลที่ยอดเยี่ยมสำหรับผู้ที่กำลังมองหาข้อมูลเพิ่มเติม สำหรับเค้าโครงนี้ฉันใช้คลาส ListView , Button , LinearLayout และ ConstraintLayout รายละเอียดรอบ ๆ แอตทริบิวต์ของพวกเขาสามารถพบได้ในหน้าเอกสาร Android
ฉันกำลังมองหา Layout ที่อธิบายพื้นที่ด้านล่างความสูงคงที่ (สำหรับปุ่ม) ได้อย่างง่ายดายและพื้นที่ด้านบน (สำหรับลูกเต๋า) ที่เติมเต็มพื้นที่หน้าจอที่มีอยู่ LinearLayout ช่องว่างองค์ประกอบย่อยโดยใช้น้ำหนักทำให้ไม่เหมาะสม RelativeLayout ไม่ได้เสนอความสามารถในการ 'เติมพื้นที่ที่เหลือ' และทำให้ไม่เหมาะสม
สายตา LinearLayout ดูใกล้เคียงกับสิ่งที่ฉันต้องการ อย่างไรก็ตาม LinearLayout มีไว้สำหรับรายการคงที่ขององค์ประกอบมากกว่ารายการแบบไดนามิก สำหรับแอพนี้รายการลูกเต๋าสามารถมีได้ทุกที่ระหว่าง 0 ถึง 25 ลูกเต๋าทำให้ ListView เป็นตัวเลือกที่ดีกว่า
ค่า 0dp นั้นเฉพาะเจาะจงกับ ConstraintLayout ที่ระบุว่าควรเติมพื้นที่ที่เหลือของผู้ปกครอง
ตามที่อธิบายไว้ข้างต้นแต่ละแถวลูกเต๋ามี 2 ปุ่มและภาพลูกเต๋า

row.xml <?xml version="1.0" encoding="utf-8"?>
<RelativeLayout
xmlns:android="http://schemas.android.com/apk/res/android"
android:layout_width="match_parent"
android:layout_height="@dimen/row_height">
<FrameLayout
android:layout_width="wrap_content"
android:layout_height="@dimen/row_height"
android:layout_alignParentStart="true"
android:layout_centerVertical="true"
android:padding="@dimen/row_padding">
<Button
android:id="@+id/dice_change_button"
android:layout_width="wrap_content"
android:layout_height="wrap_content"
android:text="@string/change_button_label">
</Button>
</FrameLayout>
<ImageView
android:id="@+id/dice_icon"
android:layout_centerInParent="true"
android:layout_width="@dimen/image_width"
android:layout_height="@dimen/image_height"
android:src="@drawable/blank_dice"/>
<FrameLayout
android:layout_width="wrap_content"
android:layout_height="@dimen/row_height"
android:layout_alignParentEnd="true"
android:layout_centerVertical="true"
android:padding="@dimen/row_padding">
<Button
android:id="@+id/dice_hold_button"
android:layout_width="wrap_content"
android:layout_height="wrap_content"
android:text="@string/hold_button_label">
</Button>
</FrameLayout>
</RelativeLayout>
ปุ่มตั้งอยู่ที่กึ่งกลางแนวตั้งของแถวและระยะห่างจากแต่ละขอบ ฉันรู้สึกว่าการออกแบบจะสะอาดยิ่งขึ้นหากการออกแบบแยกองค์ประกอบปุ่มจริงและตำแหน่งในเค้าโครง ดังนั้นสำหรับแอพของฉันฉันใช้ FrameLayout เพื่อระบุตำแหน่งและจัดกึ่งกลางปุ่มในรูปแบบนั้น
ค่าสตริงและมิติช่วยให้เราไม่เขียนสตริงการกำหนดค่าและจำนวนเต็มลงในรหัสโดยตรง สำหรับแอพขนาดเล็กของเราอาจไม่ใช่เรื่องใหญ่
string.xml <resources>
<string name="app_name">DiceRoller</string>
<string name="hold_button_label">Hold</string>
<string name="change_button_label">Change</string>
<string name="add_button_label">ADD</string>
<string name="rem_button_label">REM</string>
<string name="roll_button_label">ROLL</string>
</resources>
dimens.xml <?xml version="1.0" encoding="utf-8"?>
<resources>
<dimen name="row_height">72dp</dimen>
<dimen name="row_padding">16dp</dimen>
<dimen name="control_bar_height">72dp</dimen>
<dimen name="image_width">72dp</dimen>
<dimen name="image_height">72dp</dimen>
</resources>
ListView และ ArrayAdapter ณ จุดนี้ฉันได้เริ่มต้นโครงการ Android ของเราด้วย mainactivity ที่ว่างเปล่าและล้อเลียนเลย์เอาต์บางอย่าง ต่อไปฉันจะเข้าสู่ตรรกะและรหัส ในการเริ่มต้นฉันต้องการเข้าเรียนในคลาส Java ที่เฉพาะเจาะจงมากขึ้น ListView เป็นคลาสเลย์เอาต์พื้นฐานสำหรับการแสดงผลรายการภาพ Framework Android จะแยกส่วนประกอบภาพ ( ListView ) และส่วนประกอบข้อมูล ( List<Dice> ) โดยใช้รูปแบบอะแดปเตอร์ ในกรณีของเราอะแดปเตอร์ทั้งหมดทำแผนที่ข้อมูล ( Dice ) กับเค้าโครงภาพบางอย่าง ( dice_row.xml ) ในกรณีนี้ไฟล์เลย์เอาต์ XML อธิบายเค้าโครง
MainActivity.java public class MainActivity extends AppCompatActivity {
DiceAdapter diceAdapter;
List <Dice> diceList = new ArrayList<>();
@Override
protected void onCreate(Bundle savedInstanceState) {
super.onCreate(savedInstanceState);
//associating activity to layout
setContentView(R.layout.activity_main);
//Setup ListView and Adapter
ListView listView = findViewById(R.id.dice_list);
diceAdapter = new DiceAdapter(this, R.layout.dice_row, diceList);
listView.setAdapter(diceAdapter);
//Initialize Data
diceAdapter.add(new Dice());
}
public class DiceAdapter extends ArrayAdapter<Dice> {
public DiceAdapter(@NonNull Context context, int resource, List<Dice> list) {
super(context, resource, list);
}
@Override
public View getView(final int position, View convertView, ViewGroup parent) {
if (convertView == null) {
convertView = LayoutInflater.from(getContext()).inflate(R.layout.dice_row, parent, false);
}
return convertView;
}
}
}
แอพจะเป็นตัวแทนสถานะลูกเต๋าด้วยวัตถุลูกเต๋า วัตถุลูกเต๋ามีสองสิ่งที่คุณสมบัติ: ค่าลูกเต๋า [ว่างเปล่า, ขยาย, ดาว] และไม่ว่าลูกเต๋าจะ 'ถือ' หรือไม่ ตามหน้าที่ลูกเต๋ามีวิธีการม้วนที่จะสุ่มเลือกใบหน้าลูกเต๋า ในที่สุดฉันเพิ่มวิธีการที่เปลี่ยนค่าลูกเต๋าเป็นถัดไปในรายการ
MainActivity.java ....
public static class Dice {
public enum Face {
BLANK,
MAGNIFY,
STAR
}
public static Random random = new Random();
boolean hold = false;
Face diceVal;
Dice() {
roll();
}
public void roll() {
int num = random.nextInt(4);
if(num == 0) { //25% magify
this.diceVal = Face.MAGNIFY;
} else {
//37.5% star, 37.5% blank
if(random.nextBoolean()) {
this.diceVal = Face.BLANK;
} else {
this.diceVal = Face.STAR;
}
}
}
public void toggleHold() {
hold = !hold;
}
public void nextValue() {
int index = diceVal.ordinal();
index = (index+1) % Face.values().length;
diceVal = Face.values()[index];
}
}
ในขั้นตอนนี้ฉันทำแผนที่ปุ่มคลิกเพื่อลอจิก แพลตฟอร์ม Android มีวิธีการทำเช่นนี้สองสามวิธี วิธีหนึ่งคือการระบุแอตทริบิวต์จากไฟล์เลย์เอาต์ อีกอย่างคือการตั้งค่า onClickListener โดยทางโปรแกรม ในแอพของเราให้ใช้วิธีการใช้แอตทริบิวต์สำหรับปุ่มระดับบนสามปุ่มและตั้งค่าฟังสำหรับปุ่มแถว
addDice ถ้าจำนวนลูกเต๋าน้อยกว่า 25 เพิ่มวัตถุลูกเต๋าใหม่ลงในรายการลูกเต๋า
ออกแบบ
activity_main.xml ....
<Button
android:id="@+id/add_dice_button"
android:layout_gravity = "center"
android:layout_weight="1"
android:layout_width="wrap_content"
android:layout_height="wrap_content"
android:text="@string/add_button_label"
android:onClick="addDice"/>
....
ตรรกะ
MainActivity.java ....
public void addDice(View view) {
if(diceList.size()< MAX_DICE_COUNT) {
diceAdapter.add(new Dice());
}
}
....
removeDice หากรายการลูกเต๋าไม่ว่างเปล่าลบลูกเต๋าสุดท้ายออกจากรายการ
ออกแบบ
activity_main.xml ....
<Button
android:id="@+id/rem_dice_button"
android:layout_gravity = "center"
android:layout_weight="1"
android:layout_width="wrap_content"
android:layout_height="wrap_content"
android:text="@string/rem_button_label"
android:onClick="removeDice"/>
....
ตรรกะ
MainActivity.java ....
public void removeDice(View view) {
if(!diceList.isEmpty()) {
int lastIndex = diceList.size() - 1;
diceAdapter.remove(diceAdapter.getItem(lastIndex));
}
}
....
rollDice rerolls ค่าของลูกเต๋าทุกตัวในรายการเขาที่ไม่ได้ถูกทำเครื่องหมายสำหรับการถือครอง
ออกแบบ
activity_main.xml ....
<Button
android:id="@+id/roll_dice_button"
android:layout_weight="1"
android:layout_gravity = "center"
android:layout_width="wrap_content"
android:layout_height="wrap_content"
android:text="@string/roll_button_label"
android:onClick="rollDice"/>
....
ตรรกะ
MainActivity.java ....
public void rollDice(View view) {
//roll all dice
for(Dice dice : diceList) {
if(!dice.hold)
dice.roll();
}
//notify adapter to update view
diceAdapter.notifyDataSetChanged();
}
....
notifyDataSetChanged คืออะไร? ปุ่มม้วนจะเปลี่ยน dicevalue สำหรับวัตถุลูกเต๋าที่สอดคล้องกัน เนื่องจากการแยกรูปแบบการดู/ข้อมูลอะแดปเตอร์เค้าโครงแถวลูกเต๋าจะไม่แสดงผลอีกครั้งโดยอัตโนมัติเว้นแต่จะถูกทริกเกอร์ การโทร notifyDataSetChanged Redraws มุมมอง
การคลิกปุ่มค้างจะตั้งค่าธงค้างของลูกเต๋า
MainActivity.java ....
Button holdButton = convertView.findViewById(R.id.dice_hold_button);
holdButton.setOnClickListener(new View.OnClickListener() {
@Override
public void onClick(View v) {
Dice dice = diceList.get(position);
dice.toggleHold();
}
});
....
การคลิกปุ่มค้างจะเปลี่ยนค่าของลูกเต๋าและอัปเดตอินเทอร์เฟซ
MainActivity.java ....
Button changeButton = convertView.findViewById(R.id.dice_change_button);
changeButton.setOnClickListener(new View.OnClickListener() {
@Override
public void onClick(View v) {
Dice dice = diceList.get(position);
dice.nextValue();
diceAdapter.notifyDataSetChanged();
}
});
....


