Android Tutorial MansionOfMadnessDiceRoller Part1
1.0.0
基本的なAndroidコンストラクトを使用して、最小限の生産可能な製品ダイスローラーAndroidアプリを構築します。
VectorにインポートしますRelativeLayout 、 ConstraintLayout 、 LinearLayout ]ListViewとArrayAdapterリストListViewおよびAdapterロジック少し前に、私はこのボードゲームの狂気の大邸宅に入りました。このゲームは、プレイヤーが謎を解決しようとしている家の周りを歩き回る古典的な手がかりのようなものです。それは私が強くお勧めする素晴らしいゲームです。とにかく、ゲームはサイコロロールを使用してアクションやその他のゲームイベントを解決します。奇妙なことに、プレイヤーはゲームに含まれるよりも多くのサイコロをロールする必要がある場合があります(6)!これは、カスタムサイコロローラーアプリを構築する絶好の機会であると判断しました。このチュートリアルでは、基本的なAndroidコンポーネントを使用して、Madness Dice Rollerの邸宅を構築します。
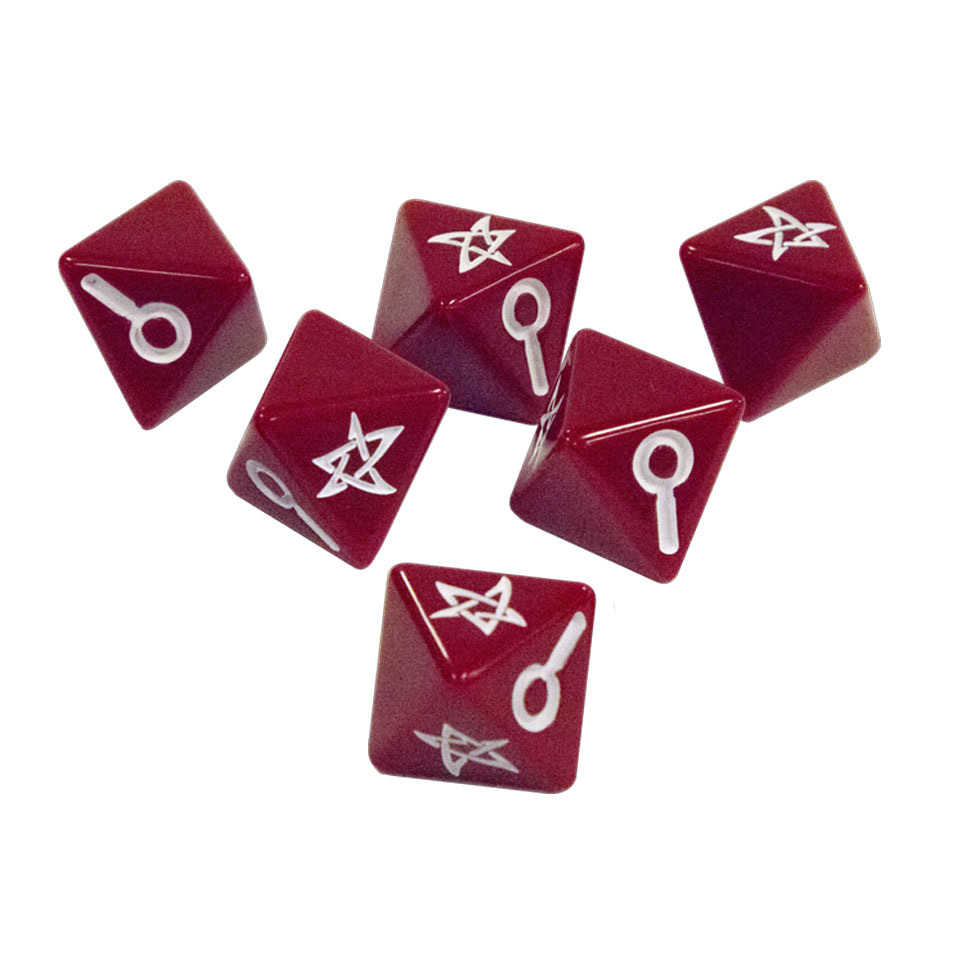
このサイコロアプリは、狂気のゲームプレイの大邸宅向けに特別に設計されているため、最初にゲームがサイコロを使用する方法を概説します。
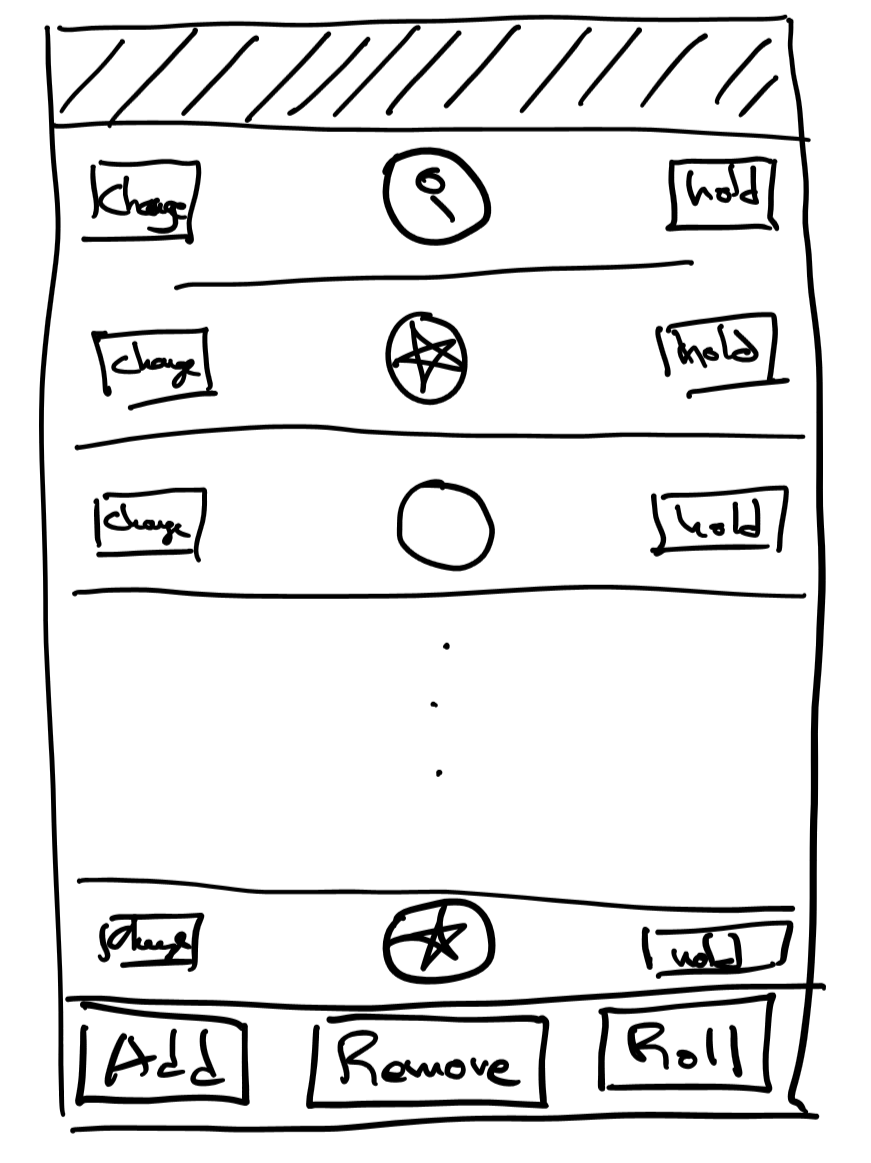
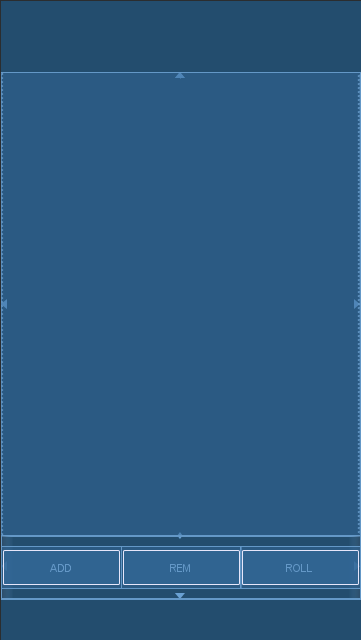
物事をシンプルに保つために、アプリはサイコロの垂直でスクロール可能なリストになります。アプリには、「ロールサイコロ」、「サイコロの追加」、「削除」をトリガーする3つのボタンがあります。各サイコロには、対応する「保留」と「変更」があります。
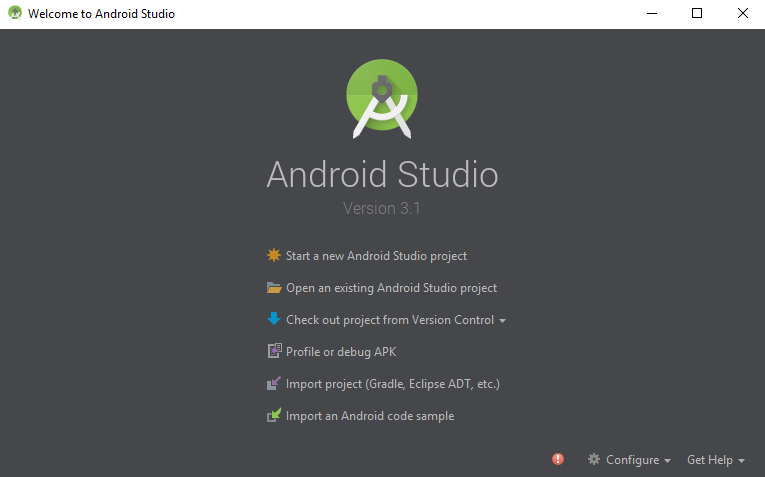
Androidプラットフォームは常にシフトしており、これらのようなチュートリアルを時間の経過とともに廃止しています。参照のために、私の開発環境:
Android環境

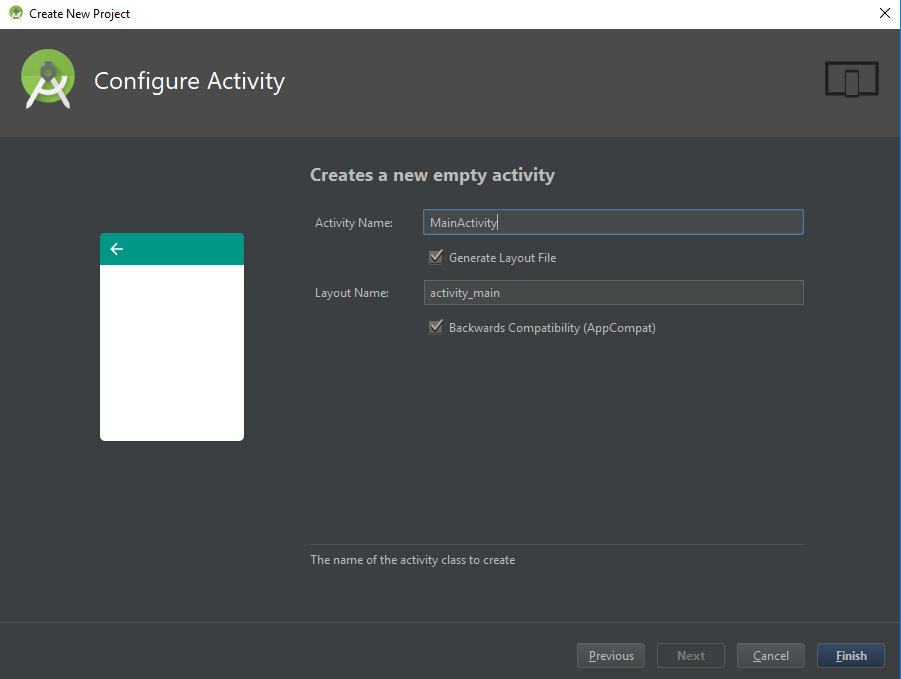
これらの名前はすべて、プロジェクトの作成後に変更できますが、プロジェクトが複雑になった場合にすべての名前の参照を追いかけるのは面倒になる可能性があります。
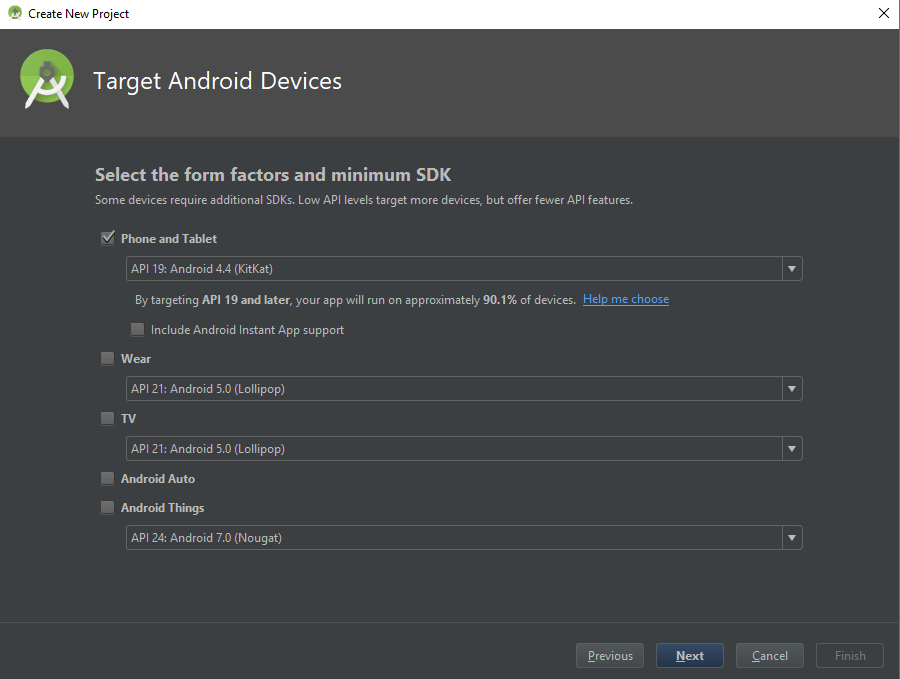
Androidには多くのバージョンがあります。リリースごとに、プラットフォームが変更されます。これは基本的に、バージョンが異なる世界には多くのAndroidデバイスがあることを意味します。アプリが使用するライブラリによって、アプリは特定のデバイスと互換性がない可能性があるため、これはアプリ開発者にとって頭痛になります。ここでのトレードオフは、新しいAndroidライブラリを使用するアプリが古いデバイスで実行できないことです。アプリが古いデバイスで実行する必要がある場合、アプリは古いAndroidコンストラクトの一部を使用する必要があります。
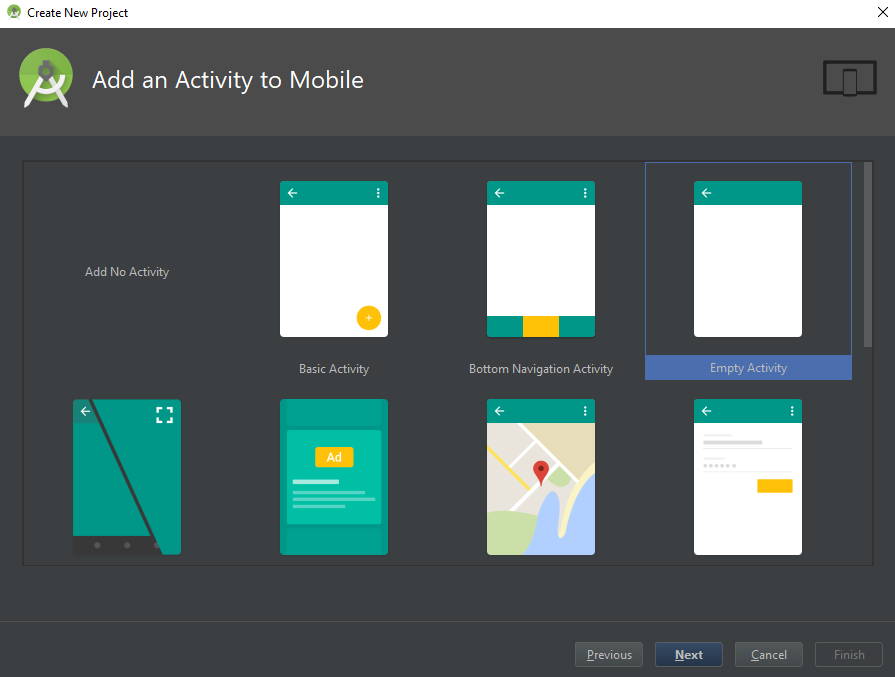
このアプリにとって、最初のテンプレートは実際にはそれほど重要ではありません。テンプレートコードは、レイアウトと初期クラスがいくつかのコードを使用して事前に設定されるため、便利な場合があります。私はこれを使用するつもりはないので、私は空のアクティビティを選びました。
Androidプロジェクトの作成ダイアログは、基本的なコンストラクトを使用してプロジェクトを初期化します。
Gradleは、構築プロジェクトを促進するフレームワークです。ウィキペディアで
Androidマニフェストは、アプリをAndroidに説明しています。アクティビットなどのアプリケーションプロパティ。詳細については、Androidドキュメントページをご覧ください。
まず、ClkerというシンプルなオンラインSVGエディターを使用して、SVGとしてサイコロの顔を引き出しました。
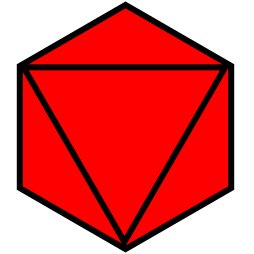
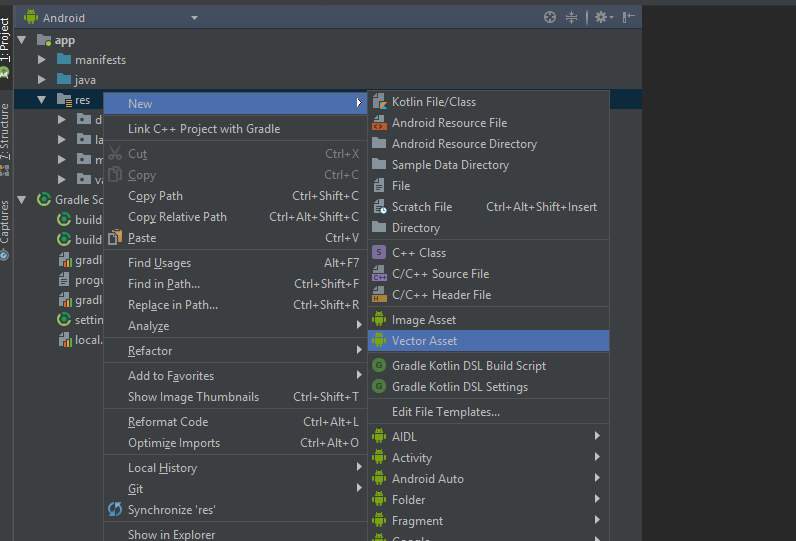
次に、Android StudioのAsset Studioを使用してプロジェクトにインポートします。

デバイスには、さまざまな解像度と寸法があります。アプリが実行するデバイスの解像度と寸法を予測することは困難です。 JPEGをスケーリングすると、ぼやけたり粒子の粗いグラフィックが発生します。これに取り組む1つの方法は、グラフィックス用です。SVGを使用することです。 SVGについて議論するオンラインで数多くの記事がありますが、参照のために、詳細についてはWikipedia SVGの記事をご覧ください。
Androidは、レイアウトを記述する2つの方法を提供します:プログラマティックとXMLレイアウト。複雑なレイアウトをプログラム的に説明することはかなり難しいので、ほとんどの人は一般的にそれを避けます。 XMLを書くことはそれほど楽しいことではないかもしれませんが、Android Studioは痛みを和らげるためのいくつかのツールを提供しています。プレビューツールとWSYWIGレイアウトエディター。しかし、編集者がいても、XMLに飛び込むことはほとんど避けられません。
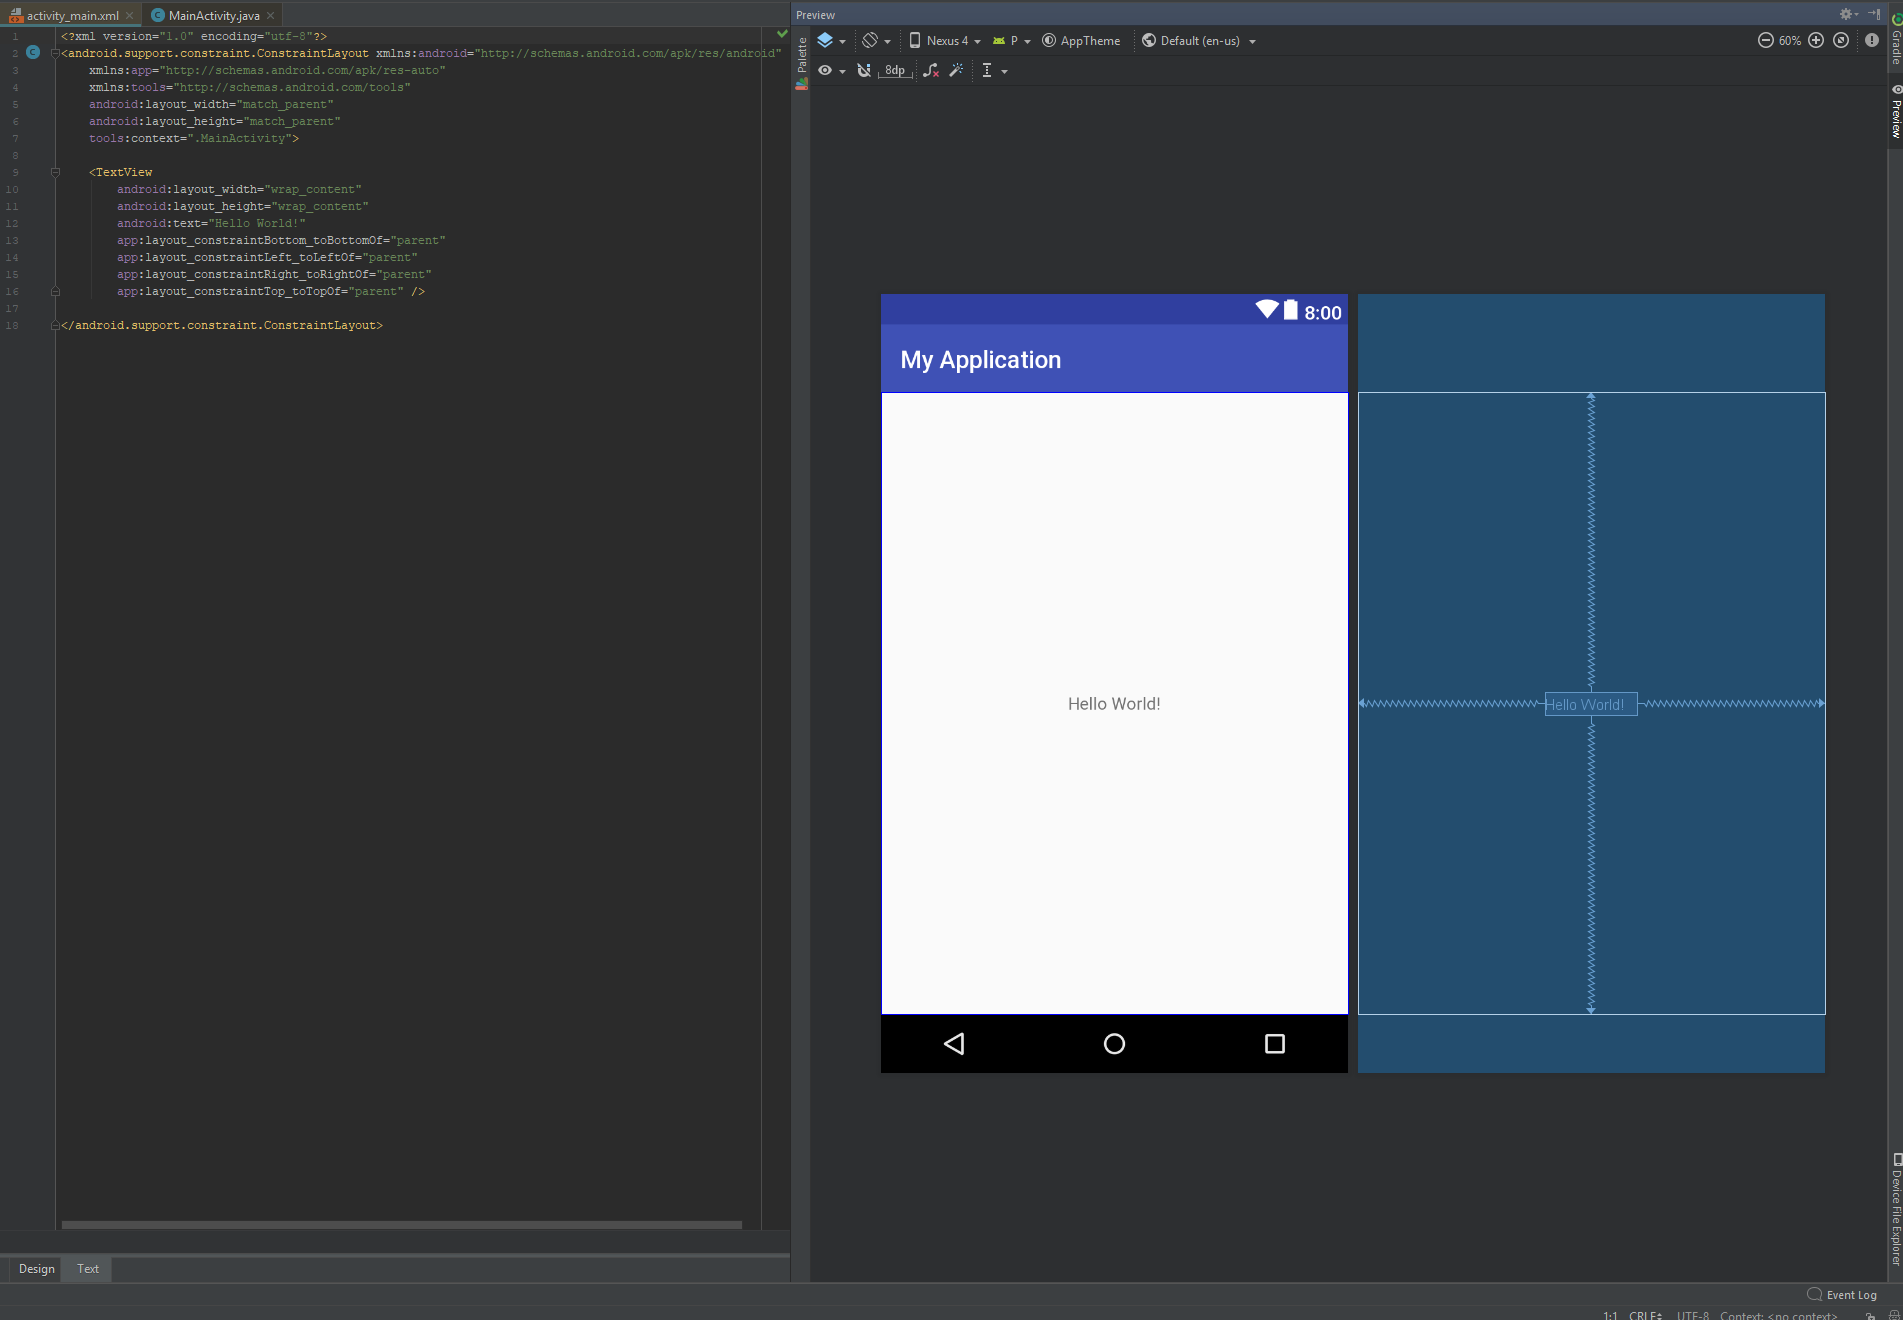
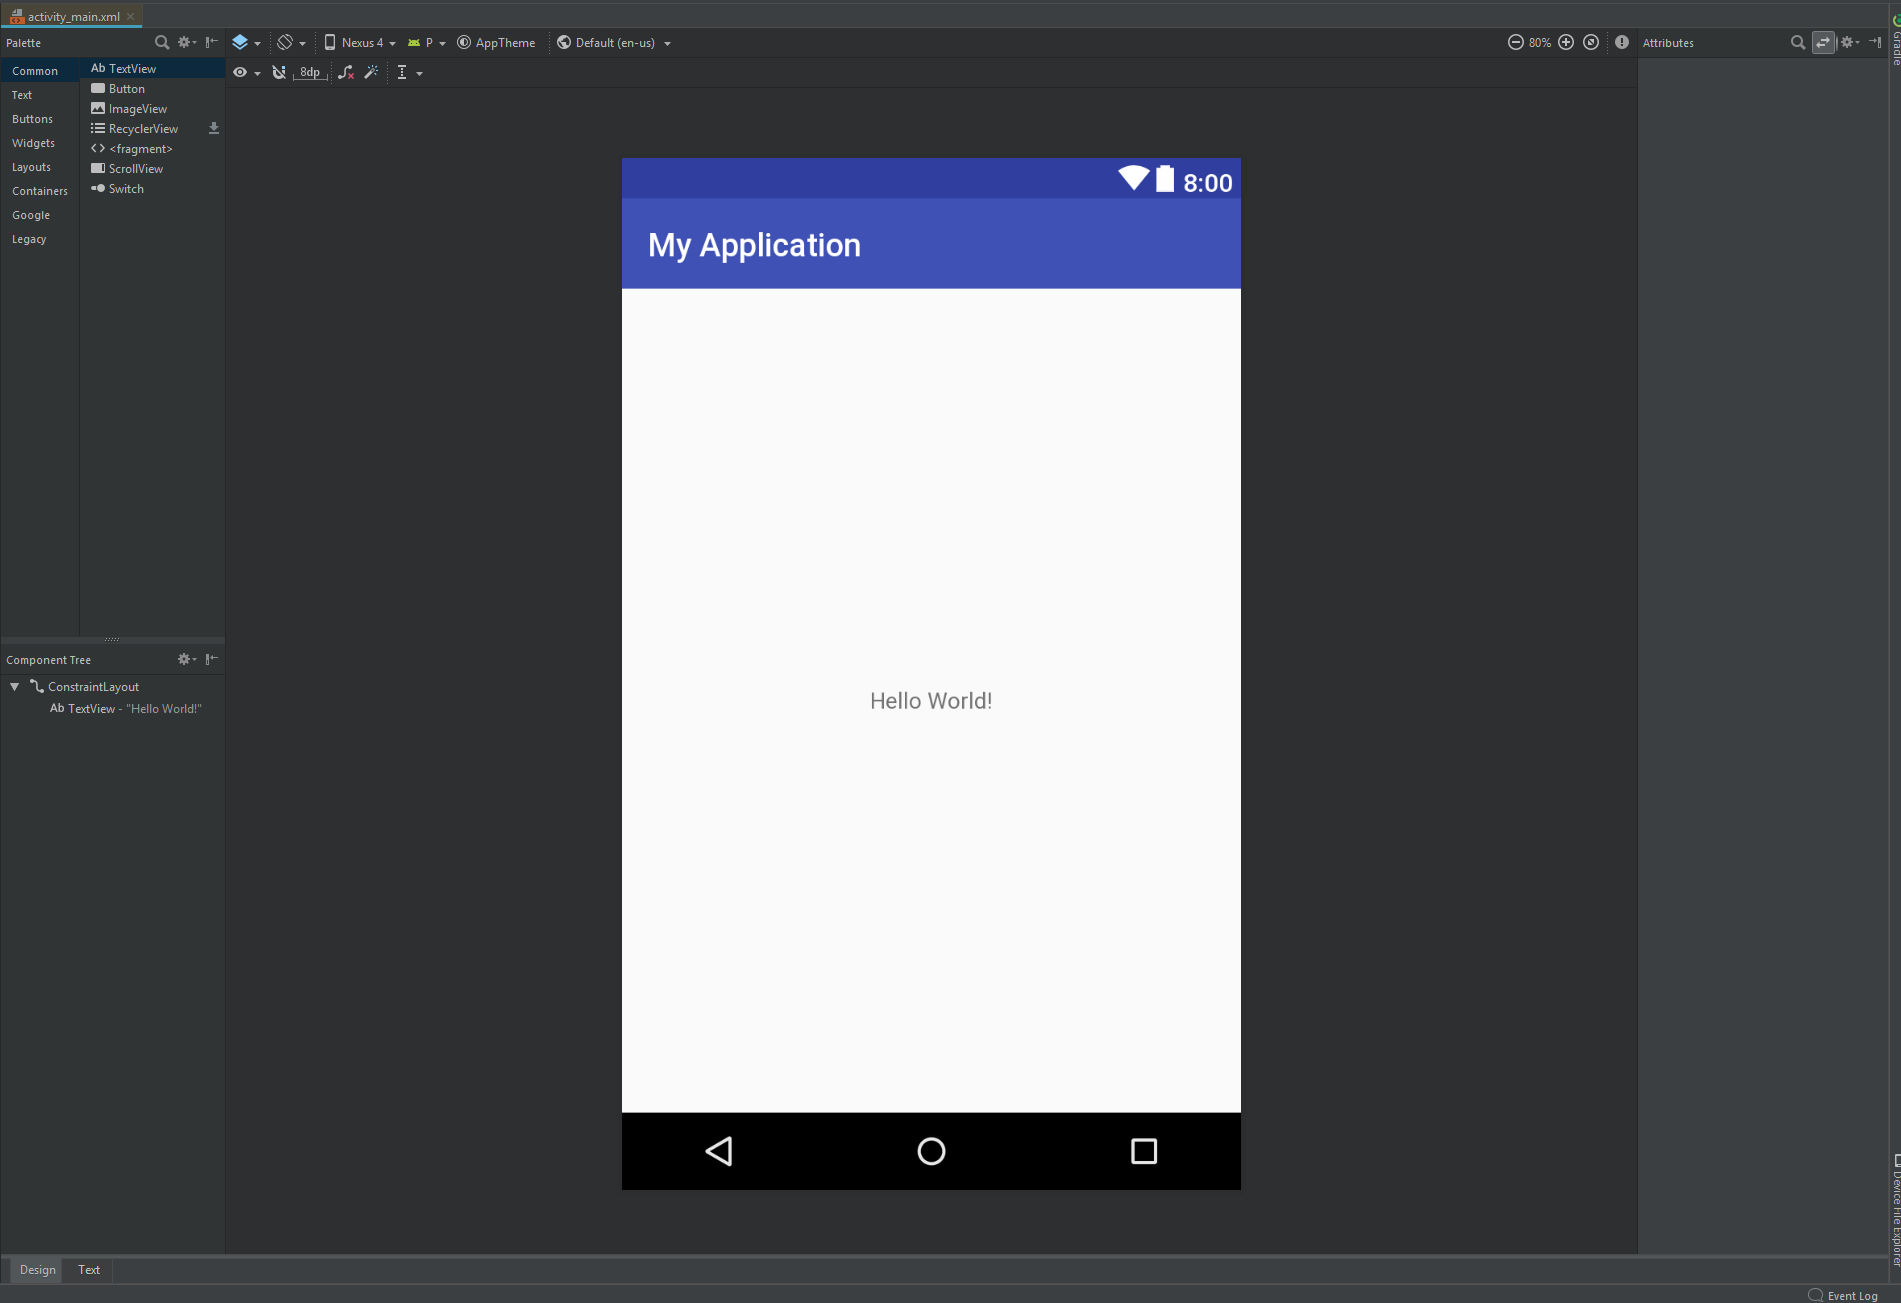
Android Studioの空のアクティビティテンプレートは、 ConstraintLayoutルートレイアウト要素で開始されます。このアプリには、サイコロエリアとコントローラーエリアの2つのコンポーネントが必要です。サイコロ領域はスクロール可能なサイコロリストになり、コントローラーは3つのボタン「追加」「ロール」を削除します。
activity_main.xml <?xml version="1.0" encoding="utf-8"?>
<android.support.constraint.ConstraintLayout xmlns:android="http://schemas.android.com/apk/res/android"
xmlns:app="http://schemas.android.com/apk/res-auto"
xmlns:tools="http://schemas.android.com/tools"
android:layout_width="match_parent"
android:layout_height="match_parent"
tools:context=".MainActivity">
<ListView
android:id="@+id/dice_list"
android:layout_height="0dp"
android:layout_width="match_parent"
app:layout_constraintBottom_toTopOf="@id/button_bar"
app:layout_constraintLeft_toLeftOf="parent"
app:layout_constraintRight_toRightOf="parent"
app:layout_constraintTop_toTopOf="parent">
</ListView>
<LinearLayout
android:id="@+id/button_bar"
android:layout_width="match_parent"
android:layout_height="@dimen/control_bar_height"
android:orientation="horizontal"
android:weightSum="3"
app:layout_constraintBottom_toBottomOf="parent"
app:layout_constraintLeft_toLeftOf="parent"
app:layout_constraintRight_toRightOf="parent"
app:layout_constraintTop_toBottomOf="@id/dice_list">
<Button
android:id="@+id/add_dice_button"
android:layout_gravity = "center"
android:layout_weight="1"
android:layout_width="wrap_content"
android:layout_height="wrap_content"
android:text="@string/add_button_label"
android:onClick="addDice"/>
<Button
android:id="@+id/rem_dice_button"
android:layout_gravity = "center"
android:layout_weight="1"
android:layout_width="wrap_content"
android:layout_height="wrap_content"
android:text="@string/rem_button_label"
android:onClick="removeDice"/>
<Button
android:id="@+id/roll_dice_button"
android:layout_weight="1"
android:layout_gravity = "center"
android:layout_width="wrap_content"
android:layout_height="wrap_content"
android:text="@string/roll_button_label"
android:onClick="rollDice"/>
</LinearLayout>
</android.support.constraint.ConstraintLayout>
XMLに不慣れな人のために、上記は意味のように見えるかもしれません。 XMLの説明はこのチュートリアルの範囲外ですが、Google、YouTube、およびWikipediaは、より多くの情報を探している人にとって素晴らしいリソースです。このレイアウトでは、クラスListView 、 Button 、 LinearLayout 、およびConstraintLayoutを使用しています。それらの属性に関する詳細は、Androidドキュメントページにあります。
固定された高さの底領域(ボタン用)と、利用可能な画面スペースを満たす上部領域(サイコロ用)を簡単に説明するLayoutを探していました。 LinearLayout 、重みを使用してサブ要素を出力し、不適切にします。 RelativeLayout 、「残りのスペースを埋める」ことができないようにする能力を提供しません。
視覚的には、 LinearLayout私が必要なものにかなり近づけています。ただし、 LinearLayout 、動的リストではなく、要素の静的リスト用です。このアプリの場合、サイコロリストには0〜25個のサイコロがあるため、ListViewの作成はより良い候補です。
0dp値は、親の残りのスペースを埋める必要があることを示すConstraintLayoutに固有です。
上記のように、各サイコロの列には2つのボタンとサイコロ画像が含まれています。

row.xml <?xml version="1.0" encoding="utf-8"?>
<RelativeLayout
xmlns:android="http://schemas.android.com/apk/res/android"
android:layout_width="match_parent"
android:layout_height="@dimen/row_height">
<FrameLayout
android:layout_width="wrap_content"
android:layout_height="@dimen/row_height"
android:layout_alignParentStart="true"
android:layout_centerVertical="true"
android:padding="@dimen/row_padding">
<Button
android:id="@+id/dice_change_button"
android:layout_width="wrap_content"
android:layout_height="wrap_content"
android:text="@string/change_button_label">
</Button>
</FrameLayout>
<ImageView
android:id="@+id/dice_icon"
android:layout_centerInParent="true"
android:layout_width="@dimen/image_width"
android:layout_height="@dimen/image_height"
android:src="@drawable/blank_dice"/>
<FrameLayout
android:layout_width="wrap_content"
android:layout_height="@dimen/row_height"
android:layout_alignParentEnd="true"
android:layout_centerVertical="true"
android:padding="@dimen/row_padding">
<Button
android:id="@+id/dice_hold_button"
android:layout_width="wrap_content"
android:layout_height="wrap_content"
android:text="@string/hold_button_label">
</Button>
</FrameLayout>
</RelativeLayout>
ボタンは、行の垂直中心にあり、各エッジからある程度の距離にあります。デザインが実際のボタン要素とレイアウト内の位置を分離した場合、デザインはよりきれいになると感じました。私のアプリには、 FrameLayoutを使用して位置を指定し、そのレイアウトのボタンを中央に配置します。
文字列と寸法の値を使用すると、構成文字列と整数を直接コードに記述しないことができます。私たちの小さなアプリにとっては、大したことではないかもしれません。
string.xml <resources>
<string name="app_name">DiceRoller</string>
<string name="hold_button_label">Hold</string>
<string name="change_button_label">Change</string>
<string name="add_button_label">ADD</string>
<string name="rem_button_label">REM</string>
<string name="roll_button_label">ROLL</string>
</resources>
dimens.xml <?xml version="1.0" encoding="utf-8"?>
<resources>
<dimen name="row_height">72dp</dimen>
<dimen name="row_padding">16dp</dimen>
<dimen name="control_bar_height">72dp</dimen>
<dimen name="image_width">72dp</dimen>
<dimen name="image_height">72dp</dimen>
</resources>
ListViewおよびArrayAdapterこの時点で、Androidプロジェクトを空のMainActivityで初期化し、いくつかのレイアウトを模倣しました。次に、ロジックとコードに触れます。まず、もっとAndroid固有のJavaクラスに参加したいと思います。 ListView 、ビジュアルリストをレンダリングするための基本的なレイアウトクラスです。 Androidフレームワークは、アダプターパターンを使用することにより、視覚コンポーネント( ListView )とデータコンポーネント( List<Dice> )を分離します。この場合、すべてのアダプターは、データ( Dice )を視覚レイアウト( dice_row.xml )にマッピングすることです。この場合、レイアウトXMLファイルがレイアウトを説明します。
MainActivity.java public class MainActivity extends AppCompatActivity {
DiceAdapter diceAdapter;
List <Dice> diceList = new ArrayList<>();
@Override
protected void onCreate(Bundle savedInstanceState) {
super.onCreate(savedInstanceState);
//associating activity to layout
setContentView(R.layout.activity_main);
//Setup ListView and Adapter
ListView listView = findViewById(R.id.dice_list);
diceAdapter = new DiceAdapter(this, R.layout.dice_row, diceList);
listView.setAdapter(diceAdapter);
//Initialize Data
diceAdapter.add(new Dice());
}
public class DiceAdapter extends ArrayAdapter<Dice> {
public DiceAdapter(@NonNull Context context, int resource, List<Dice> list) {
super(context, resource, list);
}
@Override
public View getView(final int position, View convertView, ViewGroup parent) {
if (convertView == null) {
convertView = LayoutInflater.from(getContext()).inflate(R.layout.dice_row, parent, false);
}
return convertView;
}
}
}
このアプリは、サイコロオブジェクトを使用してサイコロ状態を表します。サイコロオブジェクトには、サイコロ値[空白、拡大、星]、およびサイコロが「保持されている」かどうかの2つのプロパティがあります。機能的には、サイコロにはダイスの顔をランダムに選択するロール方法があります。最後に、リストの次のサイコロ値にサイコロ値を変更するメソッドを追加します。
MainActivity.java ....
public static class Dice {
public enum Face {
BLANK,
MAGNIFY,
STAR
}
public static Random random = new Random();
boolean hold = false;
Face diceVal;
Dice() {
roll();
}
public void roll() {
int num = random.nextInt(4);
if(num == 0) { //25% magify
this.diceVal = Face.MAGNIFY;
} else {
//37.5% star, 37.5% blank
if(random.nextBoolean()) {
this.diceVal = Face.BLANK;
} else {
this.diceVal = Face.STAR;
}
}
}
public void toggleHold() {
hold = !hold;
}
public void nextValue() {
int index = diceVal.ordinal();
index = (index+1) % Face.values().length;
diceVal = Face.values()[index];
}
}
このステップでは、[ボタン]クリックをロジックにマップします。 Androidプラットフォームには、これを行う方法がいくつかあります。 1つの方法は、レイアウトファイルから属性を指定することです。もう1つは、 onClickListenerをプログラム的に設定することです。アプリでは、3つのトップレベルボタンに属性アプローチを使用し、リスナーを行ボタンにプログラムで設定します。
DICEカウントが25未満の場合は、DICEリストに新しいサイコロオブジェクトを追加しaddDice 。
デザイン
activity_main.xml ....
<Button
android:id="@+id/add_dice_button"
android:layout_gravity = "center"
android:layout_weight="1"
android:layout_width="wrap_content"
android:layout_height="wrap_content"
android:text="@string/add_button_label"
android:onClick="addDice"/>
....
論理
MainActivity.java ....
public void addDice(View view) {
if(diceList.size()< MAX_DICE_COUNT) {
diceAdapter.add(new Dice());
}
}
....
サイコロリストが空でない場合は、リストから最後のサイコロを削除しremoveDice
デザイン
activity_main.xml ....
<Button
android:id="@+id/rem_dice_button"
android:layout_gravity = "center"
android:layout_weight="1"
android:layout_width="wrap_content"
android:layout_height="wrap_content"
android:text="@string/rem_button_label"
android:onClick="removeDice"/>
....
論理
MainActivity.java ....
public void removeDice(View view) {
if(!diceList.isEmpty()) {
int lastIndex = diceList.size() - 1;
diceAdapter.remove(diceAdapter.getItem(lastIndex));
}
}
....
rollDice 、保持のためにマークされていない彼のリストにあるすべてのサイコロの価値を再編成します。
デザイン
activity_main.xml ....
<Button
android:id="@+id/roll_dice_button"
android:layout_weight="1"
android:layout_gravity = "center"
android:layout_width="wrap_content"
android:layout_height="wrap_content"
android:text="@string/roll_button_label"
android:onClick="rollDice"/>
....
論理
MainActivity.java ....
public void rollDice(View view) {
//roll all dice
for(Dice dice : diceList) {
if(!dice.hold)
dice.roll();
}
//notify adapter to update view
diceAdapter.notifyDataSetChanged();
}
....
notifyDataSetChangedとは何ですか?ロールボタンは、対応するサイコロオブジェクトのサイコロバリューを変更します。ビュー/データアダプターパターンの分離により、Dice Rowレイアウトはトリガーされない限り自動的に再レンダリングしません。 notifyDataSetChangedの呼び出しは、ビューを再描画します。
[ホールド]ボタンをクリックすると、サイコロのホールドフラグが設定されます。
MainActivity.java ....
Button holdButton = convertView.findViewById(R.id.dice_hold_button);
holdButton.setOnClickListener(new View.OnClickListener() {
@Override
public void onClick(View v) {
Dice dice = diceList.get(position);
dice.toggleHold();
}
});
....
[ホールド]ボタンをクリックすると、サイコロの値が変更され、インターフェイスが更新されます。
MainActivity.java ....
Button changeButton = convertView.findViewById(R.id.dice_change_button);
changeButton.setOnClickListener(new View.OnClickListener() {
@Override
public void onClick(View v) {
Dice dice = diceList.get(position);
dice.nextValue();
diceAdapter.notifyDataSetChanged();
}
});
....


