next swagger doc
v0.4.0
สร้าง Swagger JSON API จากเส้นทาง NextJS API
หากคุณสนุกกับการทำงานกับนักเดินเล่นหน้าคุณจะรักการตรวจสอบครั้งต่อไป: การตรวจสอบความถูกต้องของ NextJS API, สนับสนุน ZOD, YUP, Validator ที่เร็วที่สุด, Joi และอีกมากมาย
แพ็คเกจนี้อ่านซอร์สโค้ด JSDOC ของคุณบนเส้นทาง NextJS API และสร้างข้อกำหนด OpenAPI (Swagger)
nextjs + swagger-jsdoc = next-swagger-doc
yarn add next-swagger-doc หากต้องการรวม next-swagger-doc กับโครงการถัดไปของคุณ js 13 ให้ทำตามขั้นตอนเหล่านี้ การตั้งค่านี้จะสร้างเอกสาร Swagger สำหรับ API ของคุณตามรหัสของคุณและให้ UI Swagger ในตัวสำหรับดูเอกสาร
ถัดไปสร้างไฟล์ใหม่ lib/swagger.ts ไฟล์นี้ใช้ไลบรารี next-swagger-doc เพื่อสร้างข้อกำหนด Swagger ตามเส้นทาง API ในโครงการ Next.js ของคุณ
 import { createSwaggerSpec } from "next-swagger-doc" ;

export const getApiDocs = async ( ) => {
  const spec = createSwaggerSpec ( {
    apiFolder : "app/api" , // define api folder under app folder
    definition : {
      openapi : "3.0.0" ,
      info : {
        title : "Next Swagger API Example" ,
        version : "1.0" ,
      } ,
      components : {
        securitySchemes : {
          BearerAuth : {
            type : "http" ,
            scheme : "bearer" ,
            bearerFormat : "JWT" ,
          } ,
        } ,
      } ,
      security : [ ] ,
    } ,
  } ) ;
  return spec ;
} ; สร้างไฟล์ใหม่ที่ชื่อว่า app/api-doc/react-swagger.tsx ในไฟล์นี้ให้สร้างและส่งออกส่วนประกอบ React ที่ใช้ห้องสมุด swagger-ui-react เพื่อแสดงผล UI Swagger ตามข้อกำหนดที่ให้ไว้
เพื่อจุดประสงค์ในการสาธิตนี่คือตัวอย่างที่ใช้ Swagger-ui-react
อย่าลังเลที่จะใช้ห้องสมุด UI ทางเลือกอื่น ๆ เช่น Stoplightio/Elements ฉันได้เพิ่มตัวอย่างโดยใช้ไลบรารีนี้ในโฟลเดอร์ example
 'use client' ;

import SwaggerUI from 'swagger-ui-react' ;
import 'swagger-ui-react/swagger-ui.css' ;

type Props = {
  spec : Record < string , any > ,
} ;

function ReactSwagger ( { spec } : Props ) {
  return < SwaggerUI spec = { spec } /> ;
}

export default ReactSwagger ; สร้าง app/api-doc/page.tsx หน้านี้นำเข้าข้อมูลจำเพาะ Swagger และองค์ประกอบ UI Swagger เพื่อแสดงเอกสาร Swagger
 import { getApiDocs } from "@/lib/swagger" ;
import ReactSwagger from "./react-swagger" ;

export default async function IndexPage ( ) {
  const spec = await getApiDocs ( ) ;
  return (
    < section className = "container" >
      < ReactSwagger spec = { spec } />
    </ section >
  ) ;
} สุดท้ายเพิ่มความคิดเห็น Swagger ไปยังเส้นทาง API ของคุณใน app/api/hello/route.ts ความคิดเห็นนี้รวมถึงข้อมูลเมตาเกี่ยวกับจุดสิ้นสุด API ซึ่งจะอ่านโดย next-swagger-doc และรวมอยู่ในสเป็ค Swagger
 /**
 * @swagger
 * /api/hello:
 *   get:
 *     description: Returns the hello world
 *     responses:
 *       200:
 *         description: Hello World!
 */
export async function GET ( _request : Request ) {
  // Do whatever you want
  return new Response ( 'Hello World!' , {
    status : 200 ,
  } ) ;
}
ตอนนี้นำทางไปยัง localhost:3000/api-doc (หรือทุกที่ที่คุณโฮสต์แอปพลิเคชัน next.js ของคุณ) และคุณควรเห็น UI Swagger
yarn add next-swagger-doc swagger-ui-reactpages/api-doc.tsx import { GetStaticProps , InferGetStaticPropsType } from 'next' ;
import { createSwaggerSpec } from 'next-swagger-doc' ;
import dynamic from 'next/dynamic' ;
import 'swagger-ui-react/swagger-ui.css' ;
const SwaggerUI = dynamic < {
spec : any ;
} > ( import ( 'swagger-ui-react' ) , { ssr : false } ) ;
function ApiDoc ( { spec } : InferGetStaticPropsType < typeof getStaticProps > ) {
return < SwaggerUI spec = { spec } / > ;
}
export const getStaticProps : GetStaticProps = async ( ) => {
const spec : Record < string , any > = createSwaggerSpec ( {
apiFolder : 'pages/api' // or 'src/pages/api',
definition : {
openapi : '3.0.0' ,
info : {
title : 'Next Swagger API Example' ,
version : '1.0' ,
} ,
} ,
} ) ;
return {
props : {
spec ,
} ,
} ;
} ;
export default ApiDoc ; pages/api/doc.ts import { withSwagger } from "next-swagger-doc" ;
const swaggerHandler = withSwagger ( {
definition : {
openapi : "3.0.0" ,
info : {
title : "NextJS Swagger" ,
version : "0.1.0" ,
} ,
} ,
apiFolder : "pages/api" ,
} ) ;
export default swaggerHandler ( ) ;pages/api/hello.ts import { NextApiRequest , NextApiResponse } from "next" ;
/**
* @swagger
* /api/hello:
* get:
* description: Returns the hello world
* responses:
* 200:
* description: hello world
*/
const handler = ( _req : NextApiRequest , res : NextApiResponse ) => {
res . status ( 200 ) . json ( {
result : "hello world" ,
} ) ;
} ;
export default handler ;next-swagger-doc.json {
"apiFolder" : " pages/api " ,
"schemaFolders" : [ " models " ],
"definition" : {
"openapi" : " 3.0.0 " ,
"info" : {
"title" : " Next Swagger API Example " ,
"version" : " 1.0 "
}
}
}yarn next-swagger-doc-cli next-swagger-doc.jsongh repo clone jellydn/next-swagger-doc
cd examples/next14-app
pnpm install
pnm run dev จากนั้นเปิด http: // localhost: 3000/api-doc หรือ http: // localhost: 3000/บนเบราว์เซอร์ของคุณ 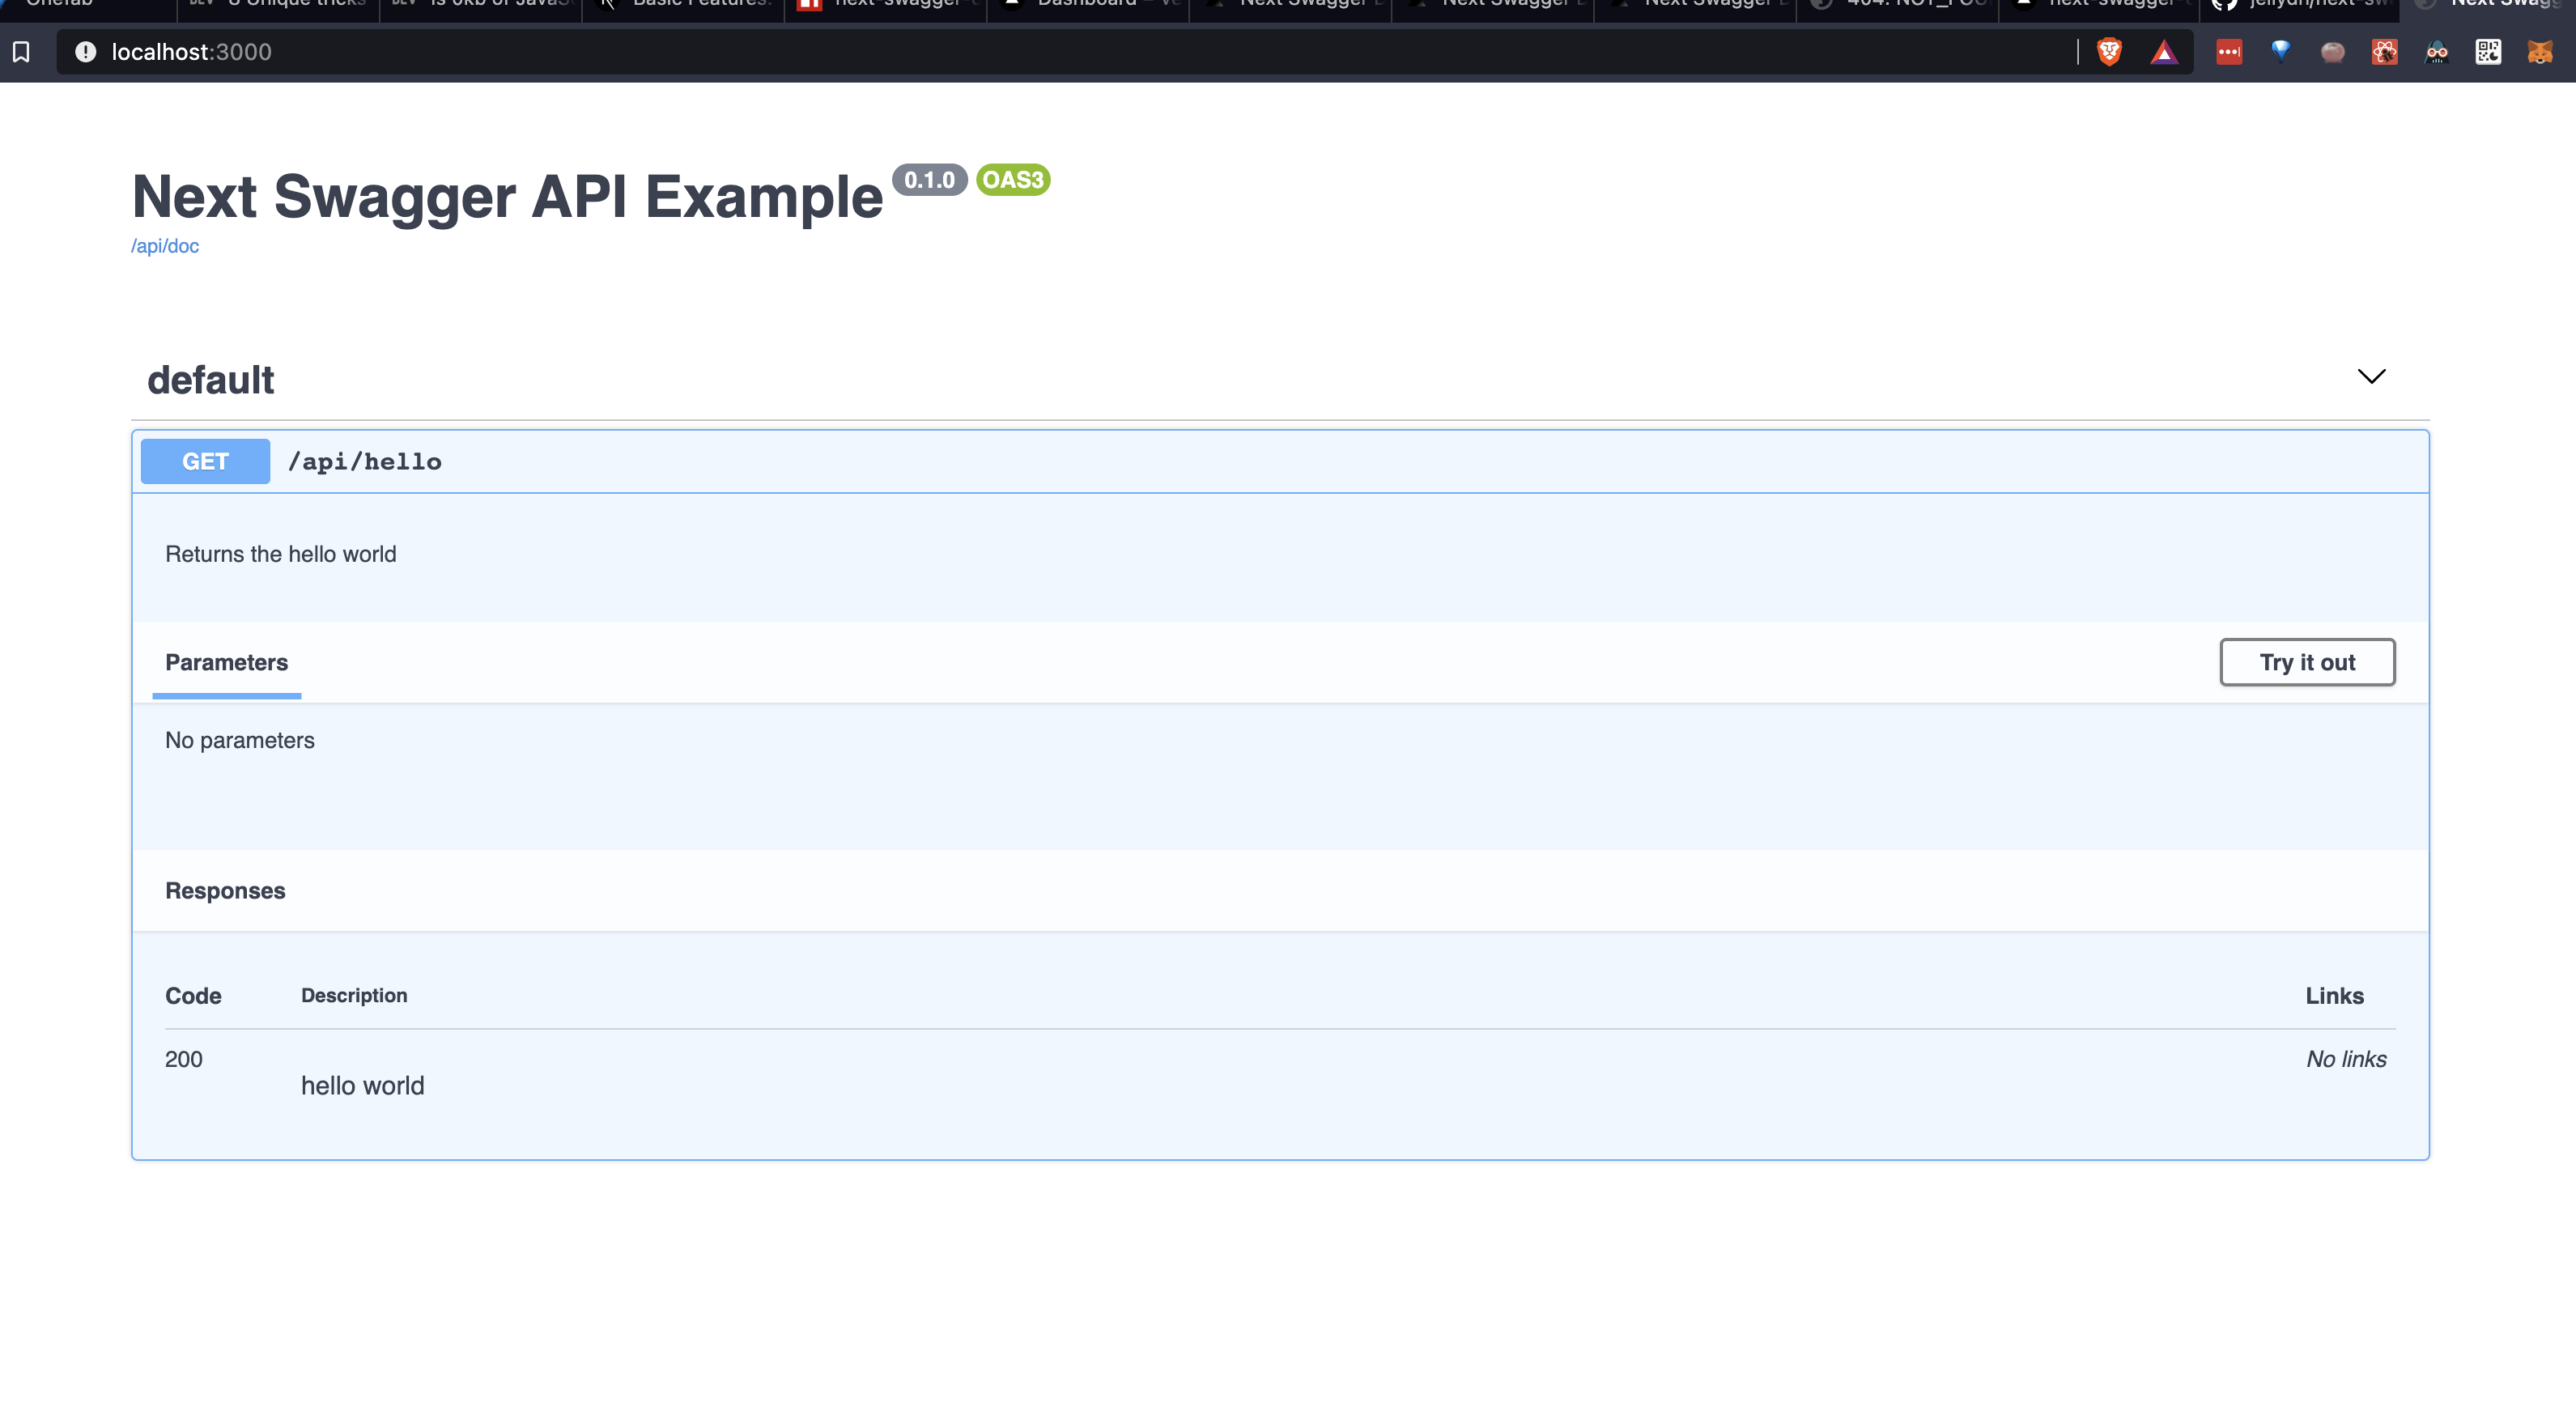
ในการตั้งค่ากฎ ESLINT ที่ตรวจสอบว่า API ทั้งหมดมีคำอธิบาย JSDOC Swagger เราสามารถใช้การตั้งค่าต่อไปนี้:
ติดตั้งปลั๊กอิน JSDOC ESLINT:
yarn add -D eslint-plugin-jsdocสร้างกฎที่กำหนดเองในไฟล์กำหนดค่า ESLINT ของคุณ:
{
    //...your configuration
    "overrides" : [
        //...your overrides
        {
            // Force the setting of a swagger description on each api endpoint
            "files" : [ " pages/api/**/*.ts " ],
            "plugins" : [ " jsdoc " ],
            "rules" : {
                "jsdoc/no-missing-syntax" : [
                " error " ,
                {
                    "contexts" : [
                    {
                        "comment" : " JsdocBlock:has(JsdocTag[tag=swagger]) " ,
                        "context" : " any " ,
                        "message" : " @swagger documentation is required on each API. Check this out for syntax info: https://github.com/jellydn/next-swagger-doc "
                    }
                    ]
                }
            ]
        }
    ]
}โครงการนี้ใช้ล่วงหน้าเพื่อบังคับใช้คุณภาพรหัส ในการติดตั้งตะขอล่วงหน้าให้เรียกใช้:
pre-commit install- Huynh Duc Dung
ให้️ถ้าโครงการนี้ช่วยคุณได้!
ขอบคุณไปที่คนที่ยอดเยี่ยมเหล่านี้ (คีย์อีโมจิ):
Dung Duc Huynh (Kaka) | tmirkovic | Matthew Holloway | leventemihaly | Pahrizal Ma'rup | อาริส | Valerio Ageno |
ลูกโซ่ |
โครงการนี้เป็นไปตามข้อกำหนดทั้งหมดของผู้เข้าร่วม การมีส่วนร่วมทุกชนิดยินดีต้อนรับ!


