next swagger doc
v0.4.0
NextJS APIルートからSwagger JSON APIを生成します
Next-Swagger-Docでの仕事を楽しむなら、次のValidations:NextJS API検証、ZOD、YUP、Fast-Validator、JOIなどをサポートすることが大好きです。
このパッケージは、nextJS APIルートでJSDOCアノテーションされたソースコードを読み取り、OpenAPI(Swagger)仕様を生成します。
nextjs + swagger-jsdoc = next-swagger-doc
yarn add next-swagger-doc next-swagger-doc Next.js 13プロジェクトに組み込むには、次の手順に従ってください。このセットアップは、コードに基づいてAPIのSwaggerドキュメントを生成し、ドキュメントを表示するための組み込みのSwagger UIを提供します。
次に、新しいファイルlib/swagger.tsを作成します。このファイルはnext-swagger-docライブラリを使用して、Next.jsプロジェクトのAPIルートに基づいてSwagger仕様を作成します。
 import { createSwaggerSpec } from "next-swagger-doc" ;

export const getApiDocs = async ( ) => {
  const spec = createSwaggerSpec ( {
    apiFolder : "app/api" , // define api folder under app folder
    definition : {
      openapi : "3.0.0" ,
      info : {
        title : "Next Swagger API Example" ,
        version : "1.0" ,
      } ,
      components : {
        securitySchemes : {
          BearerAuth : {
            type : "http" ,
            scheme : "bearer" ,
            bearerFormat : "JWT" ,
          } ,
        } ,
      } ,
      security : [ ] ,
    } ,
  } ) ;
  return spec ;
} ;app/api-doc/react-swagger.tsxという名前の新しいファイルを生成します。このファイルでは、 swagger-ui-reactライブラリを利用して提供された仕様に従ってSwagger UIをレンダリングするReactコンポーネントを作成およびエクスポートします。
デモンストレーションのために、Swagger-UI反応を使用した例を以下に示します
Stoplightio/Elementsなどの代替Swagger UIライブラリを自由に使用してください。このライブラリを使用して、 exampleフォルダーに使用した例を追加しました。
 'use client' ;

import SwaggerUI from 'swagger-ui-react' ;
import 'swagger-ui-react/swagger-ui.css' ;

type Props = {
  spec : Record < string , any > ,
} ;

function ReactSwagger ( { spec } : Props ) {
  return < SwaggerUI spec = { spec } /> ;
}

export default ReactSwagger ;新しいファイルapp/api-doc/page.tsxを作成します。このページでは、Swagger仕様とSwagger UIコンポーネントをインポートして、Swaggerドキュメントを表示します。
 import { getApiDocs } from "@/lib/swagger" ;
import ReactSwagger from "./react-swagger" ;

export default async function IndexPage ( ) {
  const spec = await getApiDocs ( ) ;
  return (
    < section className = "container" >
      < ReactSwagger spec = { spec } />
    </ section >
  ) ;
}最後に、 app/api/hello/route.tsのAPIルートにswaggerコメントを追加します。このコメントにはnext-swagger-docが読み取り、Swagger仕様に含まれるAPIエンドポイントに関するメタデータが含まれています。
 /**
 * @swagger
 * /api/hello:
 *   get:
 *     description: Returns the hello world
 *     responses:
 *       200:
 *         description: Hello World!
 */
export async function GET ( _request : Request ) {
  // Do whatever you want
  return new Response ( 'Hello World!' , {
    status : 200 ,
  } ) ;
}
次に、 localhost:3000/api-doc (またはnext.jsアプリケーションをホストする場所)に移動すると、Swagger UIが表示されます。
yarn add next-swagger-doc swagger-ui-reactpages/api-doc.tsx作成します import { GetStaticProps , InferGetStaticPropsType } from 'next' ;
import { createSwaggerSpec } from 'next-swagger-doc' ;
import dynamic from 'next/dynamic' ;
import 'swagger-ui-react/swagger-ui.css' ;
const SwaggerUI = dynamic < {
spec : any ;
} > ( import ( 'swagger-ui-react' ) , { ssr : false } ) ;
function ApiDoc ( { spec } : InferGetStaticPropsType < typeof getStaticProps > ) {
return < SwaggerUI spec = { spec } / > ;
}
export const getStaticProps : GetStaticProps = async ( ) => {
const spec : Record < string , any > = createSwaggerSpec ( {
apiFolder : 'pages/api' // or 'src/pages/api',
definition : {
openapi : '3.0.0' ,
info : {
title : 'Next Swagger API Example' ,
version : '1.0' ,
} ,
} ,
} ) ;
return {
props : {
spec ,
} ,
} ;
} ;
export default ApiDoc ; pages/api/doc.ts import { withSwagger } from "next-swagger-doc" ;
const swaggerHandler = withSwagger ( {
definition : {
openapi : "3.0.0" ,
info : {
title : "NextJS Swagger" ,
version : "0.1.0" ,
} ,
} ,
apiFolder : "pages/api" ,
} ) ;
export default swaggerHandler ( ) ;pages/api/hello.ts import { NextApiRequest , NextApiResponse } from "next" ;
/**
* @swagger
* /api/hello:
* get:
* description: Returns the hello world
* responses:
* 200:
* description: hello world
*/
const handler = ( _req : NextApiRequest , res : NextApiResponse ) => {
res . status ( 200 ) . json ( {
result : "hello world" ,
} ) ;
} ;
export default handler ;next-swagger-doc.jsonとして作成します{
"apiFolder" : " pages/api " ,
"schemaFolders" : [ " models " ],
"definition" : {
"openapi" : " 3.0.0 " ,
"info" : {
"title" : " Next Swagger API Example " ,
"version" : " 1.0 "
}
}
}yarn next-swagger-doc-cli next-swagger-doc.jsongh repo clone jellydn/next-swagger-doc
cd examples/next14-app
pnpm install
pnm run dev次に、http:// localhost:3000/api-docまたはhttp:// localhost:3000/をブラウザに開きます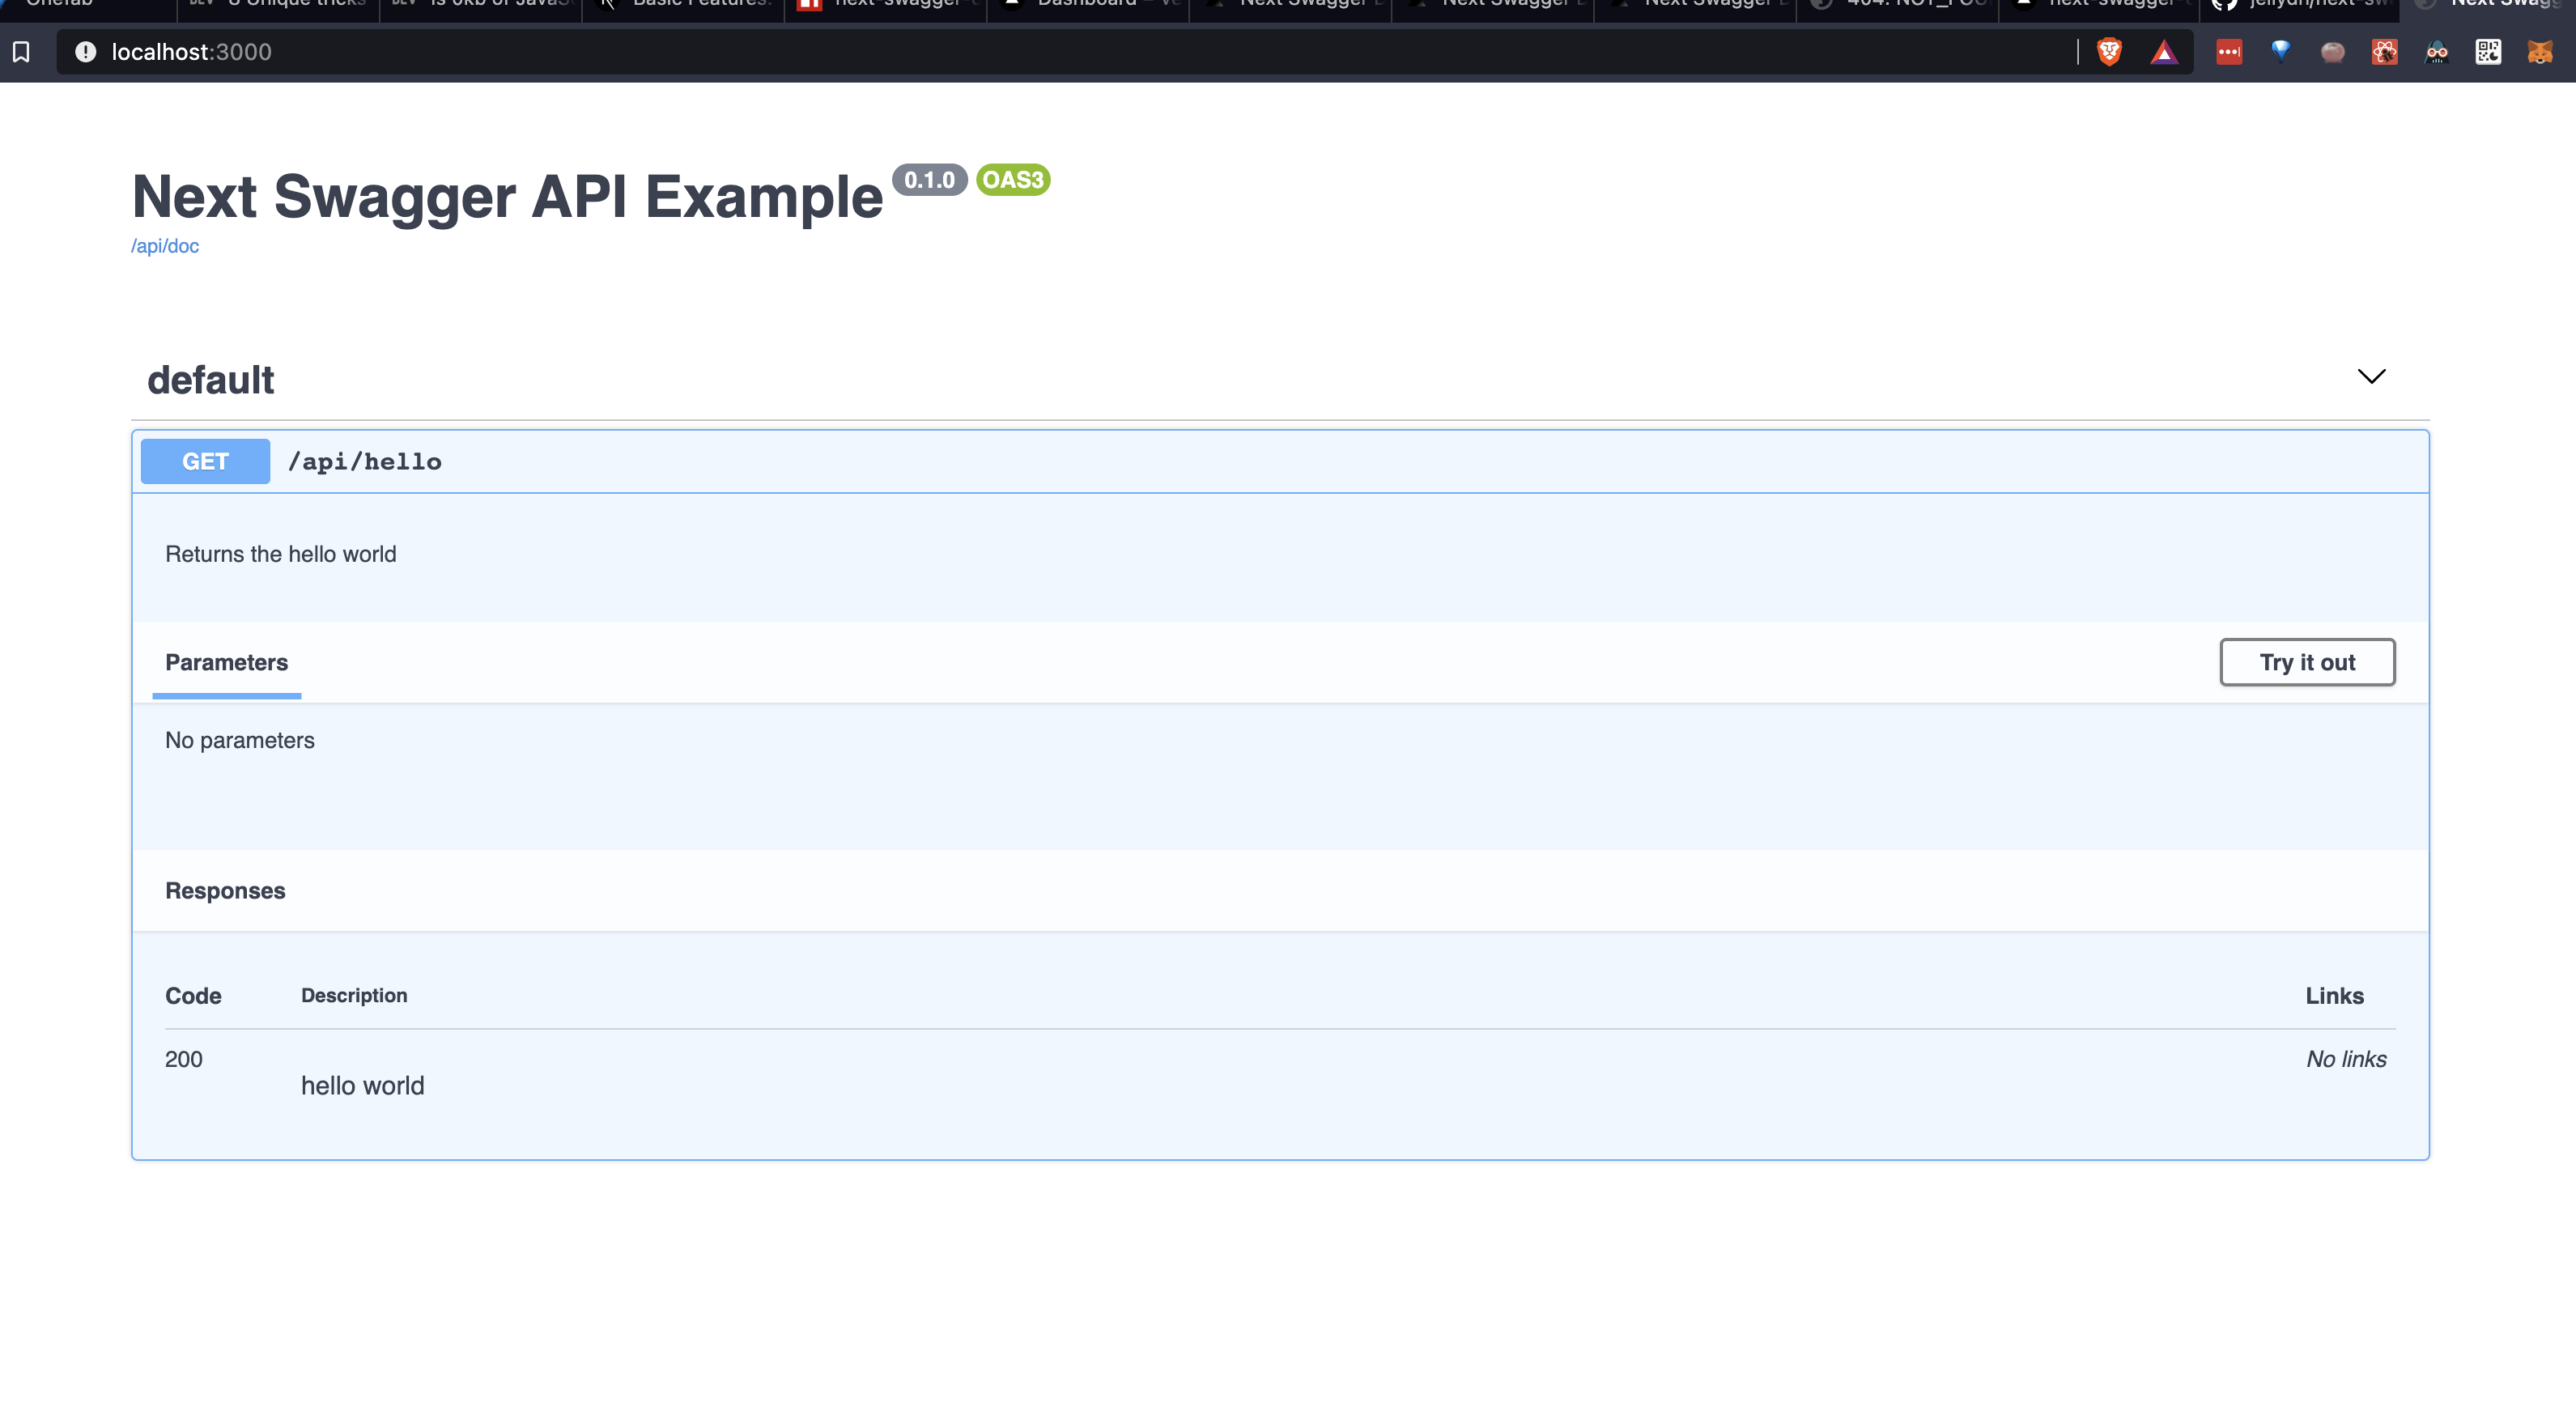
すべてのAPIが実際にswagger jsdocの説明を持っていることをチェックするEslintルールを設定するために、次の設定を使用できます。
JSDOC ESLINTプラグインをインストールします。
yarn add -D eslint-plugin-jsdocESLINT構成ファイルでカスタムルールを作成します。
{
    //...your configuration
    "overrides" : [
        //...your overrides
        {
            // Force the setting of a swagger description on each api endpoint
            "files" : [ " pages/api/**/*.ts " ],
            "plugins" : [ " jsdoc " ],
            "rules" : {
                "jsdoc/no-missing-syntax" : [
                " error " ,
                {
                    "contexts" : [
                    {
                        "comment" : " JsdocBlock:has(JsdocTag[tag=swagger]) " ,
                        "context" : " any " ,
                        "message" : " @swagger documentation is required on each API. Check this out for syntax info: https://github.com/jellydn/next-swagger-doc "
                    }
                    ]
                }
            ]
        }
    ]
}このプロジェクトでは、事前コミットを使用してコードの品質を実施しています。コミット前のフックをインストールするには、実行してください。
pre-commit install? Huynh Duc Dung
このプロジェクトがあなたを助けたなら、♥を与えてください!
これらの素晴らしい人々に感謝します(絵文字キー):
Dung Duc Huynh(Kaka) | Tmirkovic | マシュー・ホロウェイ | leventemihaly | Pahrizal Ma'rup | アリ | Valerio Ageno |
カチョ |
このプロジェクトは、全委員会の仕様に従います。あらゆる種類の貢献を歓迎します!


