Yolov5 Deepsort
1.0.0
이 기사 주소 : https://blog.csdn.net/weixin_44936889/article/details/112002152
YOLOV5+DEEPSORT를 사용하여 차량 보행자 추적 및 계산을 구현하면 코드가 탐지기 클래스로 캡슐화되어 자신의 프로젝트에 더 쉽게 포함됩니다.
코드 주소 (스타 환영) :
https://github.com/sharpiless/yolov5-deepsort/
최종 효과 : 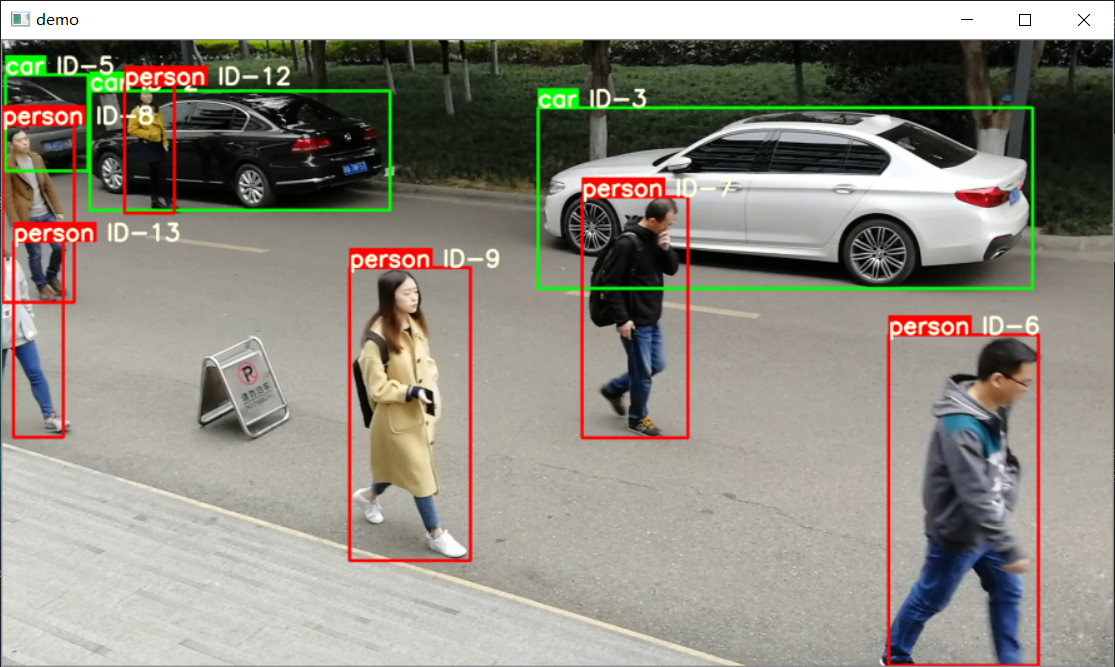
 class Detector ( baseDet ):

    def __init__ ( self ):
        super ( Detector , self ). __init__ ()
        self . init_model ()
        self . build_config ()

    def init_model ( self ):

        self . weights = 'weights/yolov5m.pt'
        self . device = '0' if torch . cuda . is_available () else 'cpu'
        self . device = select_device ( self . device )
        model = attempt_load ( self . weights , map_location = self . device )
        model . to ( self . device ). eval ()
        model . half ()
        # torch.save(model, 'test.pt')
        self . m = model
        self . names = model . module . names if hasattr (
            model , 'module' ) else model . names

    def preprocess ( self , img ):

        img0 = img . copy ()
        img = letterbox ( img , new_shape = self . img_size )[ 0 ]
        img = img [:, :, :: - 1 ]. transpose ( 2 , 0 , 1 )
        img = np . ascontiguousarray ( img )
        img = torch . from_numpy ( img ). to ( self . device )
        img = img . half ()  # 半精度
        img /= 255.0  # 图像归一化
        if img . ndimension () == 3 :
            img = img . unsqueeze ( 0 )

        return img0 , img

    def detect ( self , im ):

        im0 , img = self . preprocess ( im )

        pred = self . m ( img , augment = False )[ 0 ]
        pred = pred . float ()
        pred = non_max_suppression ( pred , self . threshold , 0.4 )

        pred_boxes = []
        for det in pred :

            if det is not None and len ( det ):
                det [:, : 4 ] = scale_coords (
                    img . shape [ 2 :], det [:, : 4 ], im0 . shape ). round ()

                for * x , conf , cls_id in det :
                    lbl = self . names [ int ( cls_id )]
                    if not lbl in [ 'person' , 'car' , 'truck' ]:
                        continue
                    x1 , y1 = int ( x [ 0 ]), int ( x [ 1 ])
                    x2 , y2 = int ( x [ 2 ]), int ( x [ 3 ])
                    pred_boxes . append (
                        ( x1 , y1 , x2 , y2 , lbl , conf ))

        return im , pred_boxes
이미지 및 예측 결과를 반환하려면 Self.Detect 메소드를 호출하십시오.
 deepsort = DeepSort ( cfg . DEEPSORT . REID_CKPT ,
                    max_dist = cfg . DEEPSORT . MAX_DIST , min_confidence = cfg . DEEPSORT . MIN_CONFIDENCE ,
                    nms_max_overlap = cfg . DEEPSORT . NMS_MAX_OVERLAP , max_iou_distance = cfg . DEEPSORT . MAX_IOU_DISTANCE ,
                    max_age = cfg . DEEPSORT . MAX_AGE , n_init = cfg . DEEPSORT . N_INIT , nn_budget = cfg . DEEPSORT . NN_BUDGET ,
                    use_cuda = True )
추적 결과를 업데이트하려면 self.update 메소드를 호출하십시오
python demo.py내 블로그를 참조하십시오.
[XiaoBai CV] YOLOV5와 함께 자신의 데이터 세트를 훈련시키기 위해 단계별로 가르쳐줍니다 (Windows 환경 구성에서 모델 배포까지)
훈련 후 웨이트 폴더에 넣으십시오
 from AIDetector_pytorch import Detector

det = Detector () result = det . feedCap ( im )여기서 Im은 BGR 이미지입니다
반환 된 결과는 사전입니다. 결과 [ '프레임']는 시각적 이미지를 반환합니다.
B 스테이션 : https://space.bilibili.com/470550823
CSDN : https://blog.csdn.net/weixin_44936889
AI 스튜디오 : https://aistudio.baidu.com/aistudio/personalcenter/thirdview/67156
github : https://github.com/sharpiless
GNU General Public License v3.0 프로토콜을 따르고 대상 감지 부품의 소스를 표시하십시오 : https://github.com/ultralytics/yolov5/


