Yolov5 Deepsort
1.0.0
Esta dirección del artículo: https://blog.csdn.net/weixin_44936889/article/details/112002152
Use yolov5+profundo para implementar el seguimiento y el conteo de los peatones del vehículo, y el código está encapsulado en una clase de detector, que es más fácil de incrustar en sus propios proyectos.
Dirección del código (bienvenida Star):
https://github.com/sharpiless/yolov5-deepsort/
Efecto final: 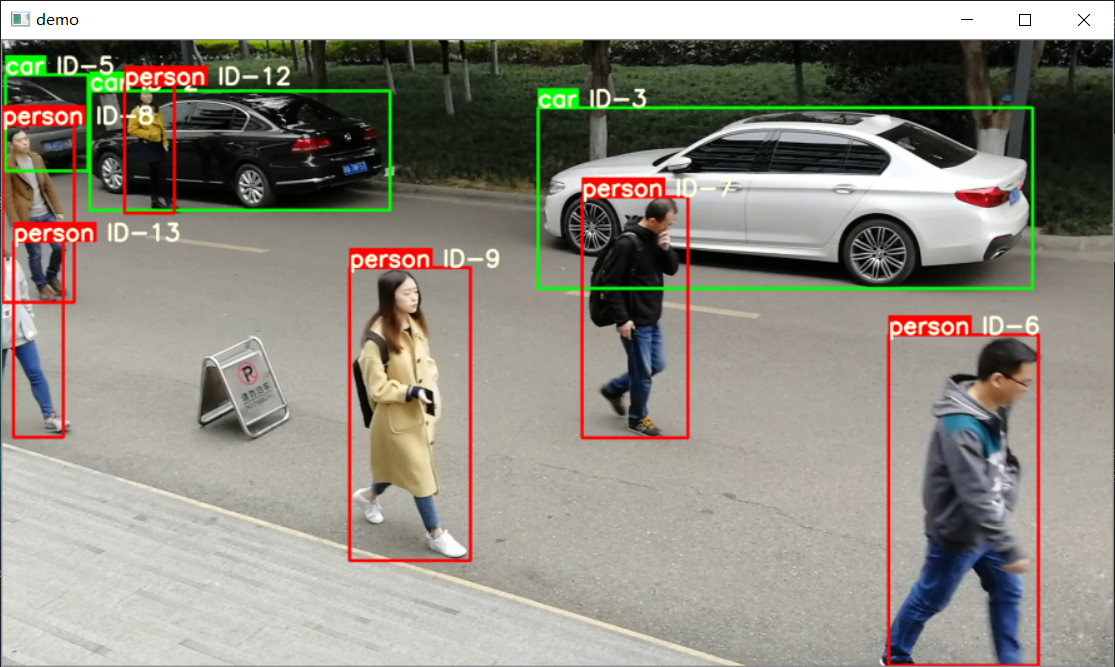
 class Detector ( baseDet ):

    def __init__ ( self ):
        super ( Detector , self ). __init__ ()
        self . init_model ()
        self . build_config ()

    def init_model ( self ):

        self . weights = 'weights/yolov5m.pt'
        self . device = '0' if torch . cuda . is_available () else 'cpu'
        self . device = select_device ( self . device )
        model = attempt_load ( self . weights , map_location = self . device )
        model . to ( self . device ). eval ()
        model . half ()
        # torch.save(model, 'test.pt')
        self . m = model
        self . names = model . module . names if hasattr (
            model , 'module' ) else model . names

    def preprocess ( self , img ):

        img0 = img . copy ()
        img = letterbox ( img , new_shape = self . img_size )[ 0 ]
        img = img [:, :, :: - 1 ]. transpose ( 2 , 0 , 1 )
        img = np . ascontiguousarray ( img )
        img = torch . from_numpy ( img ). to ( self . device )
        img = img . half ()  # 半精度
        img /= 255.0  # 图像归一化
        if img . ndimension () == 3 :
            img = img . unsqueeze ( 0 )

        return img0 , img

    def detect ( self , im ):

        im0 , img = self . preprocess ( im )

        pred = self . m ( img , augment = False )[ 0 ]
        pred = pred . float ()
        pred = non_max_suppression ( pred , self . threshold , 0.4 )

        pred_boxes = []
        for det in pred :

            if det is not None and len ( det ):
                det [:, : 4 ] = scale_coords (
                    img . shape [ 2 :], det [:, : 4 ], im0 . shape ). round ()

                for * x , conf , cls_id in det :
                    lbl = self . names [ int ( cls_id )]
                    if not lbl in [ 'person' , 'car' , 'truck' ]:
                        continue
                    x1 , y1 = int ( x [ 0 ]), int ( x [ 1 ])
                    x2 , y2 = int ( x [ 2 ]), int ( x [ 3 ])
                    pred_boxes . append (
                        ( x1 , y1 , x2 , y2 , lbl , conf ))

        return im , pred_boxes
Llame al método self.detect para devolver los resultados de la imagen y la predicción
 deepsort = DeepSort ( cfg . DEEPSORT . REID_CKPT ,
                    max_dist = cfg . DEEPSORT . MAX_DIST , min_confidence = cfg . DEEPSORT . MIN_CONFIDENCE ,
                    nms_max_overlap = cfg . DEEPSORT . NMS_MAX_OVERLAP , max_iou_distance = cfg . DEEPSORT . MAX_IOU_DISTANCE ,
                    max_age = cfg . DEEPSORT . MAX_AGE , n_init = cfg . DEEPSORT . N_INIT , nn_budget = cfg . DEEPSORT . NN_BUDGET ,
                    use_cuda = True )
Llame al método self.update para actualizar los resultados de seguimiento
python demo.pyConsulte otro blog mío:
[Xiaobai CV] Te enseñe paso a paso con Yolov5 para capacitar a su propio conjunto de datos (desde la configuración del entorno de Windows hasta la implementación del modelo)
Después del entrenamiento, colóquelo en la carpeta de pesas
 from AIDetector_pytorch import Detector

det = Detector () result = det . feedCap ( im )donde estoy una imagen bgr
El resultado devuelto es un diccionario, el resultado ['marco'] devuelve la imagen visual
Estación B: https://space.bilibili.com/470550823
CSDN: https://blog.csdn.net/weixin_44936889
AI Studio: https://aistudio.baidu.com/aistudio/personalcenter/thirdview/67156
Github: https://github.com/sharpiless
Siga el protocolo GNU General Public License v3.0 e indique la fuente de la parte de detección de destino: https://github.com/ultralytics/yolov5/


