micro rt
1.0.0
녹로 쓰여진 가벼운 광선 마이크로 서비스.
주요 아이디어는 JSON 파일 또는 HTTP 서버를 통해 터미널에서 이미지를 즉시 쉽게 렌더링하는 것입니다.
Zenity에서 영감을 받아 터미널에서 간단한 UI를 만들 수 있습니다.
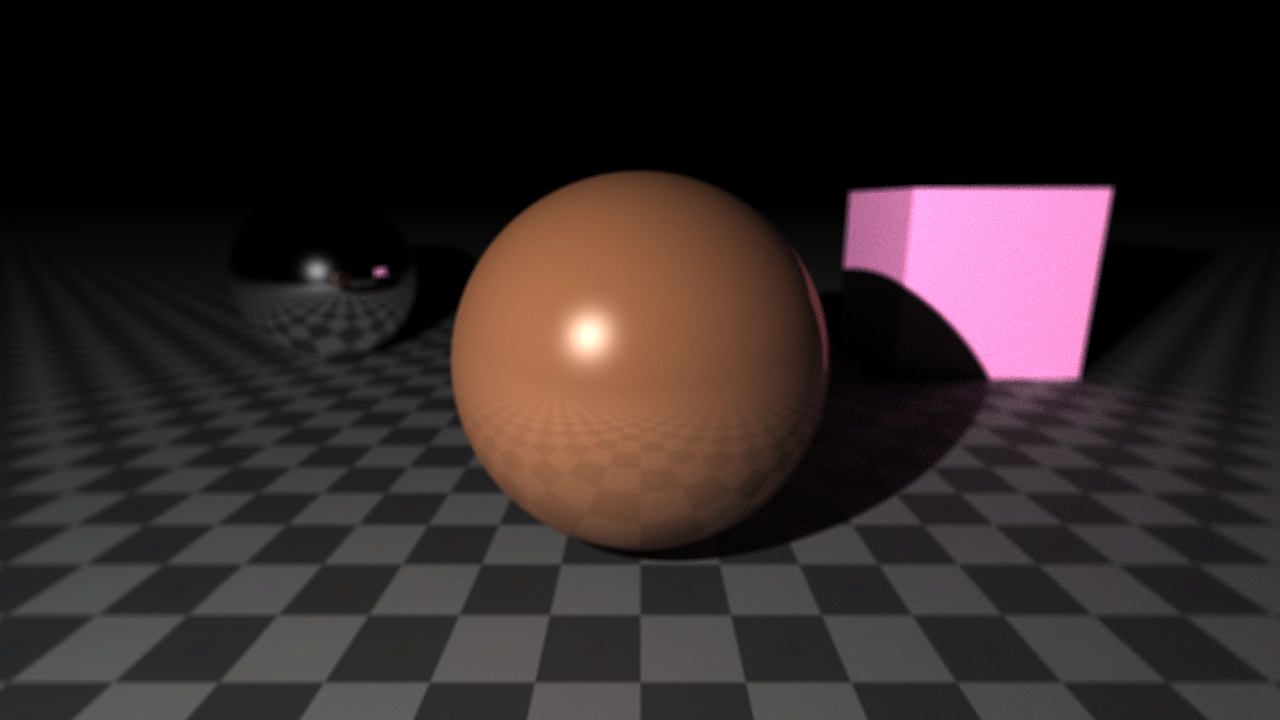
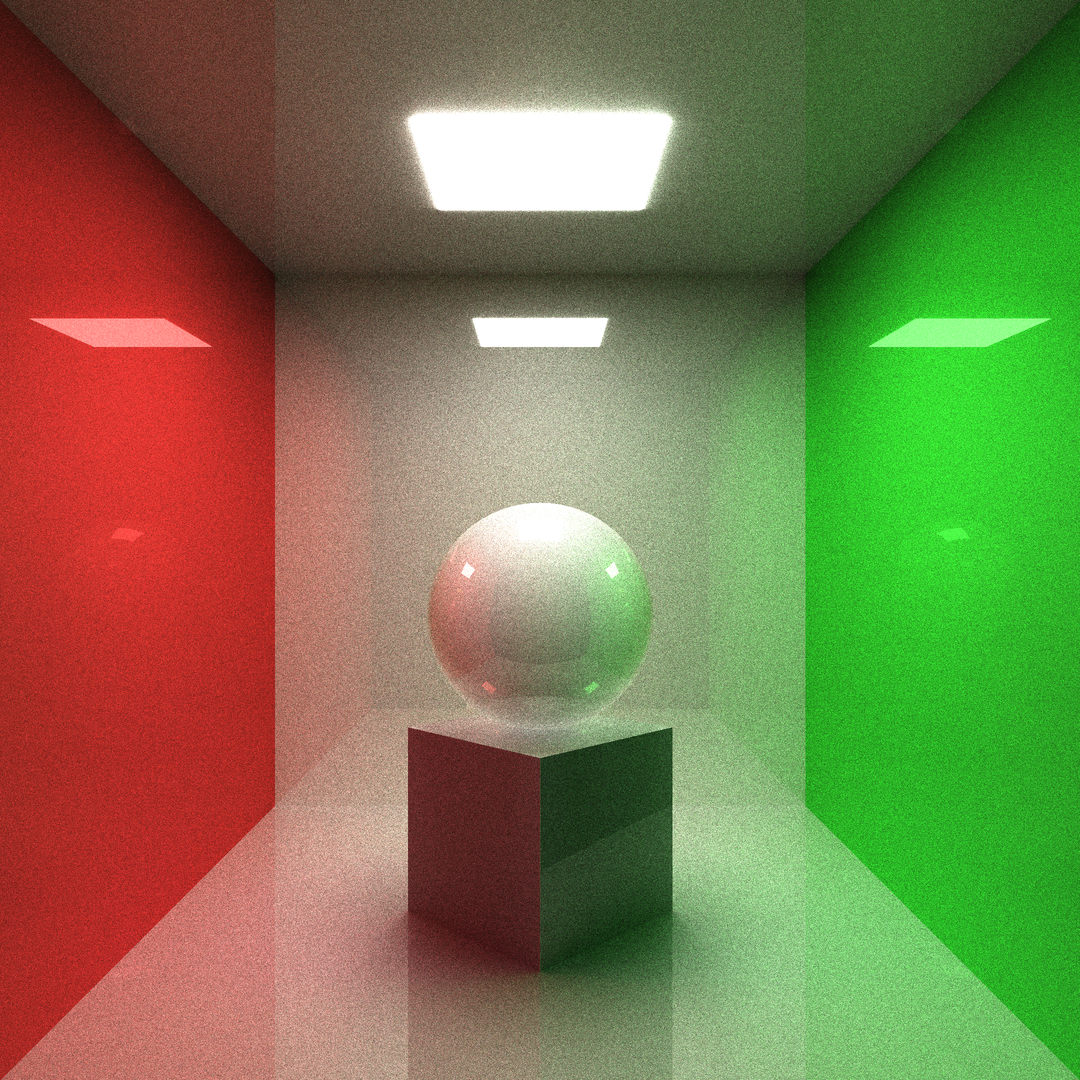
raytrace --obj sph r: 0.15 pos: 0 0 -0.1
         --obj box size: 0.25 0.25 0.25 pos: 0 0 -0.375 dir: 0 0.5 0.5 0
         --obj box size: 0.3 0.3 0.01 pos: 0 0 0.499 emit: 1
         --obj box size: 1 0.01 1 pos: 0 0.5 0
         --obj box size: 1 1 0.01 pos: 0 0 0.5
         --obj box size: 1 1 0.01 pos: 0 0 -0.5
         --obj box size: 0.01 1 1 pos: -0.5 0 0 albedo: ' #ff0000 '
         --obj box size: 0.01 1 1 pos: 0.5 0 0 albedo: ' #00ff00 '
         --cam pos: 0 -1.25 0 fov: 60 gamma: 0.6 exp: 0.8
--update --sample 1024 --ssaa 2 --res 1080 1080무슬림을 사용하여 Linux를 정적으로 구축하십시오. 이 실행 파일은 추가 LIB없이 모든 Linux 시스템에서 실행될 수 있습니다.
rustup target add x86_64-unknown-linux-musl
cargo build --release --target x86_64-unknown-linux-musl$ ./raytrace -h
Tiny raytracing microservice.
Usage: raytrace [OPTIONS] [FILE.json]
Arguments:
[FILE.json]
Full render description json input filename
Options:
-v, --verbose
Enable logging
--pretty
Print full render info in json with prettifier
-d, --dry
Dry run (useful with verbose)
-o, --output < FILE.EXT >
Final image output filename
--http < address >
Launch http server
--bounce < BOUNCE >
Max ray bounce
--sample < SAMPLE >
Max path-tracing samples
--loss < LOSS >
Ray bounce energy loss
-u, --update
Save output on each sample
-w, --worker < WORKER >
Parallel workers count
--dim < DIM >
Parallel jobs count on each dimension
-s, --scene < FILE.json >
Scene description json input filename
-f, --frame < FILE.json >
Frame description json input filename
--res < w > < h >
Frame output image resolution
--ssaa < SSAA >
Output image SSAAx antialiasing
--cam < pos: < f32 f32 f 32>> < dir: < f32 f32 f32 f 32>> < fov: < f 32>> < gamma: < f 32>> < exp: < f 32>> < aprt: < f 32>> < foc: < f 32>> ...
Add camera to the scene
--obj [ < type: sphere(sph) | plane(pln) | box | triangle(tri) > < name: < str >> < param: < sphere: r: < f 32>> | < plane: n: < f32 f32 f 32>> | < box: size: < f32 f32 f 32>> | < triangle: < f32 f32 f 32> < f32 f32 f 32> < f32 f32 f32 >>> < pos: < f32 f32 f 32>> < dir: < f32 f32 f32 f 32>> < albedo: < f32 f32 f 32> | hex > < rough: < f 32>> < metal: < f 32>> < glass: < f 32>> < opacity: < f 32>> < emit: < f 32>> < tex: < FILE.ext | < base64 str >>> < rmap: < FILE.ext | < base64 str >>> < mmap: < FILE.ext | < base64 str >>> < gmap: < FILE.ext | < base64 str >>> < omap: < FILE.ext | < base64 str >>> < emap: < FILE.ext | < base64 str >>> ...]
Add renderer to the scene
--light [ < param: < point(pt): < f32 f32 f 32>> | < dir: < f32 f32 f32 >>> < pwr: < f 32>> < col: < f32 f32 f 32> | hex > ...]
Add light source to the scene
--sky << f32 f32 f32>|hex> <pwr>...
Scene sky color
-h, --help
Print help information
-V, --version
Print version information $ ./img2json -h
Convert images to json for micro-rt.
Usage: img2json [OPTIONS] < IMG >
Arguments:
< IMG >
Input image filename
Options:
--pretty
Print json with prettifier
-f, --fmt < fmt: < buf | inl >>
Texture format
-h, --help
Print help information
-V, --version
Print version information터미널의 구로 간단한 장면을 렌더링하겠습니다.
raytrace --obj sphere --light point: -0.5 -1 0.5 PNG 이미지 1280x720을 생성합니다. 
이제 해상도, 출력 파일을 변경하고 일부 항아리아를 추가해 봅시다.
raytrace --obj sphere --light point: -0.5 -1 0.5 --res 1920 1080 --ssaa 2 -o final.ppm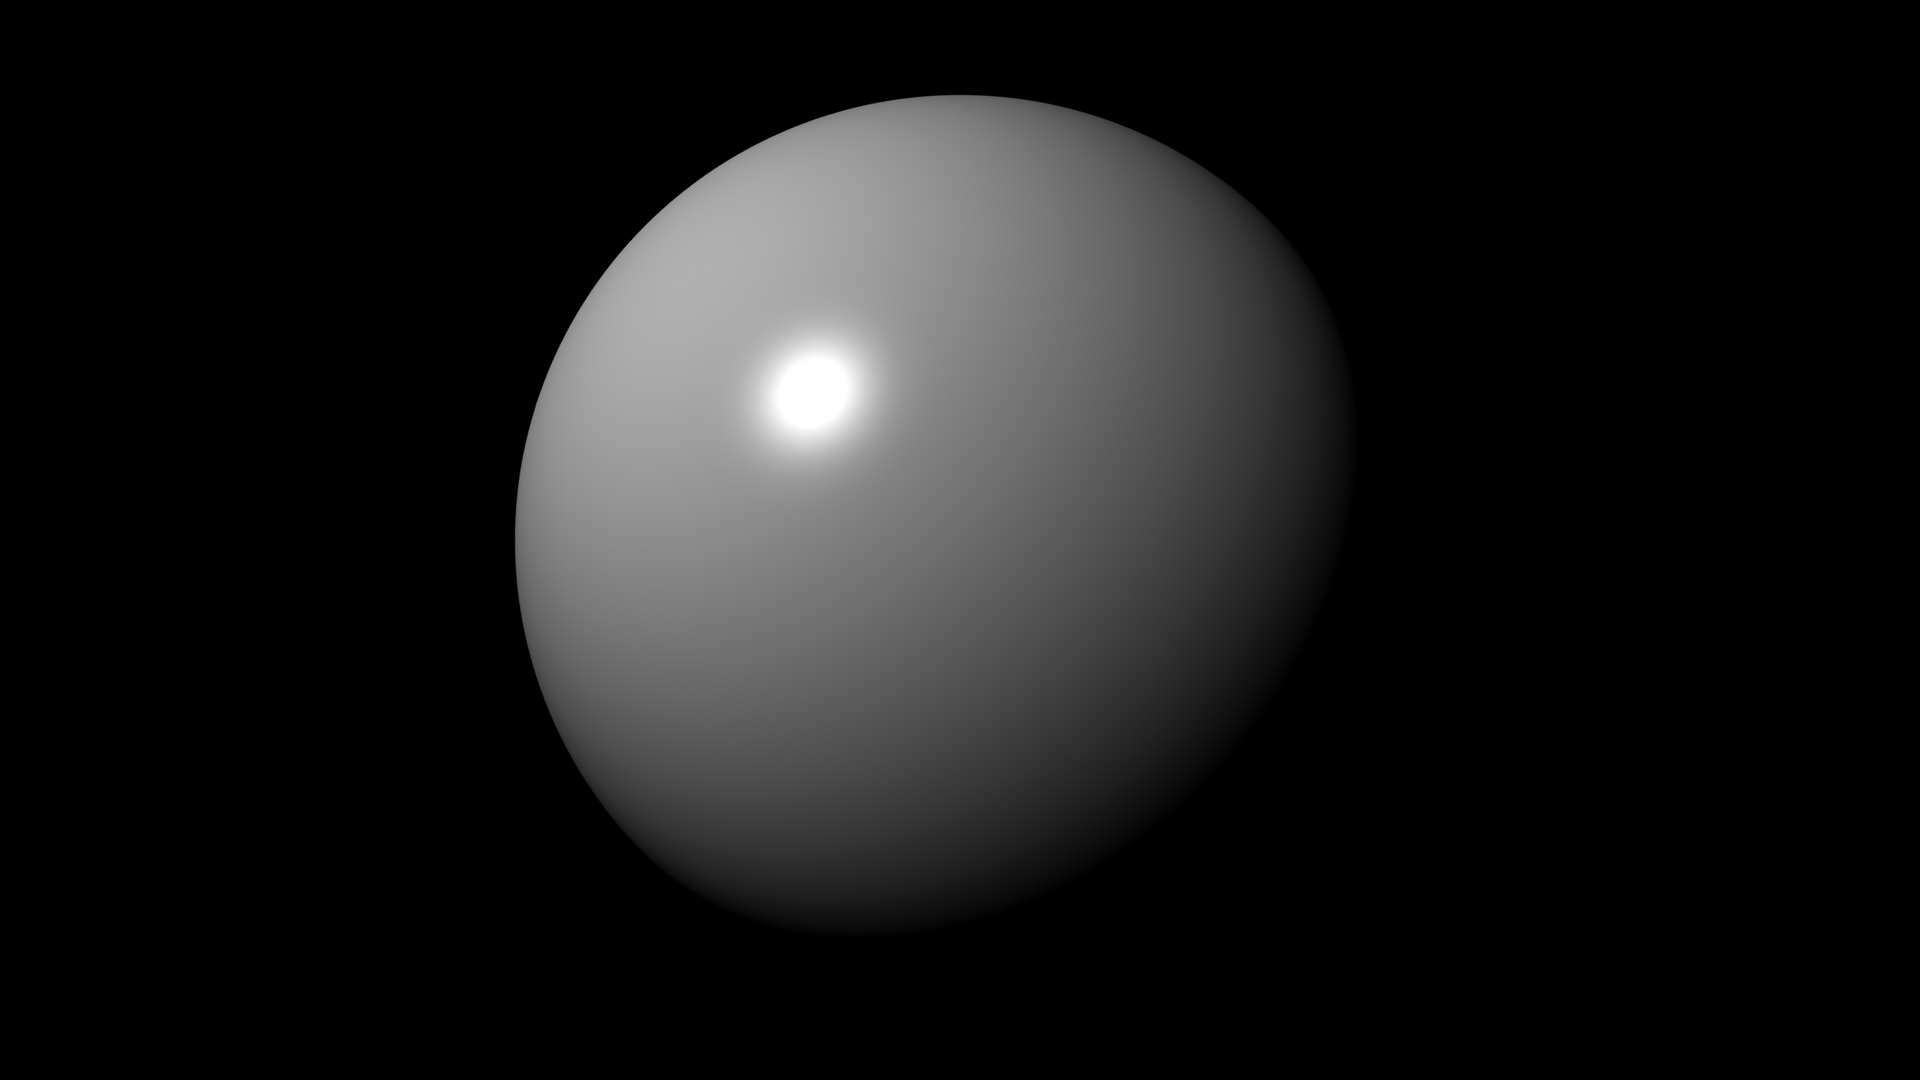
흥미로운 것을 만들어 봅시다. 시간이 걸릴 것입니다.
raytrace --obj sph r: 0.2 pos: 0.5 0.5 0 albedo: ' #ffc177 ' emit: 1.0
         --obj sph r: 0.2 pos: -0.5 0 0 rough: 1
         --obj sph r: 0.2 pos: 0 0.5 0 albedo: ' #ff0000 '
         --obj sph r: 0.2 pos: 0.5 0 0 metal: 1
         --obj sph r: 0.2 pos: -0.15 -0.5 0 glass: 0.08 opacity: 0
         --obj pln pos: 0 0 -0.201 rough: 1
         --obj pln n: 0 0 -1 pos: 0 0 1 rough: 1
         --obj pln n: -1 0 0 pos: 1 0 0 albedo: ' #00ff00 ' rough: 1
         --obj pln n: 1 0 0 pos: -1 0 0 albedo: ' #ff0000 ' rough: 1
         --obj pln n: 0 -1 0 pos: 0 1 0 rough: 1
         --cam pos: 0 -1.2 0.1 fov: 60 gamma: 0.5 exp: 0.75
         --update --bounce 16 --sample 1024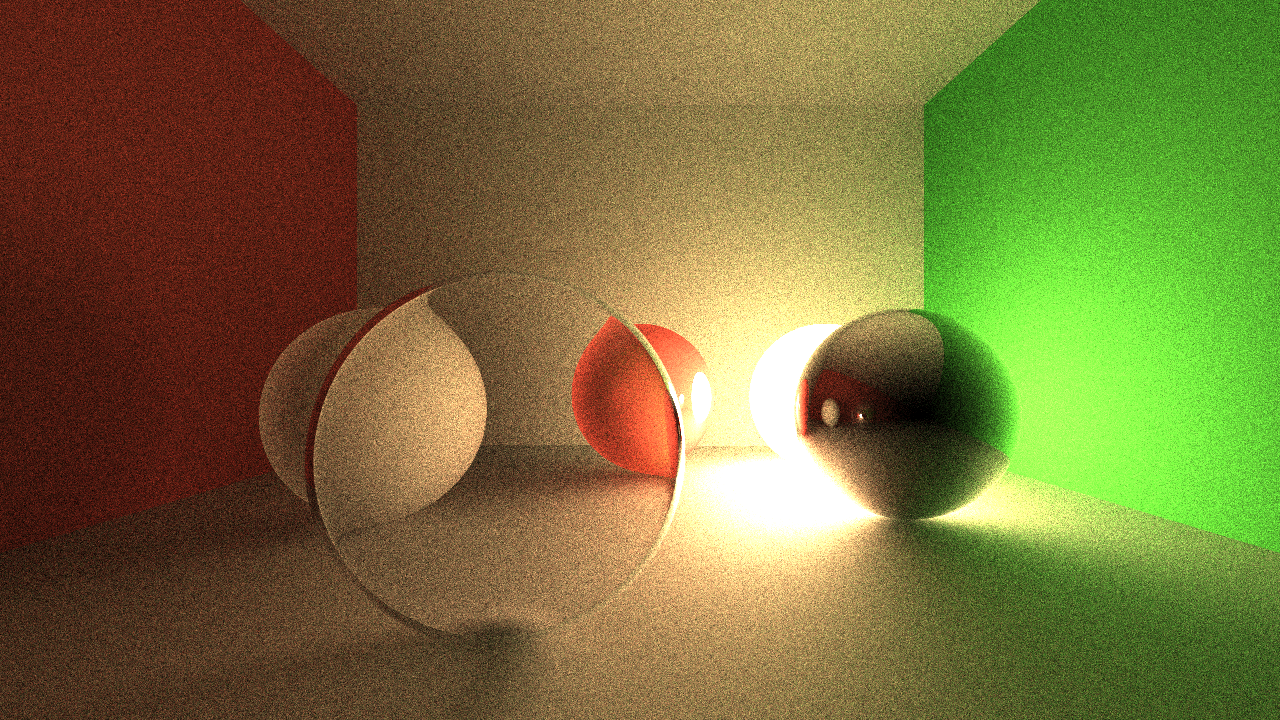
scene.json 파일은 장면 정보가 포함됩니다. {
"renderer" : [
{
"type" : " plane " ,
"n" : [ 0 , -1 , 0 ],
"pos" : [ 0 , 1 , 0 ],
"mat" : {
"rough" : 1
}
},
{
"type" : " plane " ,
"n" : [ 1 , 0 , 0 ],
"pos" : [ -1 , 0 , 0 ],
"mat" : {
"albedo" : [ 1 , 0 , 0 ],
"rough" : 1
}
},
{
"type" : " plane " ,
"n" : [ -1 , 0 , 0 ],
"pos" : [ 1 , 0 , 0 ],
"mat" : {
"albedo" : [ 0 , 1 , 0 ],
"rough" : 1
}
},
{
"type" : " plane " ,
"n" : [ 0 , 0 , -1 ],
"pos" : [ 0 , 0 , 1 ],
"mat" : {
"rough" : 1
}
},
{
"type" : " plane " ,
"n" : [ 0 , 0 , 1 ],
"pos" : [ 0 , 0 , -0.2 ],
"mat" : {
"rough" : 1
}
},
{
"type" : " sphere " ,
"r" : 0.2 ,
"pos" : [ -0.15 , -0.5 , 0 ],
"mat" : {
"glass" : 0.08 ,
"opacity" : 0
}
},
{
"type" : " sphere " ,
"r" : 0.2 ,
"pos" : [ 0.5 , 0 , 0 ],
"mat" : {
"metal" : 1
}
},
{
"type" : " sphere " ,
"r" : 0.2 ,
"pos" : [ 0 , 0.5 , 0 ],
"mat" : {
"albedo" : [ 1 , 0 , 0 ]
}
},
{
"type" : " sphere " ,
"r" : 0.2 ,
"pos" : [ -0.5 , 0 , 0 ],
"mat" : {
"rough" : 1
}
},
{
"type" : " sphere " ,
"r" : 0.2 ,
"pos" : [ 0.5 , 0.5 , 0 ],
"mat" : {
"albedo" : [ 1 , 0.76 , 0.47 ],
"emit" : 1
}
}
]
}frame.json 파일을 출력 프레임 정보를 포함합니다. {
"res" : [ 1280 , 720 ],
"ssaa" : 1 ,
"cam" : {
"dir" : [ 0 , 0 , 1 , 0 ],
"exp" : 0.75 ,
"fov" : 70 ,
"gamma" : 0.5 ,
"pos" : [ 0 , -1.2 , 0.1 ]
}
}example.json 은 모든 정보를 포함 할 수 있습니다. {
"rt" : {
"sample" : 512
},
"frame" : {
"cam" : {
"exp" : 0.75 ,
"fov" : 60 ,
"gamma" : 0.5 ,
"pos" : [ 0 , -1.2 , 0.1 ]
}
},
"scene" : {
"renderer" : [
{
"type" : " plane " ,
"n" : [ 0 , -1 , 0 ],
"pos" : [ 0 , 1 , 0 ],
"mat" : {
"rough" : 1
}
},
{
"type" : " plane " ,
"n" : [ 1 , 0 , 0 ],
"pos" : [ -1 , 0 , 0 ],
"mat" : {
"albedo" : " #ff0000 " ,
"rough" : 1
}
},
{
"type" : " plane " ,
"n" : [ -1 , 0 , 0 ],
"pos" : [ 1 , 0 , 0 ],
"mat" : {
"albedo" : " #00ff00 " ,
"rough" : 1
}
},
{
"type" : " plane " ,
"n" : [ 0 , 0 , -1 ],
"pos" : [ 0 , 0 , 1 ],
"mat" : {
"rough" : 1
}
},
{
"type" : " plane " ,
"n" : [ 0 , 0 , 1 ],
"pos" : [ 0 , 0 , -0.2 ],
"mat" : {
"rough" : 1
}
},
{
"type" : " sphere " ,
"r" : 0.2 ,
"pos" : [ -0.15 , -0.5 , 0 ],
"mat" : {
"glass" : 0.08 ,
"opacity" : 0
}
},
{
"type" : " sphere " ,
"r" : 0.2 ,
"pos" : [ 0.5 , 0 , 0 ],
"mat" : {
"metal" : 1
}
},
{
"type" : " sphere " ,
"r" : 0.2 ,
"pos" : [ 0 , 0.5 , 0 ],
"mat" : {
"albedo" : " #ff0000 "
}
},
{
"type" : " sphere " ,
"r" : 0.2 ,
"pos" : [ -0.5 , 0 , 0 ],
"mat" : {
"rough" : 1
}
},
{
"type" : " sphere " ,
"r" : 0.2 ,
"pos" : [ 0.5 , 0.5 , 0 ],
"mat" : {
"albedo" : " #ffc177 " ,
"emit" : 1.0
}
}
]
}
}raytrace --scene scene.json --frame frame.json --sample 1024raytrace example.json --sample 1024
대부분의 경우 단일 렌더링 설명 파일이 더 선호됩니다. 장면과 프레임의 분리는 전체 장면 파일을 업데이트하지 않고 일부 카메라 위치, 해상도 등을 변경하는 데 유용합니다.
raytrace --http localhost:8888POST HTTP 요청을 보내십시오. 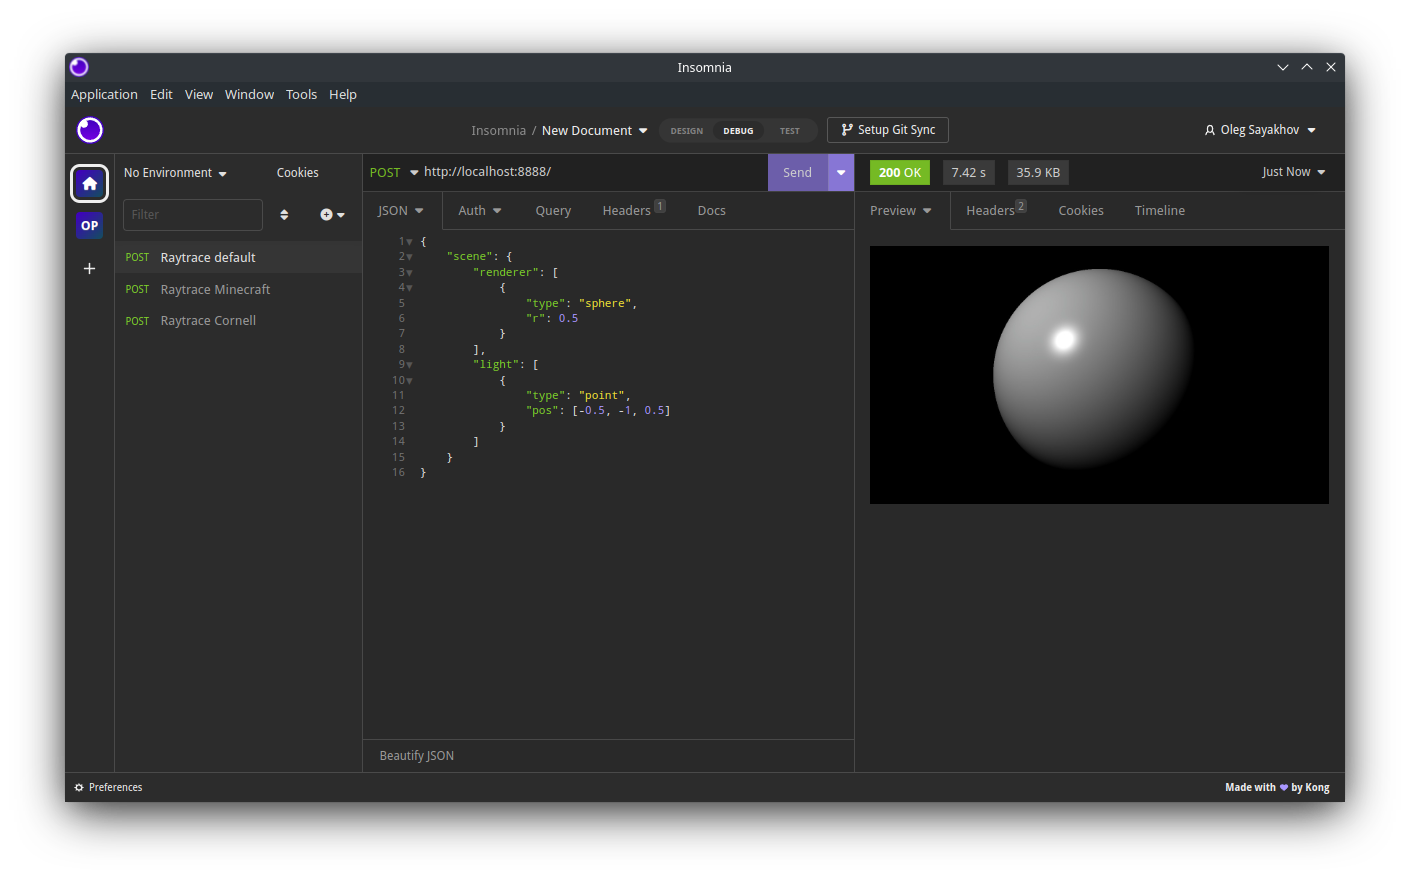
JPEG 인코딩 된 출력으로 HTTP 응답을 반환합니다.
--verbose,-v flag를 사용하여 --dry,-d 사용하여 CLI 명령에서 JSON에서 전체 렌더 정보를 얻을 수 있습니다. raytrace -v -d --obj sphere --light point: -0.5 -1 0.5{ "rt" :{ "bounce" : 8 , "sample" : 16 , "loss" : 0.15 }, "frame" :{ "res" :[ 1280 , 720 ], "ssaa" : 1.0 , "cam" :{ "pos" :[ -0.0 , -1.0 , -0.0 ], "dir" :[ 0.0 , 0.0 , 1.0 , 0.0 ], "fov" : 70.0 , "gamma" : 0.8 , "exp" : 0.2 , "aprt" : 0.001 , "foc" : 100.0 }}, "scene" :{ "renderer" :[{ "type" : " sphere " , "r" : 0.5 , "mat" :{ "albedo" :[ 1.0 , 1.0 , 1.0 ], "rough" : 0.0 , "metal" : 0.0 , "glass" : 0.0 , "opacity" : 1.0 , "emit" : 0.0 , "tex" : null , "rmap" : null , "mmap" : null , "gmap" : null , "omap" : null , "emap" : null }, "pos" :[ 0.0 , 0.0 , 0.0 ], "dir" :[ 0.0 , 0.0 , 1.0 , 0.0 ], "name" : null }], "light" :[{ "type" : " point " , "pos" :[ -0.5 , -1.0 , 0.5 ], "pwr" : 0.5 , "color" :[ 1.0 , 1.0 , 1.0 ]}], "sky" :{ "color" :[ 0.0 , 0.0 , 0.0 ], "pwr" : 0.5 }}}raytrace -v -d --pretty --obj sphere --light point: -0.5 -1 0.5{
"rt" : {
"bounce" : 8 ,
"sample" : 16 ,
"loss" : 0.15
},
"frame" : {
"res" : [ 1280 , 720 ],
"ssaa" : 1 ,
"cam" : {
"pos" : [ 0 , -1 , 0 ],
"dir" : [ 0 , 0 , 1 , 0 ],
"fov" : 70 ,
"gamma" : 0.8 ,
"exp" : 0.2 ,
"aprt" : 0.001 ,
"foc" : 100
}
},
"scene" : {
"renderer" : [
{
"name" : null ,
"type" : " sphere " ,
"r" : 0.5 ,
"mat" : {
"albedo" : [ 1 , 1 , 1 ],
"rough" : 0 ,
"metal" : 0 ,
"glass" : 0 ,
"opacity" : 1 ,
"emit" : 0 ,
"tex" : null ,
"rmap" : null ,
"mmap" : null ,
"gmap" : null ,
"omap" : null ,
"emap" : null
},
"pos" : [ 0 , 0 , 0 ],
"dir" : [ 0 , 0 , -1 , 0 ]
}
],
"light" : [
{
"type" : " point " ,
"pos" : [ -0.5 , -1 , 0.5 ],
"pwr" : 0.5 ,
"color" : [ 1 , 1 , 1 ]
}
],
"sky" : {
"color" : [ 0 , 0 , 0 ],
"pwr" : 0.5
}
}
}TBD ...


