csgo league web
v2.1.0
PUG 통계를 위한 웹 애플리케이션입니다.
우리의 지원 불일치는 여기에서 확인할 수 있습니다.
B3none - 개발자/유지관리자
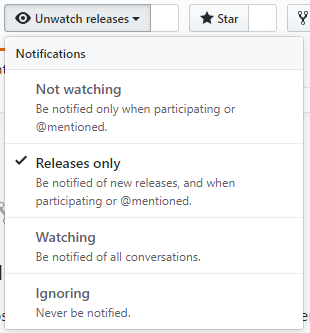
최신 버전의 플러그인을 유지하려면 저장소를 시청하는 것이 좋습니다.
프로젝트에 감사한다면 시간을 내어 저장소에 별표를 표시해 주세요.
아래 단계는 모두 Ubuntu를 사용한다는 가정하에 작성되었습니다.
sudo apt install apache2 composer openssl php php-mysql php-json php-simplexml mysql-server zip unzip -y
sudo apt install apache2 composer openssl php7.2 php7.2-mysql php7.2-json php7.2-simplexml mariadb-server zip unzip -y
sudo apt install apache2 composer openssl php7.3 php7.3-mysql php7.3-json php7.3-simplexml mariadb-server zip unzip -y
curl -sL https://deb.nodesource.com/setup_10.x | sudo -E bash -sudo apt-get install nodejsnpm -vnode -vcurl -o- https://raw.githubusercontent.com/nvm-sh/nvm/v0.35.3/install.sh | bashnvm install 10.19nvm use 10.19npm -vnode -vcd /var/www/ 로 변경합니다.rm -rf html/ 사용하여 html 디렉토리를 제거합니다.sudo a2dissite 000-default.conf 를 비활성화합니다.sudo a2enmod rewrite 활성화합니다.git clone https://github.com/csgo-league/csgo-league-webcd csgo-league-web/composer installnpm isudo npm i -g gulpgulp buildmysql_secure_installation 명령을 실행하세요.mysql -u root -p 명령을 사용하여 MYSQL에 로그인합니다. CREATE USER 'league'@'%' IDENTIFIED BY '{password}';
CREATE DATABASE panel CHARACTER SET utf8mb4 COLLATE utf8mb4_general_ci;
GRANT ALL PRIVILEGES ON panel.* TO 'league'@'%' WITH GRANT OPTION;
FLUSH PRIVILEGES;
그런 다음 데이터베이스에 대한 외부 연결을 허용하도록 MYSQL Conf를 편집하십시오. nano /etc/mysql/mysql.conf.d/mysqld.cnf 및 bind-address 0.0.0.0 으로 변경
이제 sudo service mysql restart 사용하여 MySQL 서비스를 다시 시작하십시오.
다음으로 데이터베이스를 사용하고 봇 및 게임 서버와 통신하도록 웹 패널을 구성하겠습니다.
 cd /var/www/csgo-league-web
cp env.example.php env.php
nano env.php
MySQL, 서버, RCON 및 고유 API 키와 같은 정보로 모든 필드를 채우십시오. env.php 파일에 제공된 링크를 사용하여 API 키를 생성할 수 있습니다.
완료되면 ./vendor/bin/phpmig migrate 사용하여 DB를 마이그레이션하십시오.
league CNAME을 지정하세요.cd /etc/apache2/sites-availablenano csgo-league-web.conf <VirtualHost *:80>
ServerName league.your.domain
DocumentRoot /var/www/csgo-league-web/web
<Directory /var/www/csgo-league-web/web>
Options -Indexes
AllowOverride All
FallbackResource /index.php
</Directory>
</VirtualHost>
sudo a2ensite csgo-league-web.conf 마지막으로 /csgo-league-web 디렉터리에서 chown -R www-data:www-data app 해야 합니다.
모든 준비가 완료되어야 합니다!
https://github.com/Rob--W/cors-anywhere 다운로드하거나 git clone https://github.com/Rob--W/cors-anywhere.git 다운로드하세요.screen 이나 대안을 사용하세요. cd cors-anywhere
node server.js
/var/www/csgo-league-web/assets/scripts/listeners/steam-profile.js 편집하세요.axios.get(`http://{YOUR IP}:8080/https://steamcommunity.com/profiles/${steam}?xml=true`){YOUR IP} 서버의 IP로 변경하는 것을 잊지 마세요. cd /var/www/csgo-league-web/
gulp build
추신: 웹 브라우저의 캐시를 정리하는 것을 잊지 마십시오.
too many redirects 오류가 발생하면 env.php 'WEBSITE' => '/home' 을 'WEBSITE' => '' 로 변경해 보세요.

