binlex
v1.1.1

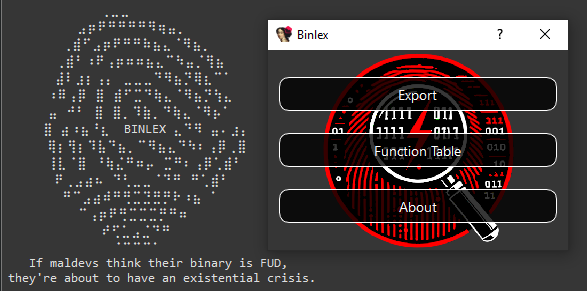
 | BINLEX-バイナリ遺伝的特性レクサーフレームワークMaldevsが彼らのバイナリがFUDであると考えている場合、彼らは実存的な危機を抱えようとしています。 |
Binlexは、バイナリファイルから指示、基本的なブロック、機能を抽出し、ゲノム、染色体、対立遺伝子ペア、および遺伝子の構造化された階層に整理するマルウェアアナリストと研究者向けのツールです。 ??
この階層的な内訳により、 BINLEXはコード構造を「DNAフィンガープリント」のように扱うことにより、マルウェアバイナリを分析および比較し、サンプル全体のパターン、類似性、およびバリエーションを簡単に検出できます。
純粋なPythonに依存するツールとは異なり、それは遅くなる可能性がありますか?Binlexは、速度、シンプルさ、柔軟性のために設計されています。そのコマンドラインインターフェイスは、アナリストが数百または数千のマルウェアサンプルにわたってパターンを検索し、時間とリソースを節約するのに役立ちます。
開発者向けに、 BinlexはRust APIおよびPythonバインディングを提供して、最小限のライセンス制限でカスタム検出ツールを構築します。 ?
マルウェアとの戦いの一環として、 Binlexは自由に使用できます。リリースページからバイナリをダウンロードしてください。 ?
Binlexの最新バージョンは、次の驚くべき機能を提供します!
| 特徴 | 説明 |
|---|---|
| プラットフォーム | - Windows? - マコー? - Linux? |
| フォーマット | - PE - マッチョ - エルフ |
| アーキテクチャ | -AMD64 -I386 -CIL |
| ?マルチスレッド | - スレッドセーフ分解キューイング - ?最大の効率のためのマルチスレッドツール |
| カスタマイズ可能なパフォーマンス | 機能をオン/オフにして、ユースケースに最適化します |
| ? JSON文字列圧縮 | JSON圧縮でメモリを保存します |
| ?類似性ハッシュ | - ?ミンハッシュ -TLSH - ? SHA256 |
| ?関数シンボル | -BLPDB 、 BLELFSYM 、またはBLMACHOSYMまたは独自のツールを使用した標準入力として関数シンボルを標準入力として渡す |
| ?§タグ付け | 簡単な組織のためのタグ付け |
| ワイルドカード | Yaraルールの生成に最適で、現在はニブルの決議になります! |
| API | - ? Rust API -Python API |
| ?機械学習機能 | - 一貫性のための正規化された機能 - ?機能スケーラーユーティリティ - ?特性フィルタリング -ONNXサンプルトレーニング - ?サンプル分類 |
| 仮想イメージング | - 仮想画像の効率的なマッピングキャッシュ - ?§ZFS / BTRFと互換性があります - 繰り返しのタスクとフィルタリングを高速化します - 軽減速度⚡ |
仮想画像をキャッシュすることにより、 Binlexはより良い速度で実行することができ、リピートランがより速く、より効率的になります。
ビンレックスを構築するには、錆が必要です。
インストールは、LinuxとMacOSのまっすぐなお気に入りです。
cargo build --release cd src/bindings/python/
virtualenv -p python3 venv/
source venv/bin/activate
pip install maturin[patchelf]
maturin develop
python
>> import binlexさまざまなプラットフォーム用のパッケージを構築するには、 Makefileを使用します。
make zst   # Make Arch Linux Package
make deb   # Make Debian Package
make wheel # Make Python Wheel結果のパッケージはtarget/ディレクトリにあります。
IDAプラグインのインストールは簡単にインストールできます。IDAのPython環境にPythonバインディングをインストールしていることを確認してください。
次に、 Binlexプラグインのディレクトリをプラグインディレクトリにコピーします。
mkdir -p ~ /.idapro/plugins/
cp -r scripts/plugins/ida/binlex/ ~ /.idapro/plugins/
IDAを開いたら、 Binlex Welcomeメッセージを迎える必要があります。
IDAプラグインを使用すると、ヤラのルールライティングと類似性分析に役立つさまざまな機能があります。
メインメニュー:
分解コンテキストメニュー:
コピーパターンとコピーHEX機能は、ヤラのルールを支援することを目的としており、類似性のハッシュとスキャンのコピーは、同様のデータを狩ることです。
あるデータベースを別のデータベースと比較するには、エクスポート機能を使用してJSONファイルをエクスポートし、 Compare Functionsをクリックして、完了するとテーブルが入力されます。
cargo docドキュメントを開くこともできます。
cargo doc --openBinlexでは、遺伝的に触発された用語の階層を使用して、バイナリコードの構造と特性を記述および象徴しています。この用語は、異なる抽象化とそれらの遺伝的類推との関係を反映しています。
ゲノム:関数やブロックなど、分析される各オブジェクトを表します。メタデータ、染色体、その他の属性を含むすべての情報をカプセル化します。
染色体:ブロックまたは関数から抽出されたコアパターンまたはシーケンスを表します。染色体は、ワイルドカードが示すように、メモリアドレス指定のないバイナリの重要な特性を識別するための青写真として機能しますか? 、単一のワイルドカードが単一の遺伝子を表します。
AlleRepair : 2つの遺伝子からなる染色体内のユニット。対立遺伝子のペアは、染色体の構成要素であり、遺伝子を意味のあるペアに結合します。
遺伝子:単一のデータのナブル(半分のバイト)を表す遺伝情報の最小単位。
これらの抽象化の関係は、次のように視覚化できます。
 Genome (function / block)
 └── Chromosome (pattern / sequence)
      └── AllelePair (two genes / single byte / two nibbles)
           └── Gene (single nibble)
{
  "type" : " block " ,
  "architecture" : " amd64 " ,
  "address" : 6442934577 ,
  "next" : null ,
  "to" : [],
  "edges" : 0 ,
  "prologue" : false ,
  "conditional" : false ,
  "chromosome" : {
    "pattern" : " 4c8b47??498bc0 " ,
    "feature" : [ 4 , 12 , 8 , 11 , 4 , 7 , 4 , 9 , 8 , 11 , 12 , 0 ],
    "entropy" : 2.2516291673878226 ,
    "sha256" : " 1f227bf409b0d9fbc576e747de70139a48e42edec60a18fe1e6efdacb598f551 " ,
    "minhash" : " 09b8b1ad1142924519f601854444c6c904a3063942cda4da445721dd0703f290208f3e32451bf5d52741e381a13f12f9142b5de21828a00b2cf90cf77948aac4138443c60bf77ec31199247042694ebb2e4e14a41369eddc7d9f84351be34bcf61458425383a03a55f80cbad420bb6e638550c15876fd0c6208da7b50816847e62d72b2c13a896f4849aa6a36188be1d4a5333865eab570e3939fab1359cbd16758f36fa290164d0259f83c07333df535b2e38f148298db255ac05612cae04d60bb0dd810a91b80a7df9615381e9dc242969dd052691d044287ac2992f9092fa0a75d970100d48362f62b58f7f1d9ec594babdf52f58180c30f4cfca142e76bf " ,
    "tlsh" : null
  },
  "size" : 7 ,
  "bytes" : " 4c8b4708498bc0 " ,
  "functions" : {},
  "number_of_instructions" : 3 ,
  "entropy" : 2.5216406363433186 ,
  "sha256" : " 84d4485bfd833565fdf41be46c1a499c859f0a5f04c8c99ea9c34404729fd999 " ,
  "minhash" : " 20c995de6a15c8a524fa7e325a6e42b217b636ab03b00812732f877f4739eeee41d7dde92ceac73525e541f9091d8dc928f6425b84a6f44b3f01d17912ec6e8c6f913a760229f685088d2528447e40c768c06d680afe63cb219a1b77a097f679122804dd5a1b9d990aa2579e75f8ef201eeb20d5650da5660efa3a281983a37f28004f9f2a57af8f81728c7d1b02949609c7ad5a30125ff836d8cc3106f2531f306e679a11cabf992556802a3cb2a75a7fe3773e37e3d5ab107a23bf22754aee15a5f41056859b06120f86cb5d39071425855ec90628687741aa0402030d73e04bc60adb0bd2430560442c4309ae258517fc1605438c95485ac4c8621026a1bb " ,
  "tlsh" : null ,
  "contiguous" : true ,
  "attributes" : [
    {
      "type" : " tag " ,
      "value" : " corpus:malware "
    },
    {
      "type" : " tag " ,
      "value" : " malware:lummastealer "
    },
    {
      "entropy" : 6.55061550644311 ,
      "sha256" : " ec1426109420445df8e9799ac21a4c13364dc12229fb16197e428803bece1140 " ,
      "size" : 725696 ,
      "tlsh" : " T17AF48C12AF990595E9BBC23DD1974637FAB2B445232047CF426489BD0E1BBE4B73E381 " ,
      "type" : " file "
    }
  ]
}
このJSONゲノムの例を考えると。
"4c8b47??498bc0"で説明されています"4c"または"8b""4"または"c"Binlex APIを使用すると、これらの染色体、それらの対立遺伝子のペア、および遺伝子を変異させて、遺伝的プログラミングを促進することができます。
この文脈での遺伝的プログラミングには、以下を含むがこれらに限定されないいくつかのベニフィがあります。
開始する最も簡単な方法は、 jqのようなJSONフィルタリングツールを活用して、コマンドラインを使用することです。
次のコマンドは、 16スレッドを使用してsample.dllを分解します。関連する特性はJSONオブジェクトであり、1行ごとに1つであり、フィルタリングと美化のためにjqにパイプされます。
Binlexコマンドラインの使用-hまたは--help使用するときに利用可能なオプションを確認します。
A Binary Pattern Lexer

Version: 2.0.0

Usage: binlex [OPTIONS] --input < INPUT >

Options:
  -i, --input < INPUT >
  -o, --output < OUTPUT >
  -a, --architecture < ARCHITECTURE >      [amd64, i386, cil]
  -c, --config < CONFIG >
  -t, --threads < THREADS >
      --tags < TAGS >
      --minimal
  -d, --debug
      --enable-instructions
      --enable-block-instructions
      --disable-hashing
      --disable-disassembler-sweep
      --disable-heuristics
      --enable-mmap-cache
      --mmap-directory < MMAP_DIRECTORY >
  -h, --help                             Print help
  -V, --version                          Print version

Author: @c3rb3ru5d3d53c
コマンドラインを使用する簡単な例を以下に示します。
binlex -i sample.dll --threads 16 | jq Binlexはファイル形式のFort Youを検出し、現在PE 、 ELF 、 MACHOバイナリ形式をサポートしていることに注意してください。
Binlexを最初に実行すると、構成ファイルがbinlex/binlex.tomlの構成ディレクトリに保存されます。
このビンレックスは、構成のために下の表に示されているように、オペレーティングシステムに基づいてデフォルトの構成ディレクトリを見つけます。
| OS | 環境変数 | BINLEX設定パスの例 |
|---|---|---|
| Linux | $XDG_CONFIG_HOMEまたは$HOME/.config | /home/alice/.config/binlex/binlex.toml |
| macos | $HOME/Library/Application Support | /Users/Alice/Library/Application Support/binlex/binlex.toml |
| Windows | {FOLDERID_RoamingAppData} | C:UsersAliceAppDataRoamingbinlexbinlex.toml |
デフォルトの構成名binlex.toml for binlexを以下に示します。
[ general ]
threads = 16
minimal = false
debug = false

[ formats . file . hashing . sha256 ]
enabled = true

[ formats . file . hashing . tlsh ]
enabled = true
minimum_byte_size = 50
threshold = 200

[ formats . file . hashing . minhash ]
enabled = true
number_of_hashes = 64
shingle_size = 4
maximum_byte_size_enabled = false
maximum_byte_size = 50
seed = 0
threshold = 0.75

[ formats . file . heuristics . features ]
enabled = true

[ formats . file . heuristics . entropy ]
enabled = true

[ instructions ]
enabled = false

[ instructions . hashing . sha256 ]
enabled = true

[ instructions . hashing . tlsh ]
enabled = true
minimum_byte_size = 50
threshold = 200

[ instructions . hashing . minhash ]
enabled = true
number_of_hashes = 64
shingle_size = 4
maximum_byte_size_enabled = false
maximum_byte_size = 50
seed = 0
threshold = 0.75

[ instructions . heuristics . features ]
enabled = true

[ instructions . heuristics . entropy ]
enabled = true

[ blocks ]
enabled = true

[ blocks . instructions ]
enabled = false

[ blocks . hashing . sha256 ]
enabled = true

[ blocks . hashing . tlsh ]
enabled = true
minimum_byte_size = 50
threshold = 200

[ blocks . hashing . minhash ]
enabled = true
number_of_hashes = 64
shingle_size = 4
maximum_byte_size_enabled = false
maximum_byte_size = 50
seed = 0
threshold = 0.75

[ blocks . heuristics . features ]
enabled = true

[ blocks . heuristics . entropy ]
enabled = true

[ functions ]
enabled = true

[ functions . blocks ]
enabled = true

[ functions . hashing . sha256 ]
enabled = true

[ functions . hashing . tlsh ]
enabled = true
minimum_byte_size = 50
threshold = 200

[ functions . hashing . minhash ]
enabled = true
number_of_hashes = 64
shingle_size = 4
maximum_byte_size_enabled = false
maximum_byte_size = 50
seed = 0
threshold = 0.75

[ functions . heuristics . features ]
enabled = true

[ functions . heuristics . entropy ]
enabled = true

[ chromosomes . hashing . sha256 ]
enabled = true

[ chromosomes . hashing . tlsh ]
enabled = true
minimum_byte_size = 50
threshold = 200

[ chromosomes . hashing . minhash ]
enabled = true
number_of_hashes = 64
shingle_size = 4
maximum_byte_size_enabled = false
maximum_byte_size = 50
seed = 0
threshold = 0.75

[ chromosomes . heuristics . features ]
enabled = true

[ chromosomes . heuristics . entropy ]
enabled = true

[ chromosomes . homologues ]
enabled = true
maximum = 4

[ mmap ]
directory = " /tmp/binlex "

[ mmap . cache ]
enabled = false

[ disassembler . sweep ]
enabled = true
コマンドラインオプションで十分でない場合、構成ファイルはすべてのオプションの最もきめ細かい制御を提供します。
デフォルトの構成ファイルをオーバーライドし、別の構成ファイルを指定する場合は、コマンドラインパラメーターを使用します。
binlex -c config.toml -i sample.dllBINLEXを実行すると、構成ファイルを使用し、それぞれのコマンドラインパラメーターが使用されるときに設定をオーバーライドします。
これは、ヤラのルールを作成することから始める一般的なワークフローです。そこでは、特定のサンプルから10個のユニークなワイルドカードヤラの弦を取得します。
binlex -i sample.dll --threads 16 | jq -r ' select(.size >= 16 and .size <= 32 and .chromosome.pattern != null) | .chromosome.pattern ' | sort | uniq | head -10
016b ?? 8b4b ?? 8bc74c6bd858433b4c0b2c0f83c5 ??????
01835404 ???? c6836a0400 ???? 837e04 ??
03c04c8d05 ???????? 4863c8420fb60401460fb64401018942 ?? 85c074 ??
03c38bf0488d140033c9ff15 ???????? 488bd84885c075 ??
03c6488d55 ?? 41ffc58945a ? 41b804000000418bcce8b8fd01 ?? eb ??
03c6488d55 ?? 41ffc58945a ? 41b804000000418bcce8e3fb01 ?? eb ??
03f7488d05 ???????? 4883c310483bd87c ??
03fb4c8bc6498bd7498bcc448d0c7d04000000e89409 ???? 8bd84885f6
03fe448bc6488bd3418bcee8d8e501 ?? 85ed
03fe897c24 ?? 397c24 ?? 0f867301 ????これをさらに一歩進めるために、それをblyaraツールで実行して、ヤラの署名をすばやく作成できます。
binlex -i sample.dll --threads 16 | jq -r ' select(.size >= 16 and .size <= 32 and .chromosome.pattern != null) | .chromosome.pattern ' | sort | uniq | head -10 | blyara -n example
rule example {
    strings:
        $trait_0 = {016b ?? 8b4b ?? 8bc74c6bd858433b4c0b2c0f83c5 ?????? }
        $trait_1 = {01835404 ???? c6836a0400 ???? 837e04 ?? }
        $trait_2 = {03c04c8d05 ???????? 4863c8420fb60401460fb64401018942 ?? 85c074 ?? }
        $trait_3 = {03c38bf0488d140033c9ff15 ???????? 488bd84885c075 ?? }
        $trait_4 = {03c6488d55 ?? 41ffc58945a ? 41b804000000418bcce8b8fd01 ?? eb ?? }
        $trait_5 = {03c6488d55 ?? 41ffc58945a ? 41b804000000418bcce8e3fb01 ?? eb ?? }
        $trait_6 = {03f7488d05 ???????? 4883c310483bd87c ?? }
        $trait_7 = {03fb4c8bc6498bd7498bcc448d0c7d04000000e89409 ???? 8bd84885f6}
        $trait_8 = {03fe448bc6488bd3418bcee8d8e501 ?? 85ed}
        $trait_9 = {03fe897c24 ?? 397c24 ?? 0f867301 ???? }
    condition:
        1 of them
Binlex IDAプラグインを使用してゲノムをエクスポートした場合、またはmw:: 、 malware用の機能開始プレフィックスをフィルタリングできる場合、さらに良い結果を得ることができます。
cat dump.json | jq -r ' select(.type == "function" and .size > 32 and (.attributes[] | .type == "symbol" and (.name | startswith("mw::")))) | .blocks[] | select(.size > 32) | .chromosome.pattern ' | blyara -n exampleghidraでビンレックスを使用するには、スクリプトディレクトリでblghidra/blghidra.pyスクリプトを使用します。
Ghidraプロジェクトの機能名と仮想アドレスを活用し、 GhidraインストールディレクトリのanalyzeHeadlessスクリプトを使用してBinlexに提供するためにそれらを提供します。
./analyzeHeadless
  < project-directory >
  < project-name >
  -process sample.dll
  -noanalysis
-postscript blghidra.py 2> /dev/null | grep -P " ^{ " type " | binlex -i sample.dll analyzeHeadlessログメッセージは、他のコマンドラインユーティリティとの相互運用性がなく、 stdoutへのログメッセージおよびその他のログ出力をstderrに印刷することに注意してください。
そのため、スクリプトの出力を収集するには2>/dev/null | grep -P "^{"type" 。
リジン関数の検出とビンレックスの関数の命名の力を活用するには、 afljを使用してプロジェクトでrizinを実行して、JSON形式の関数をリストします。
次に、この出力をblrizinにパイプします。Blrizinは、 rizin JSONをフォーマットBINLEX UNSTANDSに解析します。
さらに、これをblpdbなどの他のツールと組み合わせてPDBシンボルを解析して、関数アドレスと名前を取得できます。
通常、 jq使用するように解析することができます。この例では、 Binlexで処理された関数をカウントして、それらをより多く検出しているかどうかを確認します。
rizin -c ' aaa;aflj; ' -q sample.dll |
  blrizin |
  blpdb -i sample.pdb |
  binlex -i sample.dll |
jq ' select(.type == "function") | .address ' | wc -l注:現時点では、 blrizin blrizinを使用してradare2からの出力と互換性があります。
機械学習をしたい場合は、このようなBinlexからメモリを扱うことなくニブルを表す機能を取得できます。
binlex -i sample.dll --threads 16 | jq -r -c ' select(.size >= 16 and .size <= 32 and .signature.feature != null)| .signature.feature ' | head -10
[4,9,8,11,12,0,4,1,11,9,0,3,0,0,1,15,0,0,4,5,3,3,12,0,8,5,13,2,4,8,8,11,13,0,4,1,0,15,9,5,12,0,4,8,15,15,2,5]
[4,4,8,11,5,1,4,5,3,3,12,0,3,3,12,0,4,8,8,3,12,1,3,0,4,1,0,15,10,3,12,2]
[4,8,8,3,14,12,4,12,8,11,12,10,4,4,8,9,4,4,2,4,11,2,0,1,4,4,0,15,11,7,12,1,8,10,12,10,14,8,5,11,4,8,8,3,12,4,12,3]
[4,8,8,3,14,12,4,4,8,9,4,4,2,4,4,12,8,11,12,10,4,4,0,15,11,7,12,1,11,2,0,1,3,3,12,9,14,8,0,11,4,8,8,3,12,4,12,3]
[4,0,5,3,4,8,8,3,14,12,15,15,1,5,8,11,12,8,8,11,13,8,15,15,1,5,8,11,12,3,4,8,8,3,12,4,5,11,12,3]
[11,9,2,0,0,3,15,14,7,15,4,8,8,11,8,11,0,4,2,5,4,8,0,15,10,15,12,1,4,8,12,1,14,8,1,8,12,3]
[8,11,0,12,2,5,11,8,2,0,0,3,15,14,7,15,4,8,12,1,14,1,2,0,4,8,8,11,4,8,12,1,14,0,0,8,4,8,15,7,14,1,4,8,8,11,12,2,12,3]
[4,8,8,11,0,5,4,8,8,5,12,0,7,5,12,3,4,8,15,15,2,5]
[4,8,8,11,0,13,3,3,12,0,3,8,8,1,11,0,0,8,0,15,9,5,12,0,12,3]
[4,8,8,11,0,5,4,8,8,5,12,0,7,5,12,3,4,8,15,15,2,5]
0と1のフロート値の間でそれらを正規化することにより、機械学習モデルのためにこれを改良したい場合は、 blscalerツールをカバーしてください。
binlex -i sample.dll --threads 16 | jq -r -c ' select(.size >= 16 and .size <= 32 and .signature.feature != null) ' | blscaler --threads 16 | jq -c -r ' .signature.feature ' | head -1
[0.26666666666666666,0.6,0.5333333333333333,0.7333333333333333,0.8,0.0,0.26666666666666666,0.06666666666666667,0.7333333333333333,0.6,0.0,0.2,0.0,0.0,0.06666666666666667,1.0,0.0,0.0,0.26666666666666666,0.3333333333333333,0.2,0.2,0.8,0.0,0.5333333333333333,0.3333333333333333,0.8666666666666667,0.13333333333333333,0.26666666666666666,0.5333333333333333,0.5333333333333333,0.7333333333333333,0.8666666666666667,0.0,0.26666666666666666,0.06666666666666667,0.0,1.0,0.6,0.3333333333333333,0.8,0.0,0.26666666666666666,0.5333333333333333,1.0,1.0,0.13333333333333333,0.3333333333333333]ファイマッピングの強力な機能を活用して、記憶の使用量を削減しますが、それでも仮想画像からのベニフィットを削減します。
 # Install BTRFS
sudo pacman -S btrfs-progs compsize
# Enable the Kernel Module on Boot
echo " btrfs " | sudo tee /etc/modules-load.d/btrfs.conf
# Reboot
reboot
# Create Virtual Image Cache Storage Pool
dd if=/dev/zero of=btrfs.img bs=1M count=2048
# Make it BTRFS
mkfs.btrfs btrfs.img
# Make a Cache Directory in /tmp/
mkdir -p /tmp/binlex/
# Mount the Cache (Multiple Compression Options Available)
sudo mount -o compress=lzo btrfs.img /tmp/binlex/
# Run Binlex
binlex -i sample.dll --threads 16 --enable-file-mapping --file-mapping-directory /tmp/binlex/ --enable-file-mapping-cache
sudo compsize ec1426109420445df8e9799ac21a4c13364dc12229fb16197e428803bece1140
# Virtual Image 6GB vs Stored Size of 192MB
# Processed 1 file, 49156 regular extents (49156 refs), 0 inline.
# Type       Perc     Disk Usage   Uncompressed Referenced
# TOTAL        3%      192M         6.0G         6.0G
# none       100%      384K         384K         384K
# lzo          3%      192M         6.0G         6.0G
これにより、これをディスク上に設定するか、 /tmp/ディレクトリがRAMにマッピングされます。
RAMにマッピングすると、仮想イメージの分解を利用していますが、処理速度がほぼ2倍に繰り返されるRAMペナルティが追加されていません。
btrfsカーネル内のマッピングされたファイルへのアクセスを抽象化するため、マップされたファイルと同様に、圧縮の利点があるようにアクセスできます。
このオプションを選択した場合に時間を節約するには、 btrfsプールのマウントをブートで実現し、マウントされたプールディレクトリで仮想イメージキャッシングを好むようにBINLEX構成ファイルを設定します。このアプローチにより、毎回コマンドラインパラメーターに依存する必要はありません。
ビンレックスプロジェクトのフィロフィーは、セキュリティ、シンプルさ、速度、拡張性に焦点を当てています。
この一部は、開発者が独自の検出と狩猟ロジックを作成するためのAPIを提供することです。
この時点で、 BinlexはRustとPythonの両方のバインディングを提供します。
さび、APIの作成は簡単に開始できます
 use std :: process ;
use binlex :: Config ;
use binlex :: formats :: PE ;
use binlex :: disassemblers :: capstone :: Disassembler ;
use binlex :: controlflow :: Graph ;

// Get Default Configuration
let mut config = Config ( ) ;

// Use 16 Threads for Multi-Threaded Operations
config . general . threads = 16 ;

// Read PE File
let pe = PE . new ( "./sample.dll" , config )
  . unwrap_or_else ( |error| {
    eprintln ! ( "{}" , error ) ;
    process :: exit ( 1 ) ;
  } ) ;

// To check if DotNet PE use pe.is_dotnet()

// Get Memory Mapped File
let mapped_file = pe . image ( )
  . unwrap_or_else ( |error| {
    eprintln ! ( "{}" , error ) ;
    process :: exit ( 1 )
  } ) ;

// Get Mapped File Virtual Image
let image = mapped_file
  . mmap ( )
  . unwrap_or_else ( |error| {
    eprintln ! ( "{}" , error ) ;
    process :: exit ( 1 ) ;
  } ) ;

// Create Disassembler
let disassembler = Disassembler ( pe . architecture ( ) , & image , pe . executable_virtual_address_ranges ( ) , config )
  . unwrap_or_else ( |error| {
    eprintln ! ( "{}" , error ) ;
    process :: exit ( 1 ) ;
  } ) ;

// Create Control Flow Graph
let cfg = Graph ( pe . architecture ( ) , config ) ;

// Disassemble Control Flow
disassembler . disassemble_controlflow ( pe . entrypoint_virtual_addresses ( ) , & mut cfg ) ; use std :: process ;
use binlex :: Config ;
use binlex :: formats :: PE ;
use binlex :: disassemblers :: custom :: cil :: Disassembler ;
use binlex :: controlflow :: Graph ;
// Get Default Configuration
let mut config = Config ( ) ;
// Use 16 Threads for Multi-Threaded Operations
config . general . threads = 16 ;
// Read PE File
let pe = PE . new ( "./sample.exe" , config )
. unwrap_or_else ( |error| {
eprintln ! ( "{}" , error ) ;
process :: exit ( 1 ) ;
} ) ;
// To check if DotNet PE use pe.is_dotnet()
// Get Memory Mapped File
let mapped_file = pe . image ( )
. unwrap_or_else ( |error| {
eprintln ! ( "{}" , error ) ;
process :: exit ( 1 )
} ) ;
// Get Mapped File Virtual Image
let image = mapped_file
. mmap ( )
. unwrap_or_else ( |error| {
eprintln ! ( "{}" , error ) ;
process :: exit ( 1 ) ;
} ) ;
// Create Disassembler
let disassembler = Disassembler ( pe . architecture ( ) , & image , pe . dotnet_metadata_token_virtual_addresses ( ) , pe . dotnet_executable_virtual_address_ranges ( ) , config )
. unwrap_or_else ( |error| {
eprintln ! ( "{}" , error ) ;
process :: exit ( 1 ) ;
} ) ;
// Create Control Flow Graph
let cfg = Graph ( pe . architecture ( ) , config ) ;
// Disassemble Control Flow
disassembler . disassemble_controlflow ( pe . dotnet_entrypoint_virtual_addresses ( ) , & mut cfg ) ; use std :: process ;
use binlex :: Config ;
use binlex :: formats :: ELF ;
use binlex :: disassemblers :: custom :: cil :: Disassembler ;
use binlex :: controlflow :: Graph ;
// Get Default Configuration
let mut config = Config ( ) ;
// Use 16 Threads for Multi-Threaded Operations
config . general . threads = 16 ;
// Read PE File
let elf = ELF . new ( "./sample.exe" , config )
. unwrap_or_else ( |error| {
eprintln ! ( "{}" , error ) ;
process :: exit ( 1 ) ;
} ) ;
// Get Memory Mapped File
let mapped_file = elf . image ( )
. unwrap_or_else ( |error| {
eprintln ! ( "{}" , error ) ;
process :: exit ( 1 )
} ) ;
// Get Mapped File Virtual Image
let image = mapped_file
. mmap ( )
. unwrap_or_else ( |error| {
eprintln ! ( "{}" , error ) ;
process :: exit ( 1 ) ;
} ) ;
// Create Disassembler
let disassembler = Disassembler ( elf . architecture ( ) , & image , elf . executable_virtual_address_ranges ( ) , config )
. unwrap_or_else ( |error| {
eprintln ! ( "{}" , error ) ;
process :: exit ( 1 ) ;
} ) ;
// Create Control Flow Graph
let cfg = Graph ( elf . architecture ( ) , config ) ;
// Disassemble Control Flow
disassembler . disassemble_controlflow ( elf . entrypoint_virtual_addresses ( ) , & mut cfg ) ; use std :: process ;
use binlex :: Config ;
use binlex :: formats :: MACHO ;
use binlex :: disassemblers :: custom :: cil :: Disassembler ;
use binlex :: controlflow :: Graph ;
// Get Default Configuration
let mut config = Config ( ) ;
// Use 16 Threads for Multi-Threaded Operations
config . general . threads = 16 ;
// Read PE File
let macho = MACHO . new ( "./sample.app" , config )
. unwrap_or_else ( |error| {
eprintln ! ( "{}" , error ) ;
process :: exit ( 1 ) ;
} ) ;
// Iterate the MACHO Fat Binary Slices
for index in macho . number_of_slices ( ) {
// Get Memory Mapped File
let mapped_file = macho . image ( index )
. unwrap_or_else ( |error| {
eprintln ! ( "{}" , error ) ;
process :: exit ( 1 )
} ) ;
// Get Mapped File Virtual Image
let image = mapped_file
. mmap ( )
. unwrap_or_else ( |error| {
eprintln ! ( "{}" , error ) ;
process :: exit ( 1 ) ;
} ) ;
// Create Disassembler
let disassembler = Disassembler ( macho . architecture ( index ) , & image , macho . executable_virtual_address_ranges ( index ) , config )
. unwrap_or_else ( |error| {
eprintln ! ( "{}" , error ) ;
process :: exit ( 1 ) ;
} ) ;
// Create Control Flow Graph
let cfg = Graph ( macho . architecture ( index ) , config ) ;
// Disassemble Control Flow
disassembler . disassemble_controlflow ( macho . entrypoints ( index ) , & mut cfg ) ;
} use binlex :: controlflow :: Instruction ;
use binlex :: controlflow :: Block ;
use binlex :: controlflow :: Function ;
for address in cfg . instructions . valid_addresses ( ) {
// Read Instruction from Control Flow
instruction = Instruction ( address , & cfg ) ;
// Print Instruction from Control Flow
instruction . print ( ) ;
}
for address in cfg . blocks . valid_addresses ( ) {
// Read Block from Control Flow
block = Block ( address , & cfg ) ;
// Print Block from Control Flow
block . print ( ) ;
}
for address in cfg . functions . valid_addresses ( ) {
// Read Function from Control Flow
function = Function ( address , & cfg ) ;
// Print Function from Control Flow
function . print ( ) ;
}Binlex Python APIは、分解とコントロールフローグラフを抽象化するように設計されています。
PEメモリマッピング画像を分解するには、次の例を使用してください。
examples/python/ディレクトリには、より多くの例があります。
 from binlex . formats import PE
from binlex . disassemblers . capstone import Disassembler
from binlex . controlflow import Graph
from binlex import Config

# Get Default Configuration
config = Config ()

# Use 16 Threads for Multi-Threaded Operations
config . general . threads = 16

# Open the PE File
pe = PE ( './sample.exe' , config )

# To check if a DotNet PE use ps.is_dotnet()

# Get the Memory Mapped File
mapped_file = pe . image ()

# Get the Memory Map
image = mapped_file . as_memoryview ()

# Create Disassembler on Mapped PE Image and PE Architecture
disassembler = Disassembler ( pe . architecture (), image , pe . executable_virtual_address_ranges (), config )

# Create the Controlflow Graph
cfg = Graph ( pe . architecture (), config )

# Disassemble the PE Image Entrypoints Recursively
disassembler . disassemble_controlflow ( pe . entrypoint_virtual_addresses (), cfg ) from binlex . formats import PE
from binlex . disassemblers . custom . cil import Disassembler
from binlex . controlflow import Graph
from binlex import Config
# Get Default Configuration
config = Config ()
# Use 16 Threads for Multi-Threaded Operations
config . general . threads = 16
# Open the PE File
pe = PE ( './sample.exe' , config )
# To check if a DotNet PE use ps.is_dotnet()
# Get the Memory Mapped File
mapped_file = pe . image ()
# Get the Memory Map
image = mapped_file . as_memoryview ()
# Create Disassembler on Mapped PE Image and PE Architecture
disassembler = Disassembler ( pe . architecture (), image , pe . dotnet_metadata_token_virtual_addresses (), pe . dotnet_executable_virtual_address_ranges (), config )
# Create the Controlflow Graph
cfg = Graph ( pe . architecture (), config )
# Disassemble the PE Image Entrypoints Recursively
disassembler . disassemble_controlflow ( pe . dotnet_entrypoint_virtual_addresses (), cfg ) from binlex . formats import ELF
from binlex . disassemblers . capstone import Disassembler
from binlex . controlflow import Graph
from binlex import Config
# Get Default Configuration
config = Config ()
# Use 16 Threads for Multi-Threaded Operations
config . general . threads = 16
# Open the ELF File
elf = ELF ( './sample.so' , config )
# Get the Memory Mapped File
mapped_file = pe . image ()
# Get the Memory Map
image = mapped_file . as_memoryview ()
# Create Disassembler on Mapped ELF Image and ELF Architecture
disassembler = Disassembler ( elf . architecture (), image , elf . executable_virtual_address_ranges (), config )
# Create the Controlflow Graph
cfg = Graph ( elf . architecture (), config )
# Disassemble the PE Image Entrypoints Recursively
disassembler . disassemble_controlflow ( elf . entrypoint_virtual_addresses (), cfg ) from binlex . formats import MACHO
from binlex . disassemblers . capstone import Disassembler
from binlex . controlflow import Graph
from binlex import Config
# Get Default Configuration
config = Config ()
# Use 16 Threads for Multi-Threaded Operations
config . general . threads = 16
# Open the ELF File
macho = MACHO ( './sample.app' , config )
# MachO Fat Binary Can Support Multiple Architectures
for index in macho . number_of_slices ():
# Get the Memory Mapped File
mapped_file = macho . image ( index )
# Get the Memory Map
image = mapped_file . as_memoryview ()
# Create Disassembler on Mapped MACHO Image and MACHO Architecture
disassembler = Disassembler ( macho . architecture ( index ), image , macho . executable_virtual_address_ranges ( index ), config )
# Create the Controlflow Graph
cfg = Graph ( macho . architecture ( index ), config )
# Disassemble the MACHO Image Entrypoints Recursively
disassembler . disassemble_controlflow ( macho . entrypoints ( index ), cfg )生成されたコントロールフローグラフを解析することは、多分それが必要です。
この場合、次の手法を使用できます。
 from binlex . controlflow import Instruction
from binlex . controlflow import Block
from binlex . controlflow import Function

# Iterate Valid Instructions
for address in cfg . instructions . valid_addresses ():
  # Read Instruction from Control Flow
  instruction = Instruction ( address , cfg )
  # Print Instruction from Control Flow
  instruction . print ()

# Iterate Valid Blocks
for address in cfg . blocks . valid_addresses ():
  # Read Block from Control Flow
  block = Block ( address , cfg )
  # Print Block from Control Flow
  block . print ()

# Iterate Valid Functions
for address in cfg . functions . valid_addresses ():
  # Read Function from Control Flow
  function = Function ( address , cfg )
  # Print Function from Control Flow
function . print ()解析する代わりに、命令、ブロック、機能により直接アクセスできます。
 for instruction in cfg . instructions ():
  instruction . print ()

for block in cfg . blocks ():
  block . print ()

for function in cfg . functions ():
function . print ()また、機能からブロック、指示、対立遺伝子のペア、遺伝子に反復することもできます。
これは、最高レベルの抽象化から最も低い抽象化への進行を表しています。
 for function in cfg . functions ():
    for block in function . blocks ():
        for instruction in block . instructions ():
            for allelepair in instruction . chromosome (). allelepairs ():
                for gene in allelepair . genes ():
print ( gene )Binlexで使用できる最も強力なツールの1つは、類似性ハッシュを使用して関数、ブロック、および命令を比較することです。
これらの比較を実行することは、 compare方法を呼び出すのと同じくらい簡単です。
 for lhs in lhs_cfg . functions ():
  for rhs in rhs_cfg . functions ():
    similarity = lhs . compare ( rhs )
    similarity . print ()

for lhs in lhs_cfg . blocks ():
  for rhs in rhs_cfg . blocks ():
    similarity = lhs . compare ( rhs )
    similarity . print ()

for lhs in lhs_cfg . instructions ():
  for rhs in rhs_cfg . instructions ():
    similarity = lhs . compare ( rhs )
    similarity . print ()
サポートされている類似性ハッシュアルゴリズムは、構成で有効になっている場合に計算されます。
困難な場合がありますが、 Binlexは、独自のアルゴリズムを使用して、最良の類似性マッチを見つけるために、非連続関数で類似性分析を実行することをサポートしています。
類似性のハッシュを生成するには、少なくとも75%以上の非連続関数のデータがハッシュ可能でなければなりません。
各命令、ブロック、機能、またはゲノムには、APIを介してアクセスできる関連染色体があります。
これらの抽象化に従って、対立遺伝子のペアとそれぞれの遺伝子に続くことができます。
 # Iterate Block Chromosome
chromosome = block . chromosome ()
for allelepair in chromosome . allelepairs ():
  for gene in allelepair . genes ()
    gene . print ()

# Iterate Block Chromosome
chromosome = function . chromosome ()
for allelepair in chromosome . allelepairs ():
  for gene in allelepair . genes ()
    gene . print ()

# Iterate Block Chromosome
chromosome = function . chromosome ()
for allelepair in chromosome . allelepairs ():
  for gene in allelepair . genes ()
gene . print ()遺伝子プログラミングタスクを実行したい場合は、染色体、対立遺伝子、および遺伝子を変異させることもでき、独自の変異を追跡できます。
 chromosome = block . chromosome ()
chromosome . mutate ( 'deadbe?f' )
chromosome . number_of_mutations ()
chromosome . print ()

for allelepair in chromosome . allelepairs ():
  allelepair . mutate ( 'dead' )
  allelepair . number_of_mutations ()
  allelepair . print ()
  for gene in allelepair . genes ():
    gene . mutate ( 'd' )
    gene . number_of_mutations ()
    gene . print ()
これにより、USECASESに使用できる遺伝的アルゴリズムによる突然変異が促進されます。
ジャーナルの出版物でbinlexを使用している場合、またはオープンソースAIモデルを使用している場合は、次の引用を使用します。
 @misc { binlex ,
  author = { c3rb3ru5d3d53c } ,
  title = { binlex: A Binary Genetic Trait Lexer Framework } ,
  year = { 2024 } ,
  note = { Available at url{https://github.com/c3rb3ru5d3d53c/binlex-rs} }
}Binlexの使用が企業、個人的な目的、またはオープンソースAIモデルではない出力を生成するためのものである場合、引用は必要ありません。
たとえば、 Binlexを使用してYaraルールを作成する場合、引用は必要ありません。
これにより、 Binlexは関連性を維持することが保証されますが、寛容な企業および個人的な使用も保証します。


