mrcp plugin with freeswitch
1.0.0
github非每天登錄,如有問題,請聯繫[email protected],空閒時間回复,謝謝!
這是我的第一個Github工程,特別感謝Cotin網站《構建簡單的智能客服系統》(一)、 (二) 、(三) 對於構建過程的幫助,您在閱讀本教程前,可以先行閱讀這三篇文章,本教程基於此調整了構建順序,給出更多的操作細節,錯誤處理以及其它構建描述。
使用FreeSWITCH接受用戶手機呼叫,通過UniMRCP Server集成訊飛開放平台(xfyun)插件將用戶語音進行語音識別(ASR),並根據自定義業務邏輯調用語音合成(TTS),構建簡單的端到端語音呼叫中心。

本次示例的FreeSWITCH在MacOS High Sierra 10.13.4系統版本中進行源碼編譯安裝,未使用軟件包安裝,具體安裝步驟可見官網安裝介紹,其他平台如Linux(Ubuntu、CentOS)應均能安裝成功。
以下給出源碼編譯安裝的步驟:
1.下載FreeSWITCH源碼:
 cd /usr/local/src
git clone -b v1.6 https://freeswitch.org/stash/scm/fs/freeswitch.git freeswitch
2.安裝依賴庫
brew install autoconf
brew install automake
brew install libtool
brew install pkg-config
brew install speexdsp
brew install speex
brew install libldns-dev
brew install OpenSSL
brew install pcre
brew install pkgconfig sqlite3
brew install lua
brew install opus
brew install libsndfile
注:其他系統平台請自行確認依賴庫內容,可能的搜索結果:Ubuntu/CentOS FreeSWITCH 安裝依賴。 在ubuntu下:libtool not found。
3.編譯安裝
 cd freeswitch/
# 先执行 bootstrap.sh,生成configure文件
./bootstrap.sh
./configure --prefix=/usr/local/freeswitch
make
make install
make cd-sounds-install
make cd-moh-install
4.運行
 cd /usr/local/freeswitch/bin
./freeswitch
即可啟動應用。
注:安裝過程中可能出現的問題configure中的錯誤。
FreeSWITCH默認配置1000-1019(20個)用戶,默認密碼1234,您可以提前跳轉到“第四步測試與驗證” 的驗證步驟,登錄並撥打5000,可以聽到默認IVR的示例語音菜單指引。
本次示例的UniMRCP Server在CentOS 7中進行源碼編譯安裝,感謝由Github用戶cotinyang提供的已經寫好的集成訊飛SDK的UniMRCP Server源碼。
1.下載UniMRCP Server Plugin Demo 源碼:
 cd /opt
git clone https://github.com/cotinyang/MRCP-Plugin-Demo.git MRCP-Plugin-Demo
2.編譯準備環境
 cd MRCP-Plugin-Demo/unimrcp-deps-1.5.0
# # 编译可能出现错误, 注释掉:107 ~ 109, getopt的set,其中存在不识别的option
# # 编译生成apr, apr-util, target path: ./libs
./build-dep-libs.sh
注:1.過程中需要輸入兩次y,並確認;2.另外,我們為該Demo工程Fork了一個自己維護的工程,地址為https://github.com/wangkaisine/MRCP-Plugin-Demo 您也可以使用這個地址的源碼。
3.編譯安裝unimrcp
 cd unimrcp-1.5.0
./bootstrap
# # 如果不能自动检测apr,apr-util,请在configure中增加 option:--with-apr=/path/apr --with-apr-util=/path/apr-util/
# # apr, apr-util由./build-dep-libs.sh 生成
./configure
make
make install
即可在/usr/local/中看到安裝好的unimrcp。
4.測試運行
 cd /usr/local/unimrcp/bin
./unimrcpserver -o 3
可以使用client進行驗證
 cd /usr/local/unimrcp/bin
./unimrcpclient
> help
usage:

- run [app_name] [profile_name] (run demo application)
       app_name is one of ' synth ' , ' recog ' , ' bypass ' , ' discover '
       profile_name is one of ' uni2 ' , ' uni1 ' , ...

       examples:
           run synth
           run recog
           run synth uni1
           run recog uni1

- loglevel [level] (set loglevel, one of 0,1...7)

- quit, exit
輸入help回車,給出了使用方法,輸入run recog運行語音識別測試,run synth進行語音合成測試。
1.訊飛開發平台SDK下載
由於從訊飛開放平台下載的SDK包和用戶以及用戶創建的應用相關聯,因此需要將third-party/xfyun中的文件和文件夾全部刪除,重新下載解壓屬於自己的SDK,目錄與源代碼基本一致。
您需要註冊並登錄訊飛開放平台,進入控制台頁面,並創建應用;
在“我的應用”界面獲得你的APPID,並為該應用“添加新服務”,選擇需要的“語音聽寫”和”在線語音合成“服務(本示例需要);
點擊右側“SDK下載”,在跳轉頁面中確認“選擇應用”已經選中了您創建的應用,“選擇您需要的AI能力”選中上述兩項服務,並點擊“SDK下載”等待SDK生成與完成下載。
將下載的zip包,解壓並替換MRCP-Plugin-Demo/unimrcp-1.5.0/plugins/third-party/xfyun/下的所有文件及文件夾。
注:創建應用頁面中的應用平台選擇“Linux”。
2.plugin編寫與編譯
本步驟將告訴您如何編寫unimrcp的插件代碼,即現在MRCP-Plugin-Demo/unimrcp-1.5.0/plugins文件夾下xfyun_recog、xfyun_xynth文件夾下的文件及其相關配置是如何得到的,如果您當前還不關注此細節,可以跳過本步驟至第四步。
實際上,上述MRCP-Plugin-Demo代碼是在Unimrcp官網下載Unimrcp 1.5.0 和Unimrcp Deps 1.5.0 並在此基礎上添加的plugin代碼。
首先編輯configure.ac文件,會在後面的Makefile中使用到的宏定義。 XFyun recognizer plugin的添加如下:
dnl XFyun recognizer plugin.
UNI_PLUGIN_ENABLED(xfyunrecog)

AM_CONDITIONAL([XFYUNRECOG_PLUGIN],[test " ${enable_xfyunrecog_plugin} " = " yes " ])

...

plugins/xfyun-recog/Makefile

...

echo XFyun recognizer plugin....... : $enable_xfyunrecog_plugin
注:其中··· 是該文件中的其它默認配置,請找到對應位置填寫。
對應地,XFyun synthesizer plugin的添加如下:
dnl XFyun synthesizer plugin.
UNI_PLUGIN_ENABLED(xfyunsynth)

AM_CONDITIONAL([XFYUNSYNTH_PLUGIN],[test " ${enable_xfyunsynth_plugin} " = " yes " ])

···

plugins/xfyun-synth/Makefile

···

echo XFyun synthesizer plugin...... : $enable_xfyunsynth_plugin
新增源碼與目錄
在plugins 目錄下,新建xfyun-recog 目錄,並在該目錄下新建src 目錄,可以將demo_recog_engine.c 拷貝到該目錄下改名為xfyun_recog_engine.c,將xfyun_recog_engine.c文件進行修改(已知一個修改的部分:將appid修改成你自己下載sdk的appid,不然會報錯:QISRAudioWrite failed! error code:10407),xfyun-synth目錄下對應創建並修改。
在xfyun-recog文件夾下新建Makefile.am文件,內容如下:
AM_CPPFLAGS                = $( UNIMRCP_PLUGIN_INCLUDES )

plugin_LTLIBRARIES         = xfyunrecog.la

xfyunrecog_la_SOURCES       = src/xfyun_recog_engine.c
xfyunrecog_la_LDFLAGS       = $( UNIMRCP_PLUGIN_OPTS )
                              -L $( top_srcdir ) /plugins/third-party/xfyun/libs/x64
                              -lmsc -ldl -lpthread -lrt -lstdc++
xfyunrecog_ladir            = $( libdir )
xfyunrecog_la_DATA          = $( top_srcdir ) /plugins/third-party/xfyun/libs/x64/libmsc.so


include $( top_srcdir ) /build/rules/uniplugin.am

UNIMRCP_PLUGIN_INCLUDES     += -I $( top_srcdir ) /plugins/third-party/xfyun/include
對應地,在fyun-synth文件夾下新建Makefile.am文件夾,內容如下:
AM_CPPFLAGS                = $( UNIMRCP_PLUGIN_INCLUDES )

plugin_LTLIBRARIES         = xfyunsynth.la

xfyunsynth_la_SOURCES       = src/xfyun_synth_engine.c
xfyunsynth_la_LDFLAGS       = $( UNIMRCP_PLUGIN_OPTS )
                              -L $( top_srcdir ) /plugins/third-party/xfyun/libs/x64
                              -lmsc -ldl -lpthread -lrt
xfyunsynth_ladir            = $( libdir )

include $( top_srcdir ) /build/rules/uniplugin.am

UNIMRCP_PLUGIN_INCLUDES     += -I $( top_srcdir ) /plugins/third-party/xfyun/include
修改plugins文件夾下Makefile.am文件,xfyun-recog添加內容如下:
 if XFYUNRECOG_PLUGIN
SUBDIRS               += xfyun-recog
endif
對應地,xfyun-synth添加內容如下:
 if XFYUNRECOG_PLUGIN
SUBDIRS               += xfyun-synth
endif
修改conf/unimrcpserver.xml文件,從默認啟用demo engine改為啟用我們的兩個engine。
xfyun-recog修改如下:
< engine id = " Demo-Recog-1 " name = " demorecog " enable = " false " />
< engine id = " XFyun-Recog-1 " name = " xfyunrecog " enable = " true " />
對應地,xfyun-synth修改如下:
< engine id = " Demo-Synth-1 " name = " demorecog " enable = " false " />
< engine id = " XFyun-Synth-1 " name = " xfyunsynth " enable = " true " />
同時,如果您已經準備好將UniMRCP Server和FreeSWITCH對接,您應該在conf/unimrcpserver.xml中配置好server的ip地址,即當前unimrcp安裝的子網訪問地址。
重新編譯安裝unimrcp(第二步3)。
當你啟動時出現如下問題時:
- Failed to Load DSO: /usr/local/unimrcp/lib/libmsc.so: undefined symbol: _ZTVN10__cxxabiv117__class_type_infoE
fix:-lstdc++
- ./unimrcpserver: error while loading shared libraries: libsofia-sip-ua.so.0: cannot open shared object file: No such file or directory
fix:
在etc/ld.so.conf 内容增加: /usr/local/lib
ldconfig 将ld.so.conf读入cache配置FreeSWITCH
我們需要將處理用戶語音呼入的FreeSWITCH與向xfyun engine發請求的unimrcp server兩者連接起來。
1.配置unimrcp模塊並自動加載;
 # 编辑/usr/local/src/freeswitch/modules.conf文件,找到要安装的模块,去掉前面的注释符号#
cd /usr/local/src/freeswitch
vim modules.conf
# asr_tts/mod_unimrcp
asr_tts/mod_unimrcp

# 执行make mod_xxx-install命令,这样就编译相应模块,并把编译后的动态库安装的/usr/local/freeswitch/mod目录下
make mod_unimrcp-install

# 编辑/usr/local/freeswitch/conf/autoload_configs/modules.conf.xml,去掉注释符号,如果没有发现对应模块,则添加
< load module= " mod_unimrcp " / >
2.設置profile文件與conf文件;
在/usr/local/freeswitch/conf/mrcp_profiles目錄新建unimrcpserver-mrcp-v2.xml配置文件:
< include >
  <!-- UniMRCP Server MRCPv2 -->
  <!-- 后面我们使用该配置文件,均使用 name 作为唯一标识,而不是文件名 -->
  < profile name = " unimrcpserver-mrcp2 " version = " 2 " >
    <!-- MRCP 服务器地址 -->
    < param name = " server-ip " value = " 192.168.1.23 " />
    <!-- MRCP SIP 端口号 -->
    < param name = " server-port " value = " 8060 " />
    < param name = " resource-location " value = " " />

    <!-- FreeSWITCH IP、端口以及 SIP 传输方式 -->
    < param name = " client-ip " value = " 192.168.1.24 " />
    < param name = " client-port " value = " 5069 " />
    < param name = " sip-transport " value = " udp " />


    < param name = " speechsynth " value = " speechsynthesizer " />
    < param name = " speechrecog " value = " speechrecognizer " />
    <!-- param name="rtp-ext-ip" value="auto"/ -->
    < param name = " rtp-ip " value = " 192.168.1.24 " />
    < param name = " rtp-port-min " value = " 4000 " />
    < param name = " rtp-port-max " value = " 5000 " />
    < param name = " codecs " value = " PCMU PCMA L16/96/8000 " />

    <!-- Add any default MRCP params for SPEAK requests here -->
    < synthparams >
    </ synthparams >

    <!-- Add any default MRCP params for RECOGNIZE requests here -->
    < recogparams >
      <!-- param name="start-input-timers" value="false"/ -->
    </ recogparams >
  </ profile >
</ include >
配置/usr/local/freeswitch/conf/autoload_configs/unimrcp.conf.xml文件:
< configuration name = " unimrcp.conf " description = " UniMRCP Client " >
  < settings >
    <!-- UniMRCP profile to use for TTS -->
    < param name = " default-tts-profile " value = " unimrcpserver-mrcp2 " />
    <!-- UniMRCP profile to use for ASR -->
    < param name = " default-asr-profile " value = " unimrcpserver-mrcp2 " />
    <!-- UniMRCP logging level to appear in freeswitch.log.  Options are:
         EMERGENCY|ALERT|CRITICAL|ERROR|WARNING|NOTICE|INFO|DEBUG -->
    < param name = " log-level " value = " DEBUG " />
    <!-- Enable events for profile creation, open, and close -->
    < param name = " enable-profile-events " value = " false " />

    < param name = " max-connection-count " value = " 100 " />
    < param name = " offer-new-connection " value = " 1 " />
    < param name = " request-timeout " value = " 3000 " />
  </ settings >

  < profiles >
    < X-PRE-PROCESS cmd = " include " data = " ../mrcp_profiles/*.xml " />
  </ profiles >

</ configuration >
注:1.unimrcpserver-mrcp-v2.xml中server-ip為unimrcpserver啟動的主機ip;2.client-ip和rtp-ip為FreeSWITCH啟動的主機,client-port仕FreeSWITCH作為客戶端訪問unimrcpserver的端口,手機作為客戶端訪問的FreeSWITCH端口默認為5060,兩者不同;3.unimrcpserver-mrcp-v2.xml中的profile name應和unimrcp.conf.xml中的default-tts-profile與default-ars-profile的value一致(有些文檔的分析中稱mrcp_profiles中的xml文件名也必須和這兩者一致,實際上是非必須的)。
Attenion: unimrcpserver 和freeswitch 部署在同一個網段很重要,最好部署測試的時候在同一台物理機器上進行
3.配置IVR與腳本。
在/usr/local/freeswitch/conf/dialplan/default.xml里新增如下配置:
< extension name = " unimrcp " >
    < condition field = " destination_number " expression = " ^5001$ " >
   	    < action application = " answer " />
        < action application = " lua " data = " names.lua " />
    </ condition >
</ extension >
在/usr/local/freeswitch/scripts目錄下新增names.lua腳本:
 session : answer ()

-- freeswitch.consoleLog("INFO", "Called extension is '".. argv[1]"'n")
welcome = " ivr/ivr-welcome_to_freeswitch.wav "
menu = " ivr/ivr-this_ivr_will_let_you_test_features.wav "
--
grammar = " hello "
no_input_timeout = 80000
recognition_timeout = 80000
confidence_threshold = 0.2
--
session : streamFile ( welcome )
-- freeswitch.consoleLog("INFO", "Prompt file is n")

tryagain = 1
 while ( tryagain == 1 ) do
 --
       session : execute ( " play_and_detect_speech " , menu .. " detect:unimrcp {start-input-timers=false,no-input-timeout= " .. no_input_timeout .. " ,recognition-timeout= " .. recognition_timeout .. " } " .. grammar )
       xml = session : getVariable ( ' detect_speech_result ' )
 --
       if ( xml == nil ) then
               freeswitch . consoleLog ( " CRIT " , " Result is 'nil' n " )
               tryagain = 0
       else
               freeswitch . consoleLog ( " CRIT " , " Result is ' " .. xml .. " ' n " )
               tryagain = 0
    end
end
 --
 -- put logic to forward call here
 --
 session : sleep ( 250 )
 session : set_tts_params ( " unimrcp " , " xiaofang " );
 session : speak ( "今天天气不错啊" );
 session : hangup ()
我們需要在/usr/local/freeswitch/grammar目錄新增hello.gram語法文件,可以為空語法文件須滿足語音識別語法規範1.0標準(簡稱SRGS1.0),該語法文件ASR 引擎在進行識別時可以使用。
<? xml version = " 1.0 " encoding = " utf-8 " ?>
< grammar version = " 1.0 " xml : lang = " zh-cn " root = " Menu " tag-format = " semantics/1.0 "
      xmlns=http://www.w3.org/2001/06/grammar
    xmlns:sapi= " http://schemas.microsoft.com/Speech/2002/06/SRGSExtensions " ><!- 这些都是必不可少的-->
  < rule id = " city " scope = " public " >
    < one-of >     <!-- 匹配其中一个短语-->
      < item >北京</ item >
      < item >上海</ item >
    </ one-of >
  </ rule >
  < rule id = " cross " scope = " public " >
    < one-of >
      < item >到</ item >
      < item >至</ item >
      < item >飞往</ item >
    </ one-of >
  </ rule >
  < rule id = " Menu " scope = " public " >
    < item >
      < ruleref uri = " #date " />         <!--指定关联的其他规则的节点-->
      < tag >out.date = reles.latest();</ tag >
    </ item >
    < item repeat = " 0-1 " >从</ item >    <!--显示1次或0次-->
    < item >
      < ruleref uri = " #city " />
      < tag >out.city = rulels.latest();</ tag >
    </ item >
    < item >
      < ruleref uri = " #cross " />
      < tag >out.cross = rulels.latest();</ tag >
    </ item >
    < item >
      < ruleref uri = " #city " />
      < tag >out.city = rulels.latest();</ tag >
    </ item >
  </ rule >
</ grammar >
注:lua腳本中,”play_and_detect_speech” 調用了ASR 服務,”speak” 調用了TTS 服務。配置啟動中遇到問題。
下載測試工具:Adore SIP Client
在App Store(其他手機系統請到對應應用市場)中搜索“Adore SIP Client”,並下載。
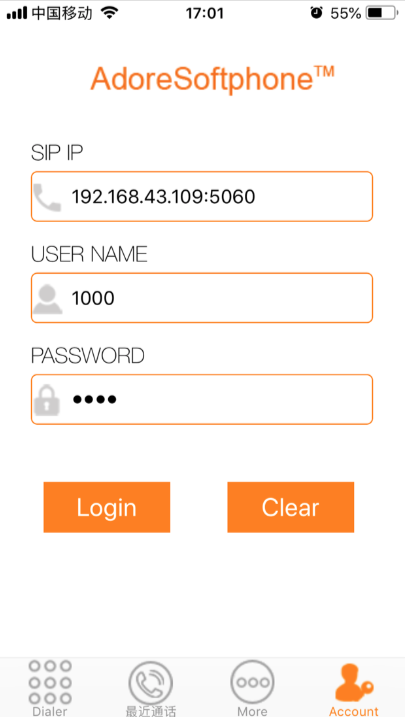
其中SIP IP是FreeSWITCH服務開啟的主機IP與port(默認為5060),USER NAME如上所述可選1000-1019,PASSWORD默認為1234。點擊"Login"(請確保手機連接的網絡與FreeSWITCH在同一個子網內),並撥打5001進行語言測試驗證(如果您是從第一步跳轉過來的,請撥打5000)。
FreeSWITCH主頁:https://freeswitch.com/
Unimrcp主頁:http://www.unimrcp.org/
Apache APR:https://apr.apache.org/
訊飛SDK包導入方式:https://doc.xfyun.cn/msc_linux/SDK%E5%8C%85%E5%AF%BC%E5%85%A5.html


