the mvm.github.io
Initial Release of V2.0.0
演示網站現在在IPF中鏡像!
由Artem Sheludko基於V1.0的Armando Maynez。
Adam Blog 2.0是一個Jekyll主題,該主題與GitHub頁面100%兼容。如果您不熟悉GitHub頁面,則可以查看其文檔以獲取更多信息。喬納森·麥格隆(Jonathan McGlone)在Github上創建和託管個人網站的指南也是一個很好的資源。
Jekyll是一個簡單的博客意識,靜態網站生成器,用於個人,項目或組織網站。基本上,Jekyll將您的頁面內容與模板文件一起使用,並生成一個完整的網站。有關更多信息,請訪問官方Jekyll網站以獲取其文檔。 Codecademy還提供了有關如何為完整初學者部署Jekyll網站的出色課程。
在Github上託管您的網站的優點在於,您不必在計算機上實際安裝了Jekyll。一切都可以通過GitHub代碼編輯器來完成,並且了解如何使用Jekyll或命令行的知識。您所要做的就是將帖子添加到_posts目錄中,然後編輯_config.yml文件以更改站點設置。有了一些關於HTML和CSS的基本知識,您甚至可以將網站修改為自己喜歡的。這一切都可以通過GITHUB代碼編輯器來完成,該編輯器的作用像內容管理系統(CMS)。
<tweet> </tweet>標籤即可。檢查主題中的主題
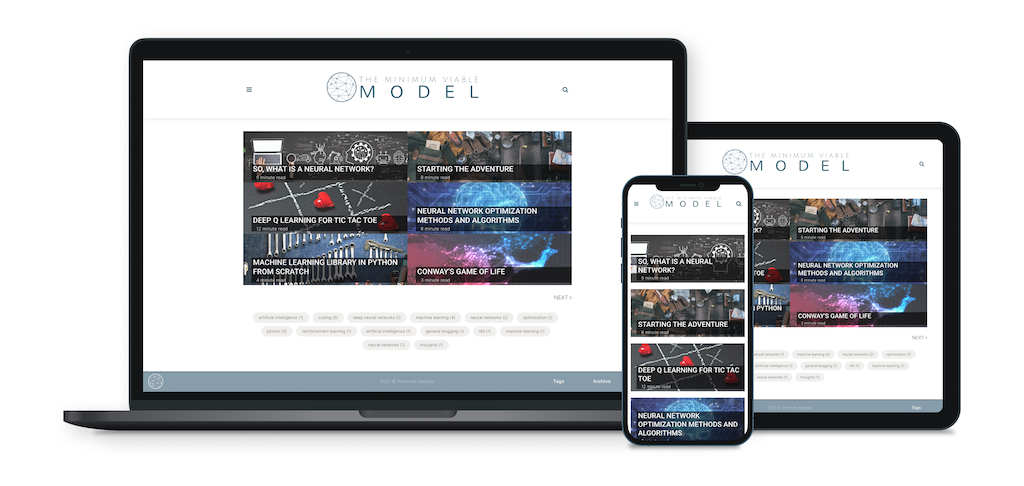
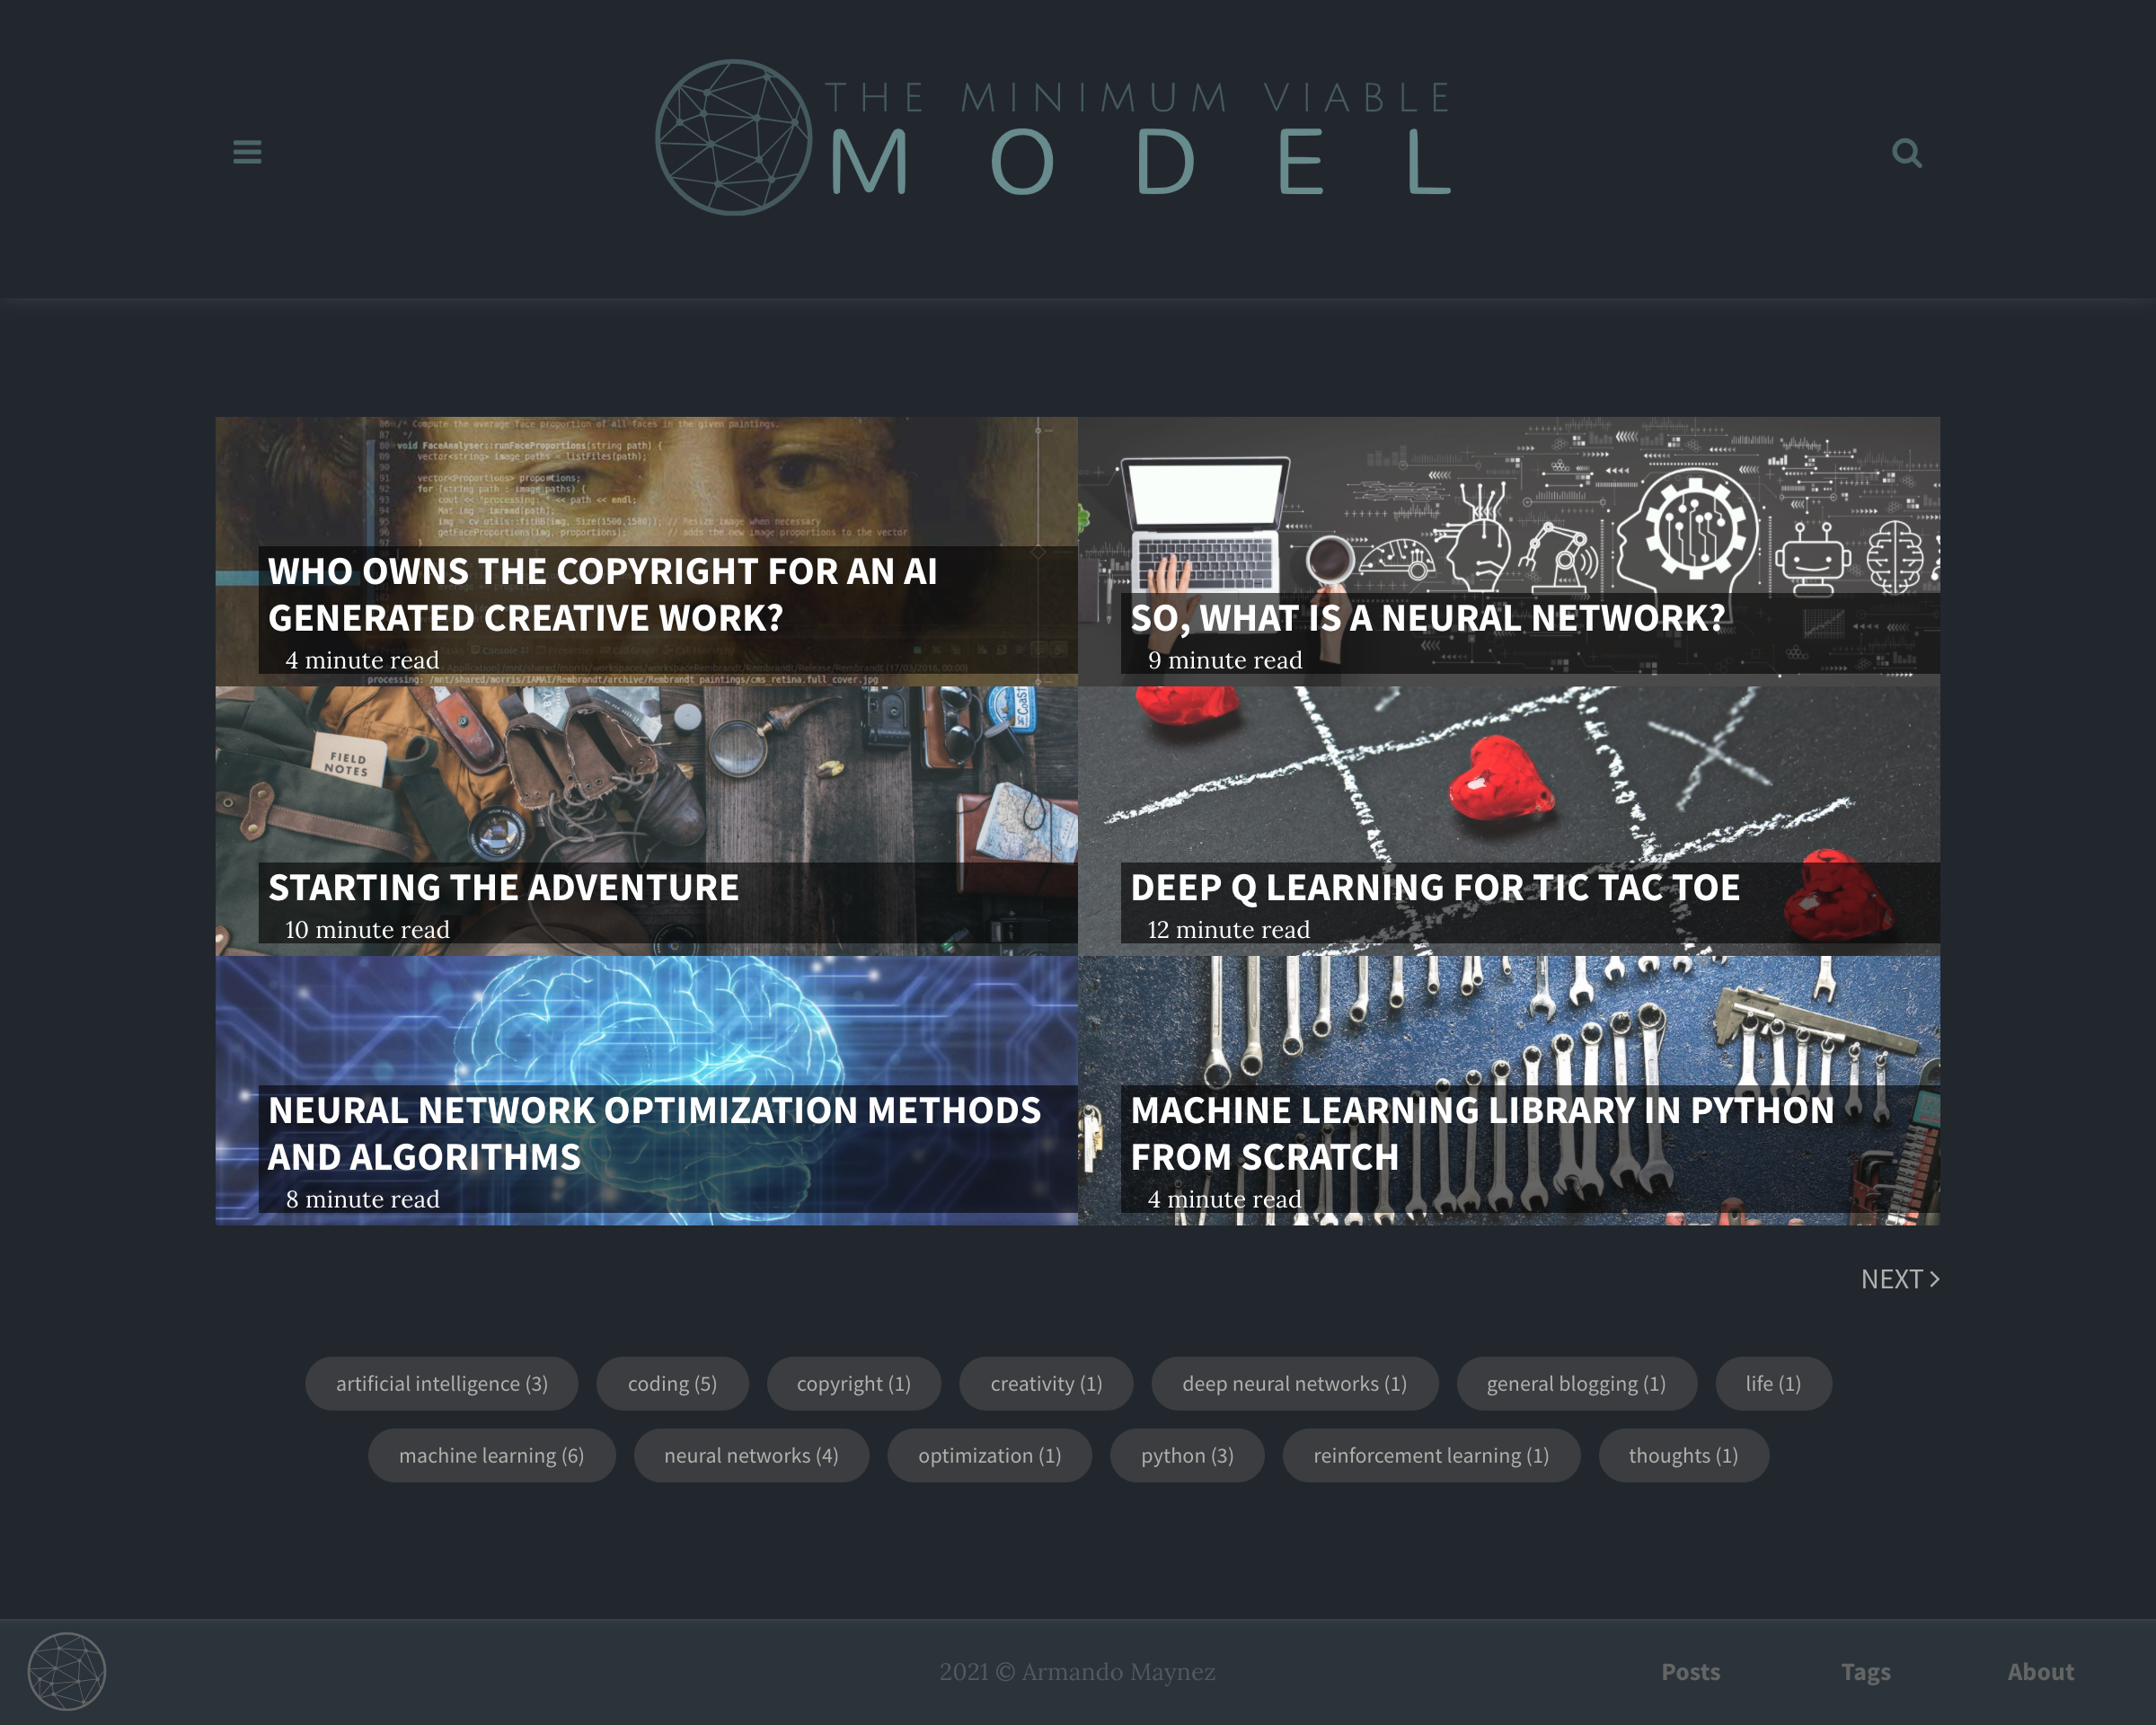
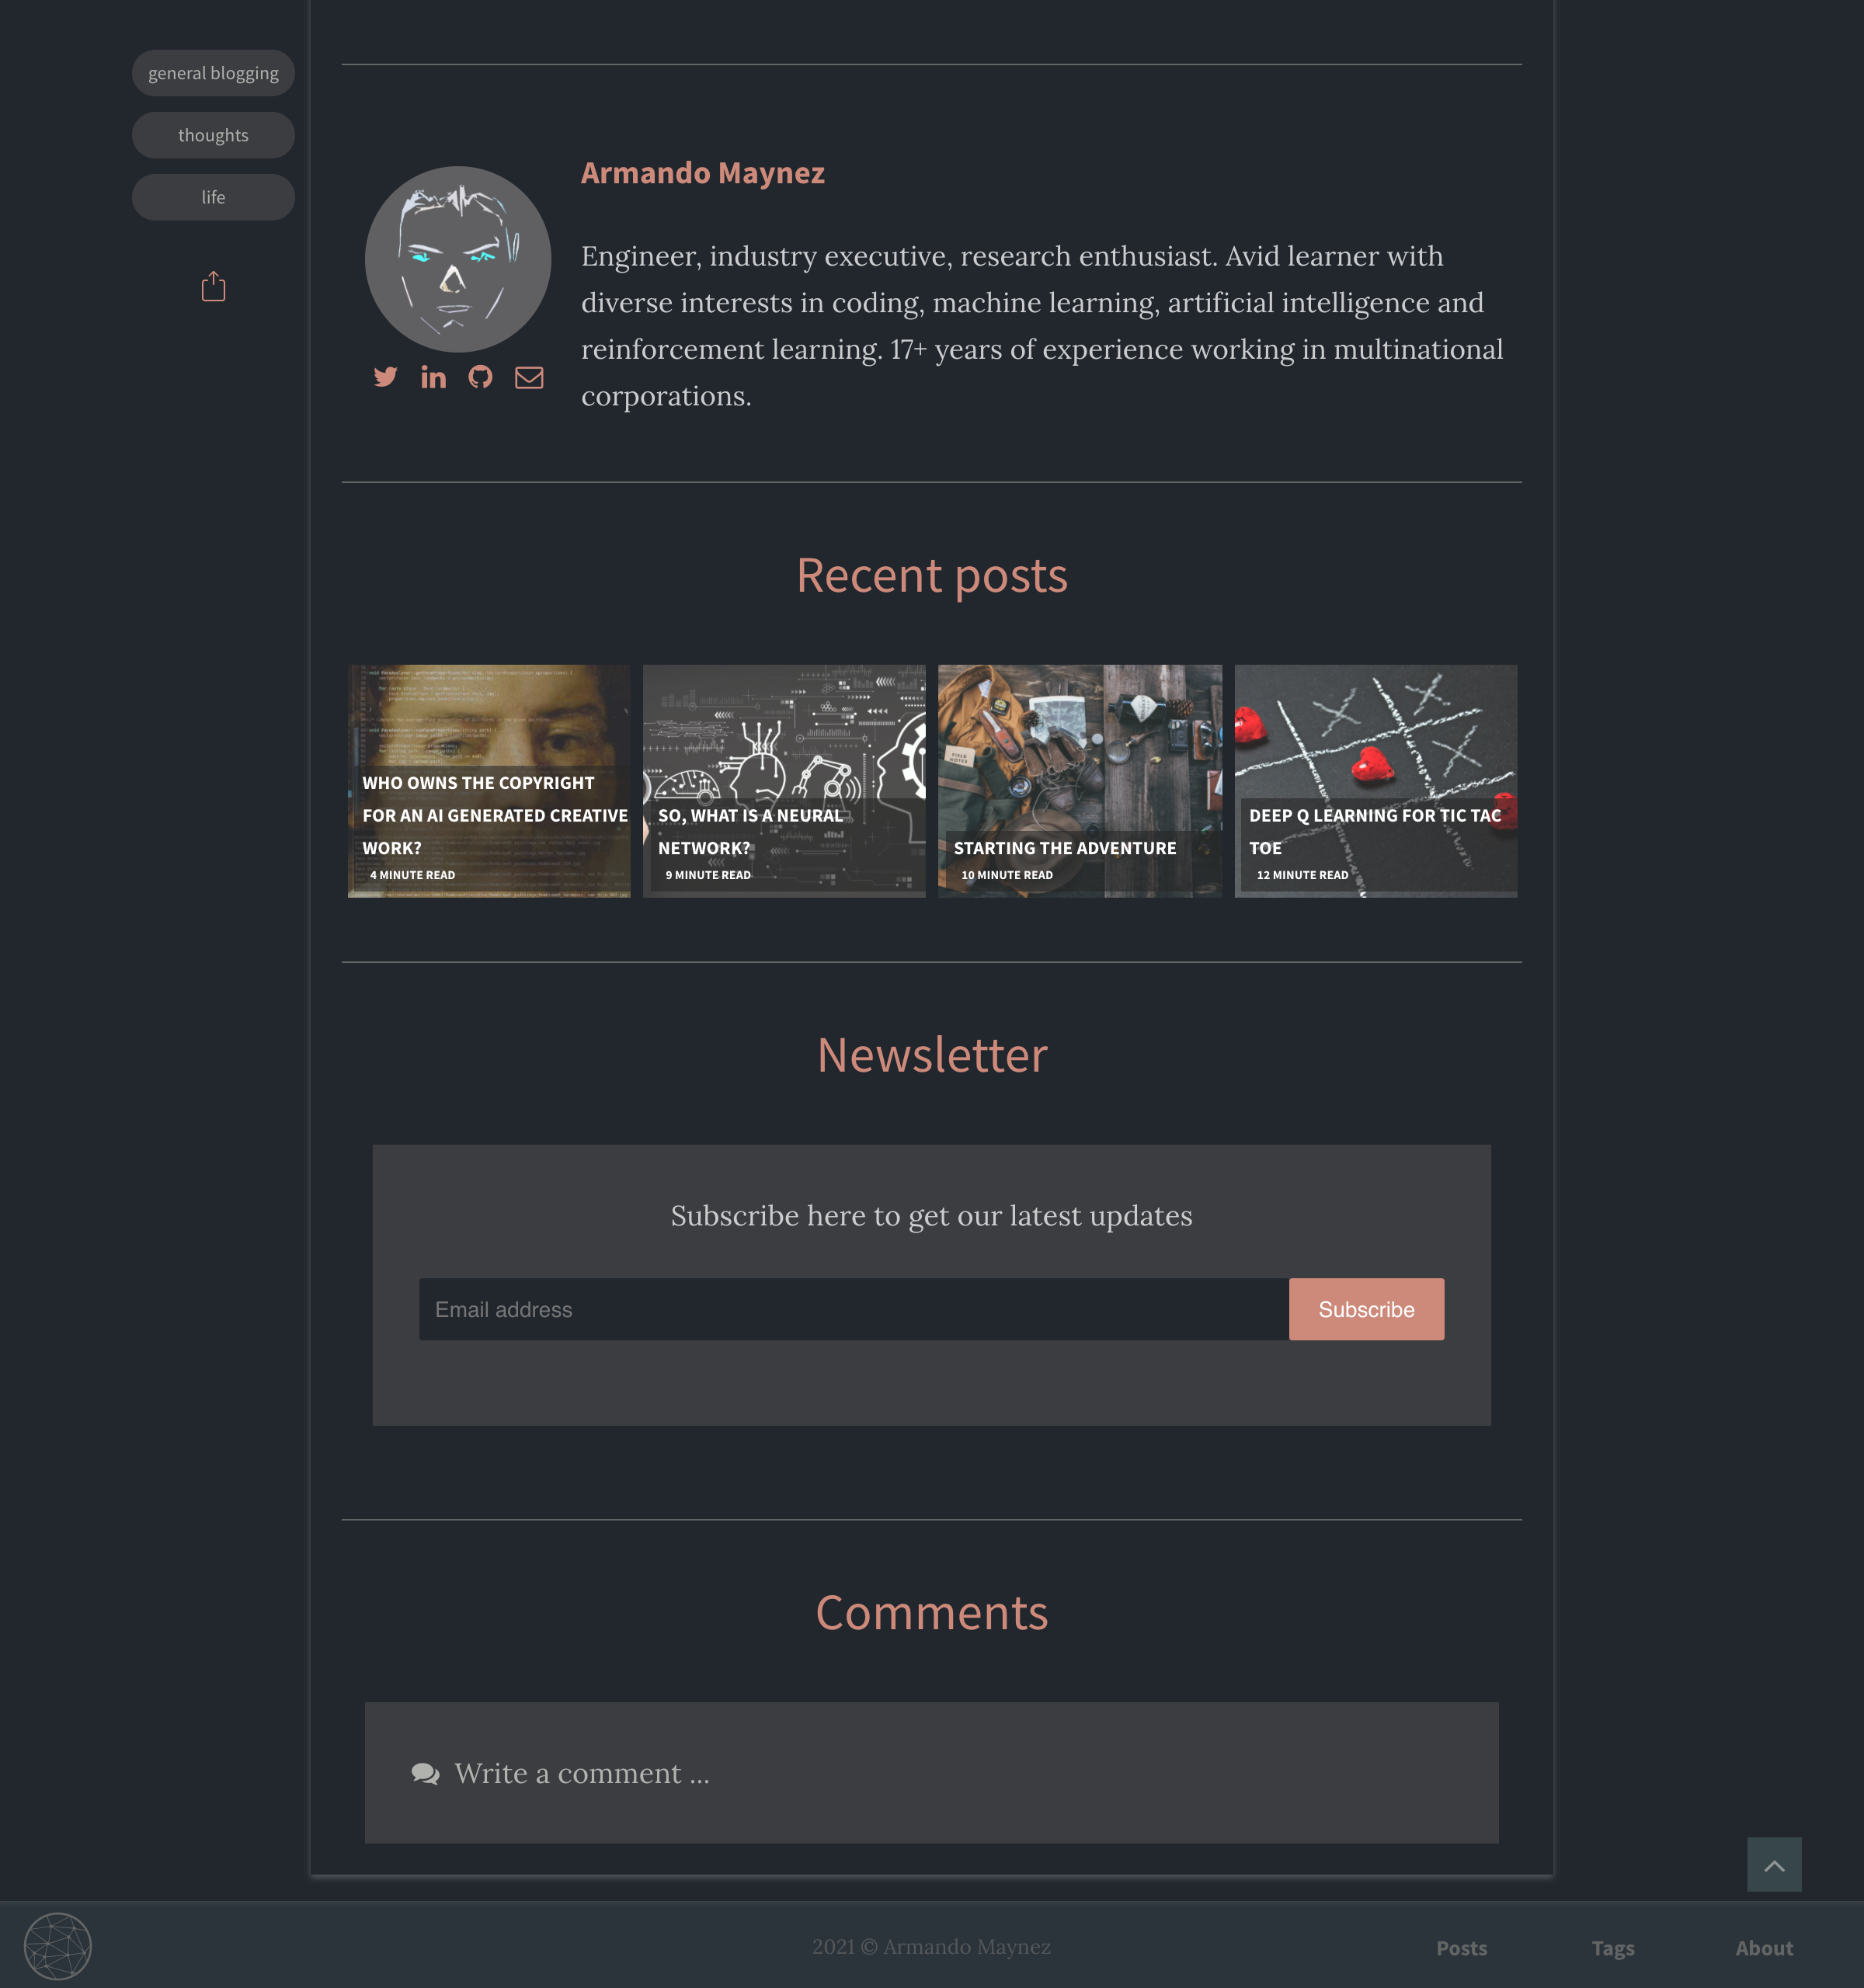
主頁看起來像這樣:
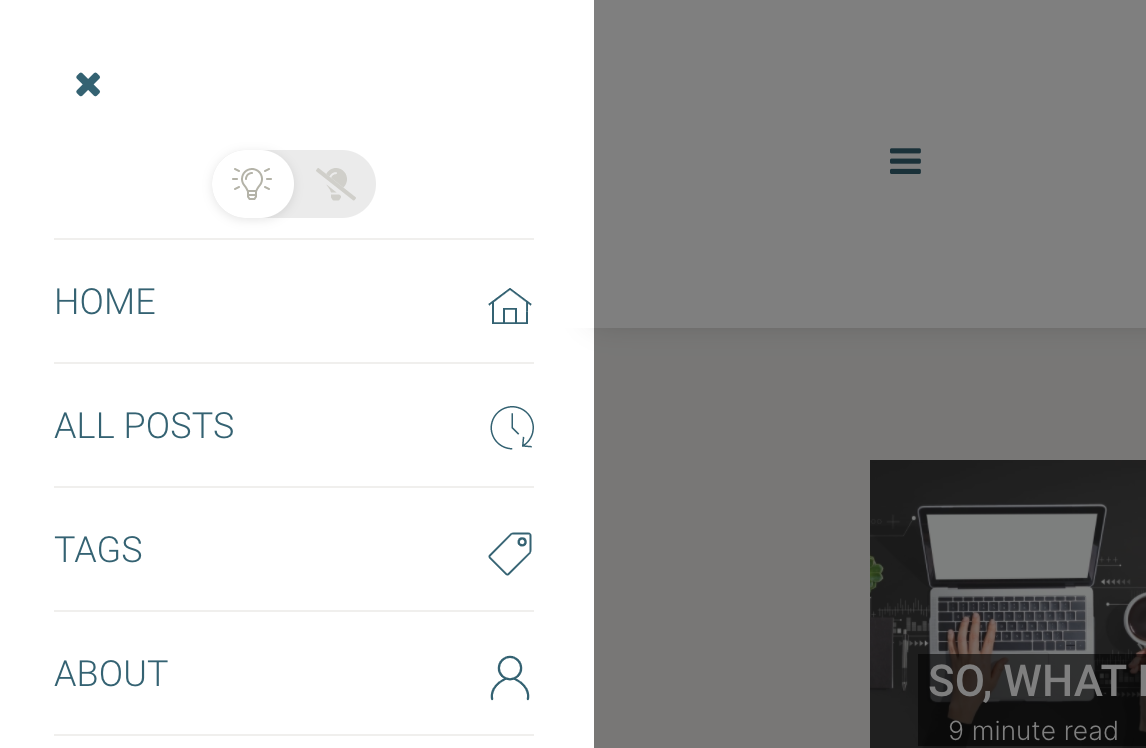
主菜單中的深色模式選擇器:
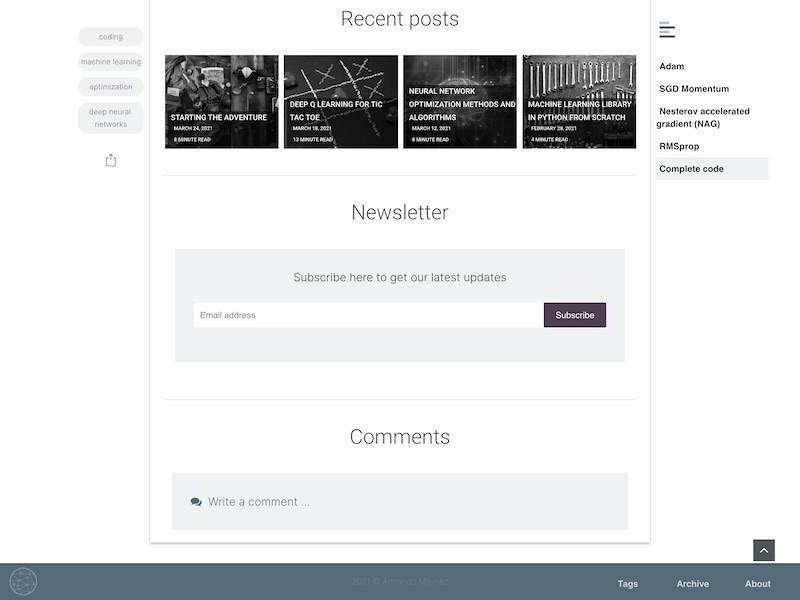
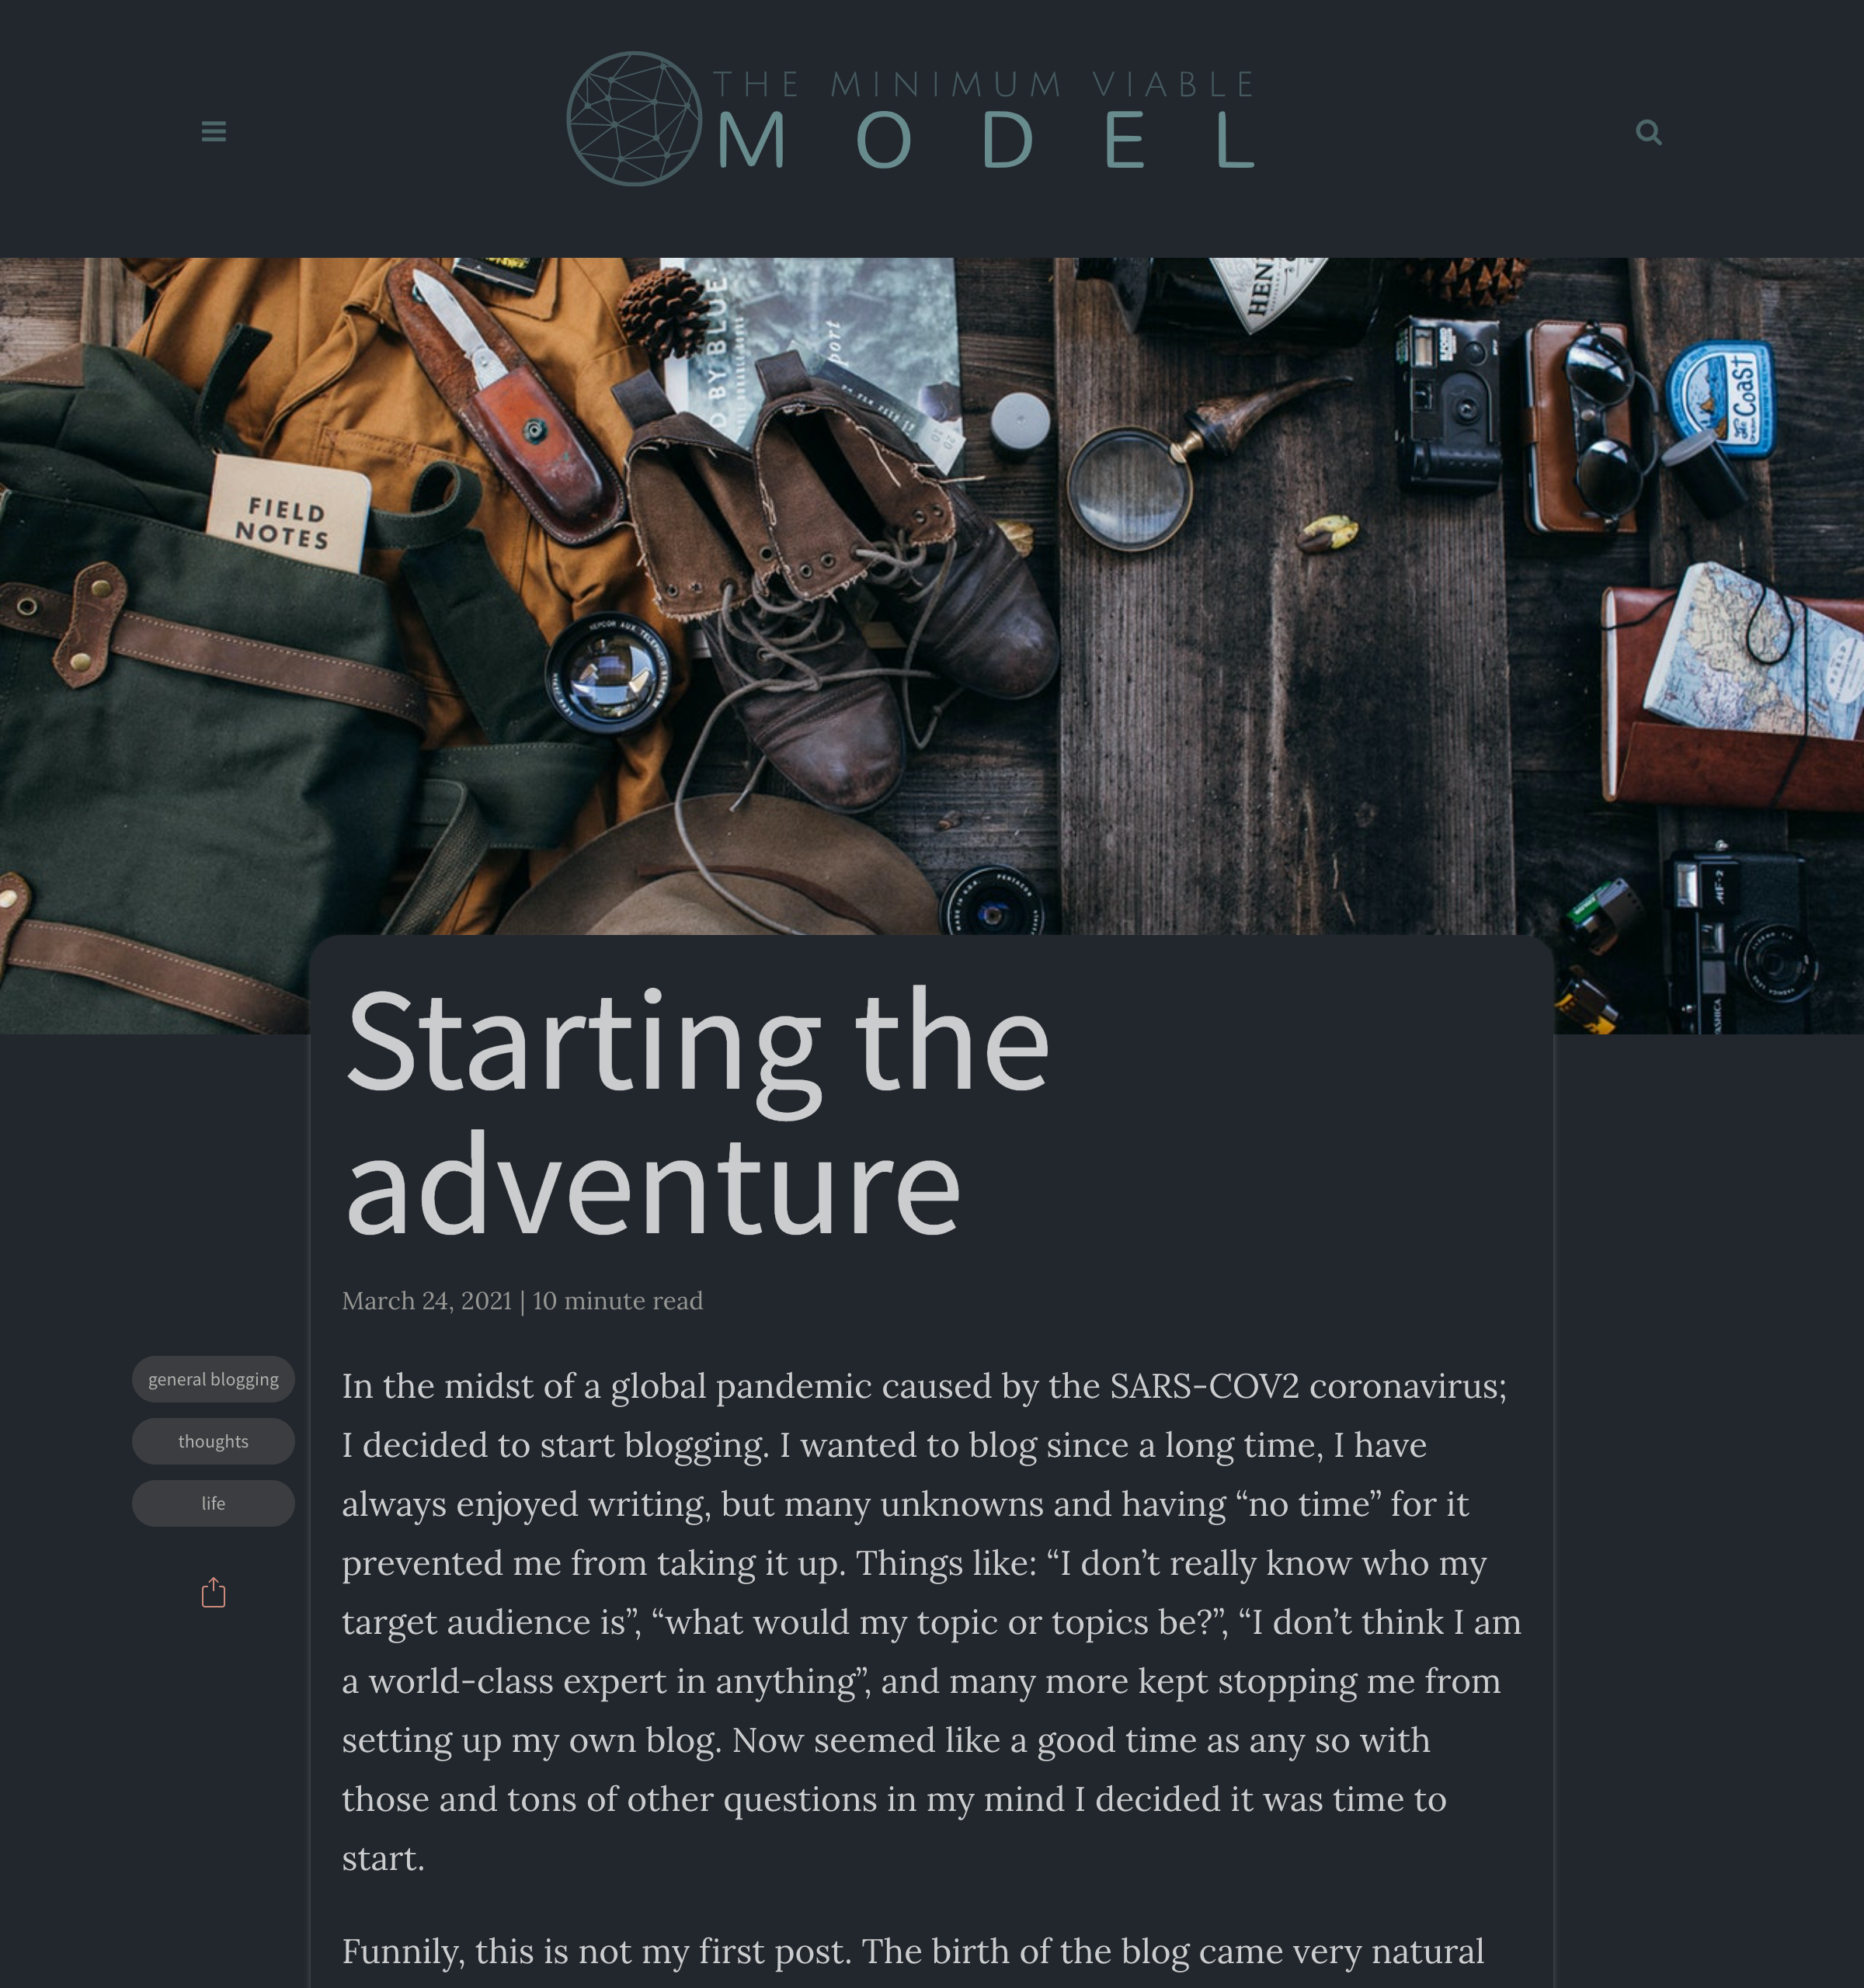
帖子頁面看起來像:

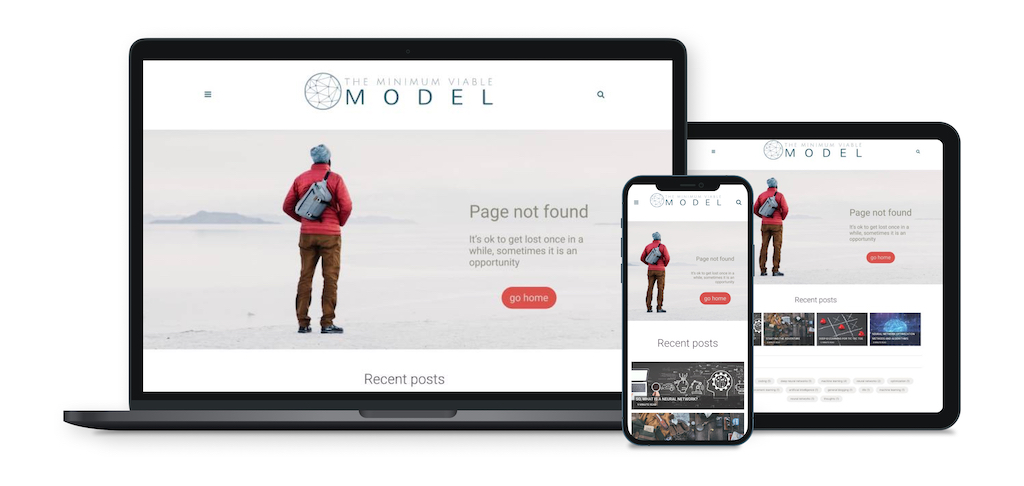
自定義響應404:
黑暗模式看起來像這樣:
有關Adam Blog 2.0的完整本地安裝,請下載您自己的Adam Blog 2.0副本,然後將其解壓縮到自己的目錄中。從那裡,打開您喜歡的命令行工具,輸入bundle install ,然後輸入jekyll serve 。您的網站應在http:// localhost:4000的本地啟動並在本地運行。
如果您是Jekyll的新手,建議您在https://jekyllrb.com/上查看文檔,或者有Smashing Magazine的教程。
如果您在GitHub頁面上託管您的網站,則將更改對_config.yml文件(或任何其他文件)進行更改將迫使您與Jekyll進行重建。任何更改都應在不久之後可見。如果您在本地託管您的網站,則必須再次運行jekyll serve以進行更改。
前往_posts目錄,查看網站上當前的所有帖子,並查看帖子文件通常是什麼樣子的示例。您只需複制模板帖子,然後開始添加自己的內容。
將此存儲庫分配到您自己的帳戶中。
您可以免費使用GitHub頁面免費託管Jekyll網站。單擊此處以獲取更多信息。
當分叉時,如果您用作目的地的一個名為USERNAME.github.io的存儲庫,則您的URL將為https://USERNAME.github.io/ https://USERNAME.github.io/REPONAME/ ),您的網站將發布給GH-PAGES分支。注意:如果要在同一github用戶名下託管多個站點,那麼您將必須使用項目頁面而不是用戶頁面 - 只需將存儲庫名稱更改為'http://username.github.io'之外的其他內容。
除了您的github-username.github.io repo映射到root URL之外,您還可以通過為其他存儲庫使用gh-pages分支來提供站點,以便在github-username.github.io/repo-name上找到它們。
這將要求您像這樣修改_config.yml :
 # Site settings
title : Repo Name
email : [email protected]
author : Your Name
description : " Repo description "
baseurl : " /repo-name "
url : " https://github-username.github.io "
這將確保為您的資產和職位構建正確的相對路徑。
使用您的數據,位於根目錄中的Modify _config.yml文件。
 # Site settings
title : The Title for Your Website
description : ' A description of your blog '
permalink : ' :title:output_ext ' # how the permalinks will behave
baseurl : " / " # the subpath of your site, e.g. /blog
url : " " # the base hostname & protocol for your site, e.g. http://example.com
logo : " " # the logo for your site
logo-icon : " " # a smaller logo, typically squared
logo-icon-SEO : " " # must be a non SVG file, could be the same as the logo-icon

# Night/Dark mode default mode is "auto", "auto" is for auto nightshift (19:00 - 07:00), "manual" is for manual toggle, and "on/off" is for default on/off. Whatever the user's choice is, it will supersede the default setting of the site and be kept during the visit (session). Only the dark mode setting is "manual", it will be always kept on every visit (i.e. no matter the browser is closed or not)
night_mode : " auto "
logo-dark : " /assets/img/branding/MVM-logo-full-dark.svg " # if you want to display a different logo when in dark mode
highlight_theme : syntax-base16.monokai.dark # select a dark theme for the code highlighter if needed


# Author settings
author : Your Name # add your name
author-pic : ' ' # a picture of you
about-author : ' ' # a brief description of you

# Contact links
email : [email protected] # Add your Email address
phone : # Add your Phone number
website :  # Add your website
linkedin :  # Add your Linkedin handle
github :  # Add your Github handle
twitter :  # Add your Twitter handle
bandcamp :  # Add your Bandcamp username

# Tracker
analytics : # Google Analytics tag ID
fbadmin : # Facebook ID admin

# Paginate
paginate : 6 # number of items to show in the main page
paginate_path : ' page:num '
words_per_minute : 200 # default words per minute to be considered when calculating the read time of the blog posts要配置新聞通訊,請在https://mailchimp.com中創建一個帳戶,設置Web註冊表單,然後從config.yml文件中的嵌入式註冊表粘貼鏈接:
 # Newsletter
mailchimp : " https://github.us1.list-manage.com/subscribe/post?u=8ece198b3eb260e6838461a60&id=397d90b5f4 "要配置DISQU,請設置一個與您的網站相同名稱的DISQUS網站。然後,在_config.yml中,編輯disqus_identifier值以啟用。
 # Disqus
discus_identifier :  # Add your discus identifier
comments_curtain : yes # leave empty to show the disqus embed directly
有關如何設置Disqus的更多信息。
自定義網站顏色。 modify /assets/css/main.css main.css如下:
 html {
  --shadow :       rgba ( 32 , 30 , 30 , .3 );
  --accent :       # DB504A ;    /* accent */
  --accent-dark :  # 4e3e51 ;    /* accent 2 (dark) */
  --main :         # 326273 ;    /* main color */
  --main-dim :     # 879dab ;    /* dimmed version of main color */
  --text :         # 201E1E ;
  --grey1 :        # 5F5E58 ;
  --grey2 :        # 8D897C ;
  --grey3 :        # B4B3A7 ;
  --grey4 :        # DAD7D2 ;
  --grey5 :        # F0EFED ;
  --background :   # ffffff ;
}

html [ data-theme = "dark" ]  {
  --accent :       # d14c47 ;    /* accent */
  --accent-dark :  # CD8A7A ;    /* accent 2 (dark) */
  --main :         # 4C6567 ;    /* main color */
  --main-dim :     # 273335 ;    /* dimmed version of main color */
  --text :         # B4B3A7 ;
  --grey1 :        # 8D897C ;
  --grey2 :        # 827F73 ;
  --grey3 :        # 76746A ;
  --grey4 :        # 66645D ;
  --grey5 :        # 4A4945 ;
  --background :   # 201E1E ;
  --shadow :       rgba ( 180 , 179 , 167 , .3 );
}自定義站點字體。 modify /assets/css/main.css main.css如下:
...
  --font1 : 'Lora' , charter , Georgia , Cambria , 'Times New Roman' , Times , serif ; /* body text */
  - - font2 : 'Source Sans Pro' , 'Helvetica Neue' , Helvetica , Arial , sans-serif ; /* headers and titles   */
  - - font1 - light :      400;
  - - font1 - regular :    400;
  - - font1 - bold :       600;
  - - font2 - light :      200;
  - - font2 - regular :    400;
  - - font2 - bold :       700;
...如果更改字體,則還需要修改/_includes/head.html如下:不使用新字體和字體權重:不按下來和更改以下行:
< link href =" https://fonts.googleapis.com/css?family=Lora:400,600|Source+Sans+Pro:200,400,700 " rel =" stylesheet " >在上面的行之前刪除<style></style>中的所有內容:
 < style >
/* latin */
@font-face {
  font-family: 'Lora';
  ...
</ style >您會在/_posts/ Directory中找到示例帖子。繼續編輯任何帖子並重新構建網站以查看您的更改,對於GitHub頁面,每次提交都會自動發生這種情況。您可以以許多不同的方式重建網站,但是最常見的方法是運行jekyll serve ,該服務啟動Web服務器並在更新文件時自動將您的網站自動再生。
要添加新帖子,只需在_posts YYYY-MM-DD-name-of-post.md約定中添加一個文件,並包含必要的前提。查看任何示例帖子,以了解其工作原理。如果您已經有一個使用Jekyll構建的網站,只需複制您的帖子即可遷移到Adam Blog 2.0。
每個帖子的前提選擇是:
---
layout : post # ensure this one stays like this
read_time : true # calculate and show read time based on number of words
show_date : true # show the date of the post
title :  Your Blog Post Title
date :   XXXX-XX-XX XX:XX:XX XXXX
description : " The description of your blog post "
img : # the path for the hero image, from the image folder (if the image is directly on the image folder, just the filename is needed)
tags : [tags, of, your, post]
author : Your Name
github : username/reponame/ # set this to show a github button on the post
toc : yes # leave empty or erase for no table of contents
---
使用Markdown編輯您的博客文章。這是有關如何使用它的好指南。
刪除/assets/img/posts/ of to張貼的圖像中的圖像。
確保在存儲庫設置中打開github頁面,並指向主分支或主分支(在此克隆此存儲庫)。
如果您熟悉Jekyll,那麼Adam Blog 2.0目錄結構不應該太難導航。您可能會注意到默認目錄結構之間的差異的一些亮點。有關這些文件夾和文件的更多信息,請參見Jekyll文檔網站。
Adam Blog 2.0/
├── _includes                  # Theme includes
├── _layouts                   # Theme layouts (see below for details)
├── _posts                     # Where all your posts will go
├── assets                     # Style sheets and images are found here
|  ├── css                     # Style sheets go here
|  |  └── _sass                # Folder containing SCSS files
|  |  └── main.css             # Main SCSS file
|  |  └── highlighter          # Style sheet for code syntax highlighting
|  └── img                     #
|     └── posts                # Images go here
├── _pages                     # Website pages (that are not posts)
├── _config.yml                # Site settings
├── Gemfile                    # Ruby Gemfile for managing Jekyll plugins
├── index.html                 # Home page
├── LICENSE.md                 # License for this theme
├── README.md                  # Includes all of the documentation for this theme
├── feed.xml                   # Generates atom file which Jekyll points to
├── 404.html                   # custom and responsive 404 page
├── all-posts.json             # database of all posts used for infinite scroll
├── ipfs-404.html              # 404 page for IPFS
├── posts-by-tag.json          # database of posts by tag
├── robots.txt                 # SEO crawlers exclusion file
├── search.json                # database of posts used for search
└── sitemap.xml # automatically generated sitemap for search engines要完全從頭開始,只需刪除_posts , assets/img/posts文件夾中的所有文件,然後添加您自己的內容。 _config.yml文件中的所有內容都可以編輯以滿足您的需求。還將favicon.ico文件更改為您自己的favicon。
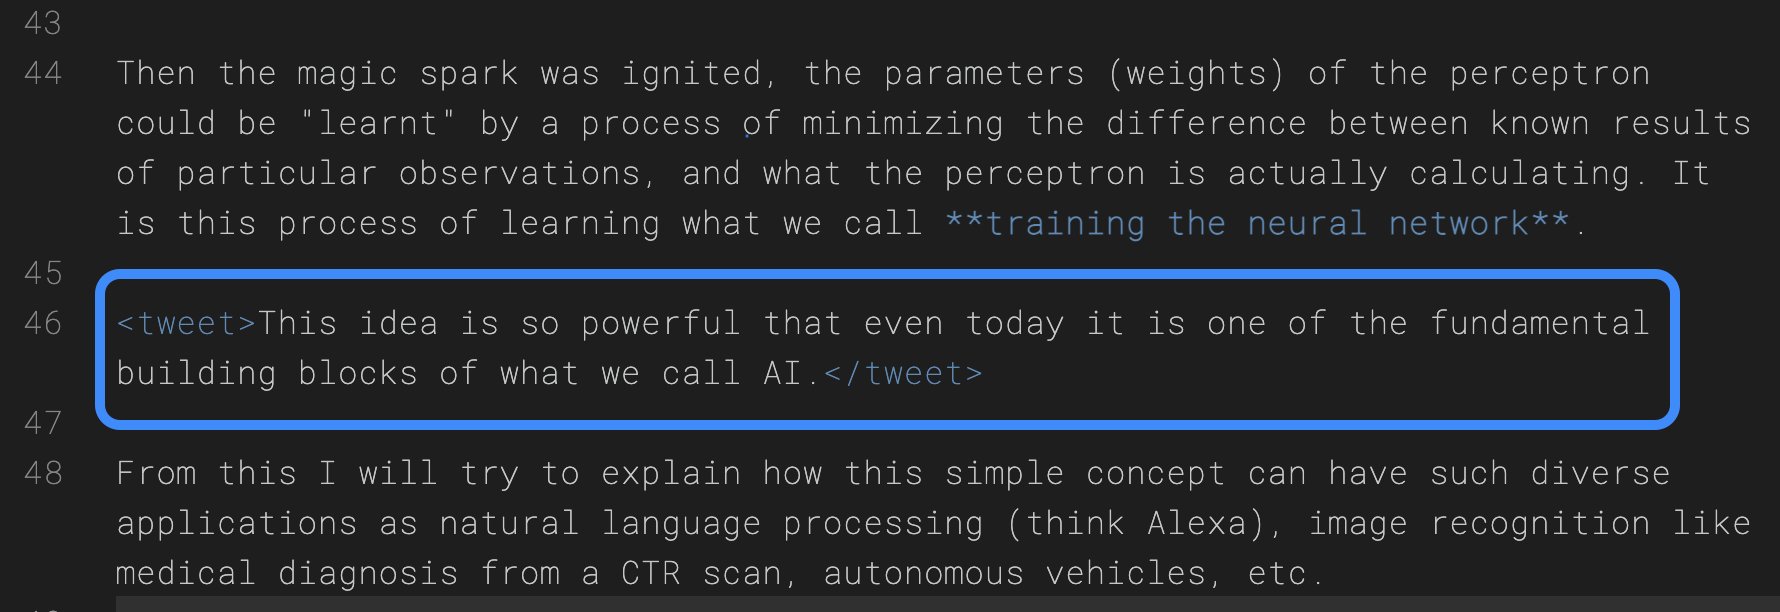
如果您的博客文章中有可推文報價,並希望將其作為單擊“推文”塊中的單擊,則只需使用<tweet></tweet>標籤,它們之間的所有內容都將在單擊中轉換為Tweet Box。
可以通過Google Analytics(分析)跟踪您的網站統計信息。與DISQUS類似,您必須為Google Analytics(分析)創建一個帳戶,並在_config.yml文件中的google-ID下為您的網站輸入正確的Google ID。有關如何設置Google Analytics(分析)的更多信息。
默認情況下,通過Jekyll-Feed支持原子。使用jekyll feed,您可以在_config.yml文件中設置諸如“標題”,“描述”和“作者”之類的配置變量。
您的原子供稿文件將在https://your.site/feed.xml示例上進行。
所有社交媒體偶像都歸功於字體很棒。您可以在_config.yml文件中更改出現的圖標以及它們鏈接到的帳戶。
Adam Blog 2.0與MathJax開箱即用,這使您可以通過使用乳膠在帖子中顯示數學方程式。只需添加Mathjax: yes在您的帖子的前磨牙中。
< p style = " text-align : center " >
( theta _ {t+1} = theta _ {t} - dfrac{eta}{sqrt{hat{v} _ t} + epsilon} hat{m} _ t ) .
</ p >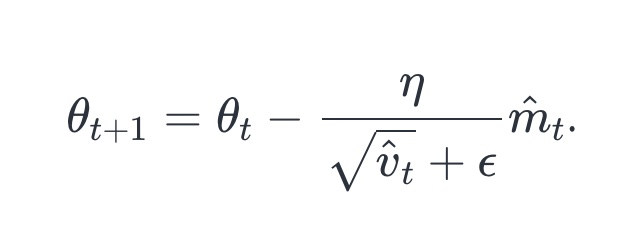
Adam Blog 2.0通過圍欄代碼塊提供語法突出顯示。語法突出顯示允許您根據顯示哪種編程語言以不同的顏色和字體顯示源代碼。您可以在此處找到支持的編程語言的完整列表。另一個選擇是通過GIST嵌入您的代碼。
您可以在_config.yml文件中選擇語法亮點的顏色主題:
highlight_theme : syntax-base16.monokai.dark # select a theme for the code highlighter有關選項的參考,請參見Highlighter目錄。
Jekyll提供了對GitHub風味的Markdown的支持,這使您可以使用Markdown語法格式化帖子。
查看Jekyll文檔,以獲取有關如何充分利用Jekyll的更多信息。在Jekyll的GitHub repo中提交所有錯誤/功能請求。如果您有疑問,可以在Jekyll Talk上詢問他們。
如果您想提出功能請求,或在文檔中報告錯誤或錯字,請提交GitHub問題。如果您想做出貢獻,請隨時提交拉動請求 - 作為獎勵,我將在下面歸功於所有貢獻者!如果這是您的第一個拉動請求,則首先閱讀GitHub流程可能會有所幫助。
Adam Blog 2.0被設計為用戶自定義和滿足自己獨特需求的基礎。請求功能和/或提交拉的請求時,請記住這一點。我想看到的一些變化的例子是使網站更容易使用或更好地做事的事物。請避免更改不會使大多數用戶受益。
該主題是完全免費的開源軟件。您可以根據需要使用它,因為它是根據MIT許可證分發的。如果您有任何問題,任何問題或建議,請隨時提出GitHub問題。


