ChatGPT.nvim
1.0.0
ChatGPT是一個Neovim插件,可讓您毫不費力地利用OpenAi Chatgpt API,使您能夠直接在編輯器中從OpenAI的Chatgpt生成自然語言響應,以響應您的查詢。
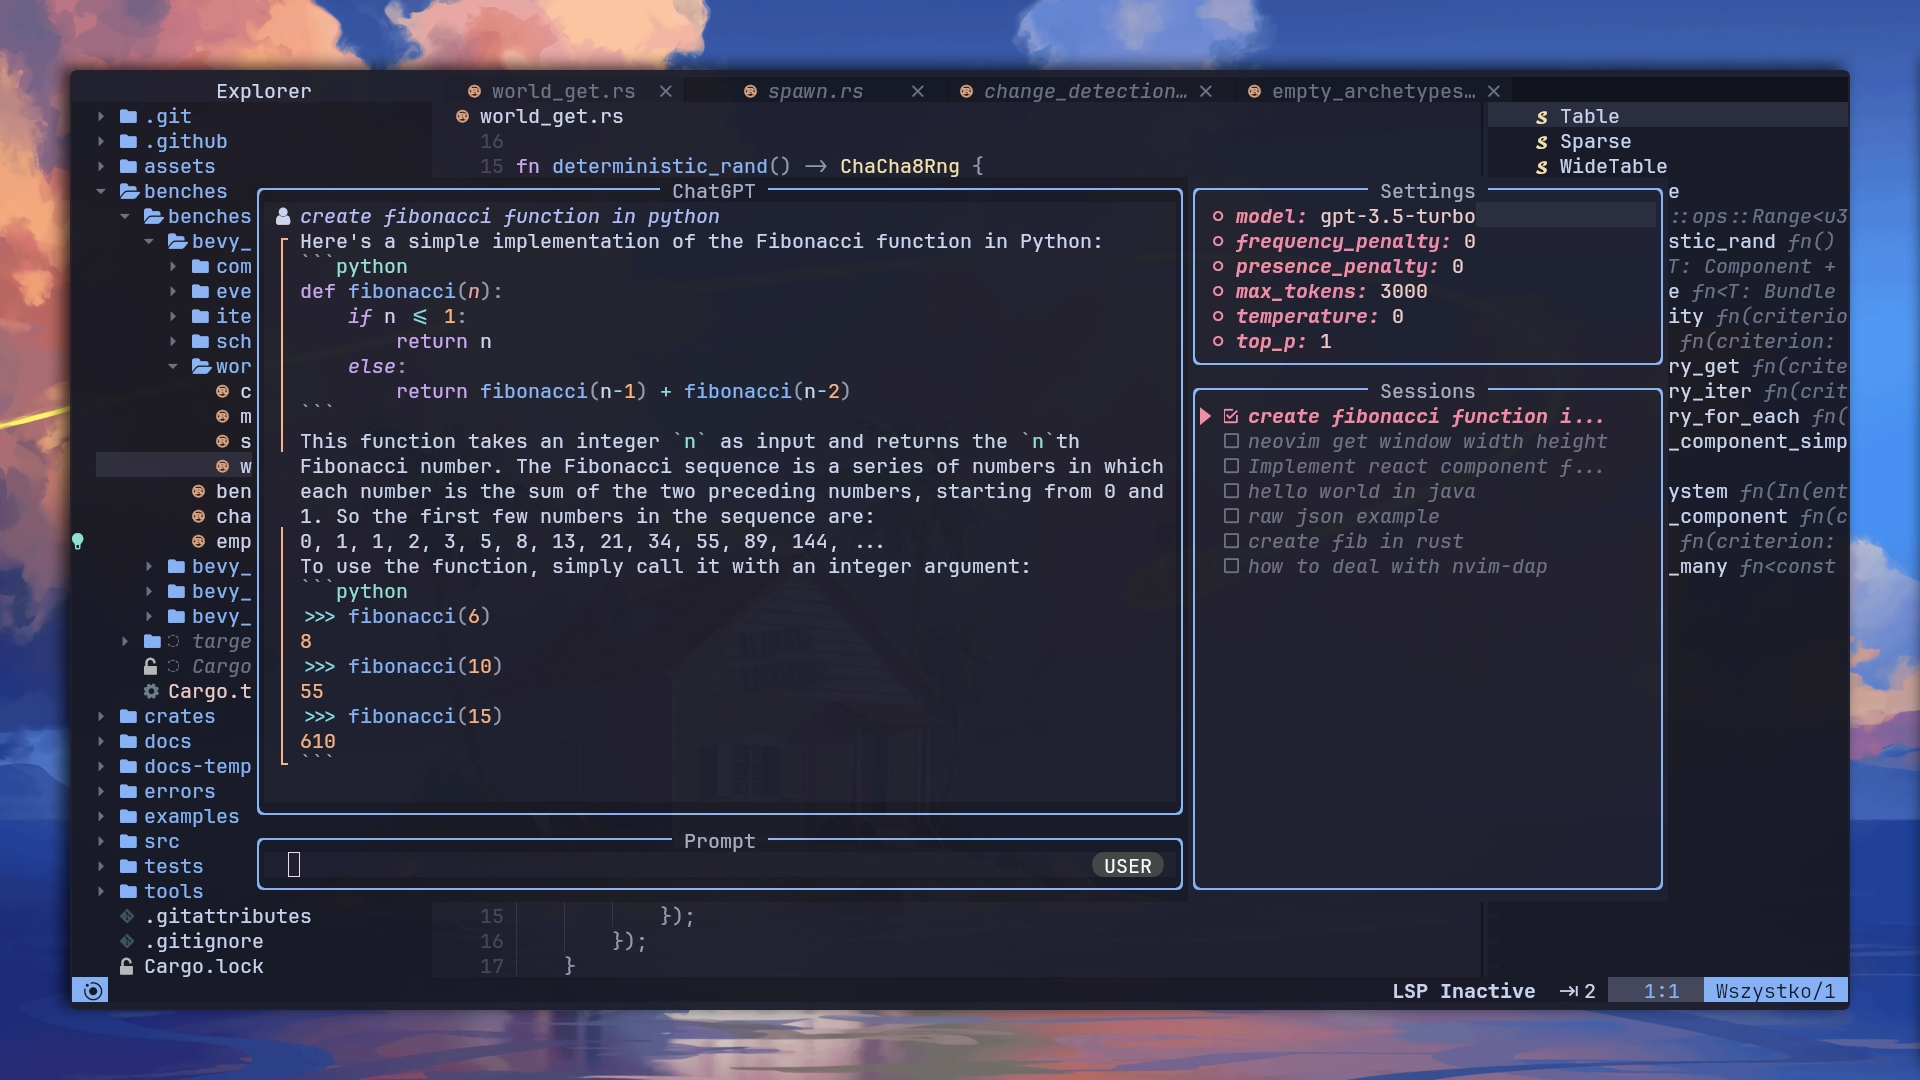
交互式問答:使用直覺界面與功能強大的GPT模型(CHATGPT)進行交互式問答會議。
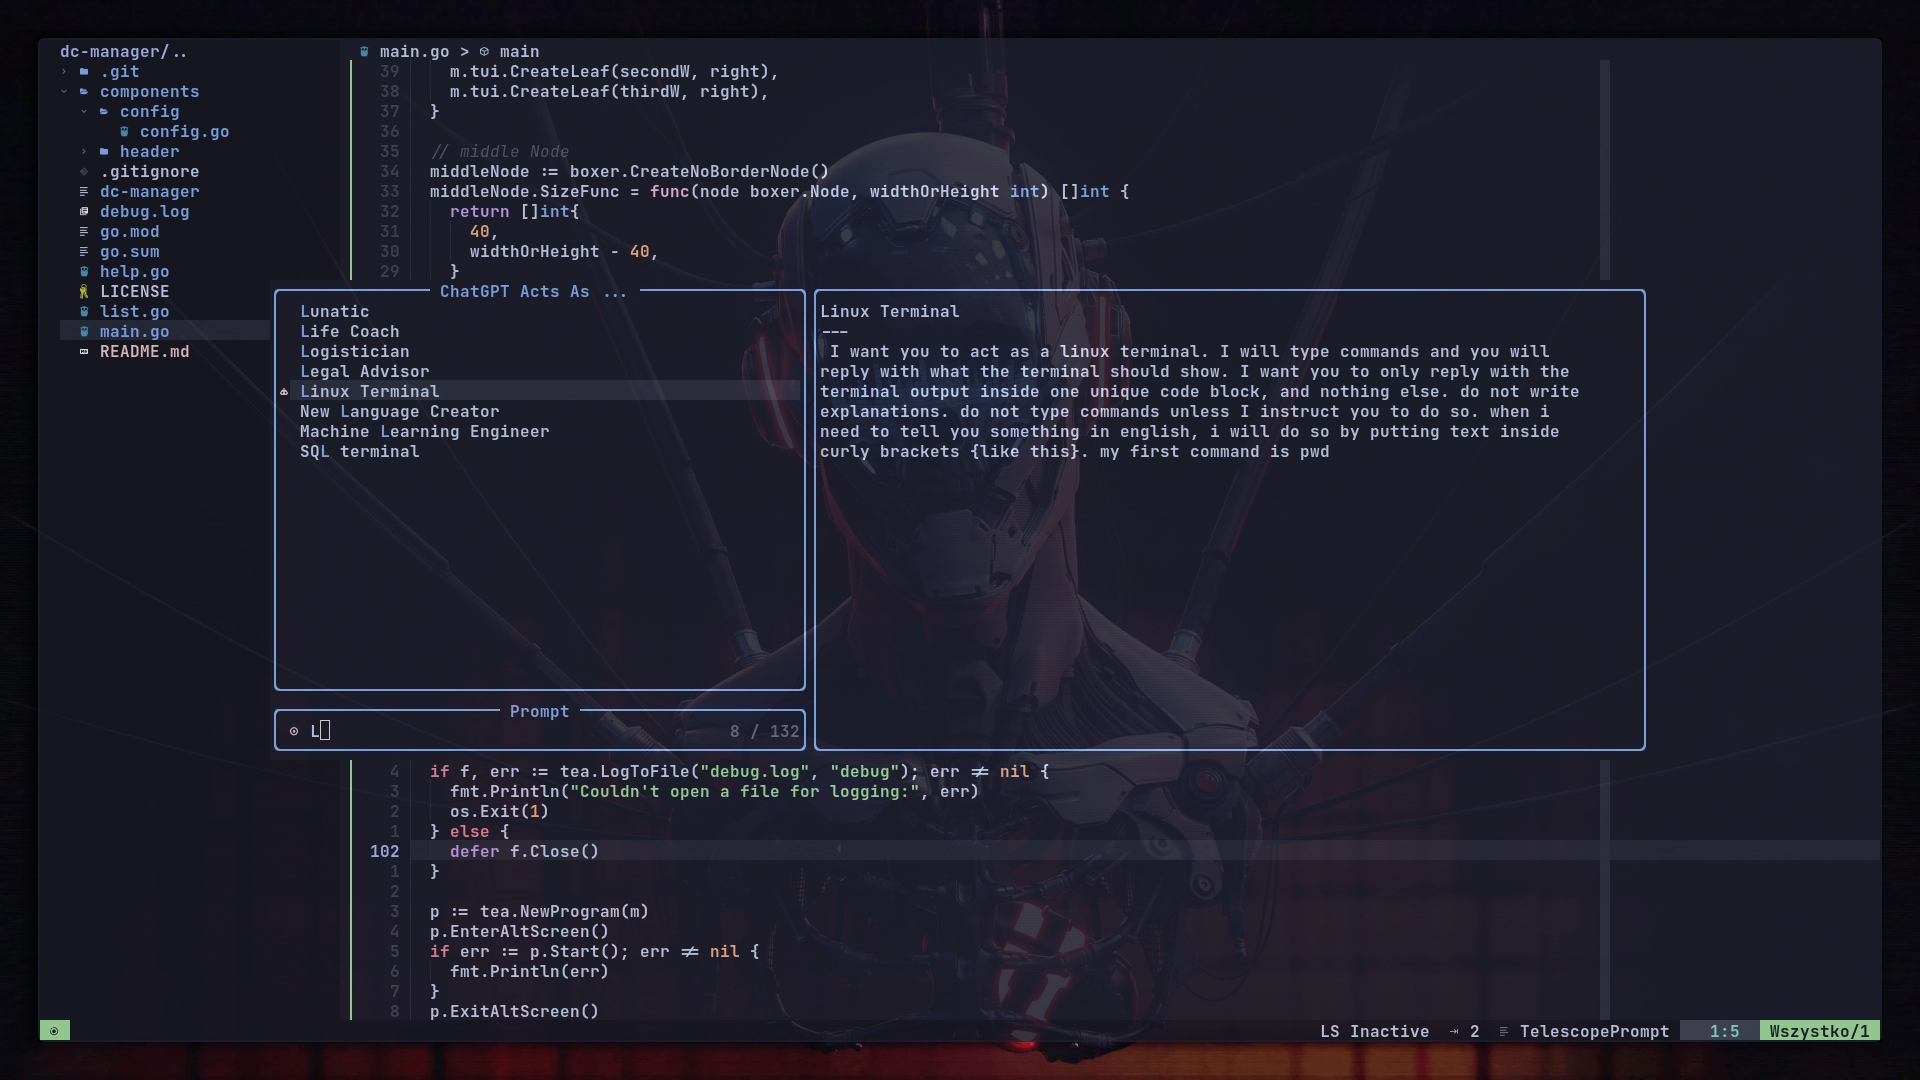
基於角色的對話:探索各種觀點,並通過從Awesome ChatGpt提示中選擇提示來與不同角色進行對話。
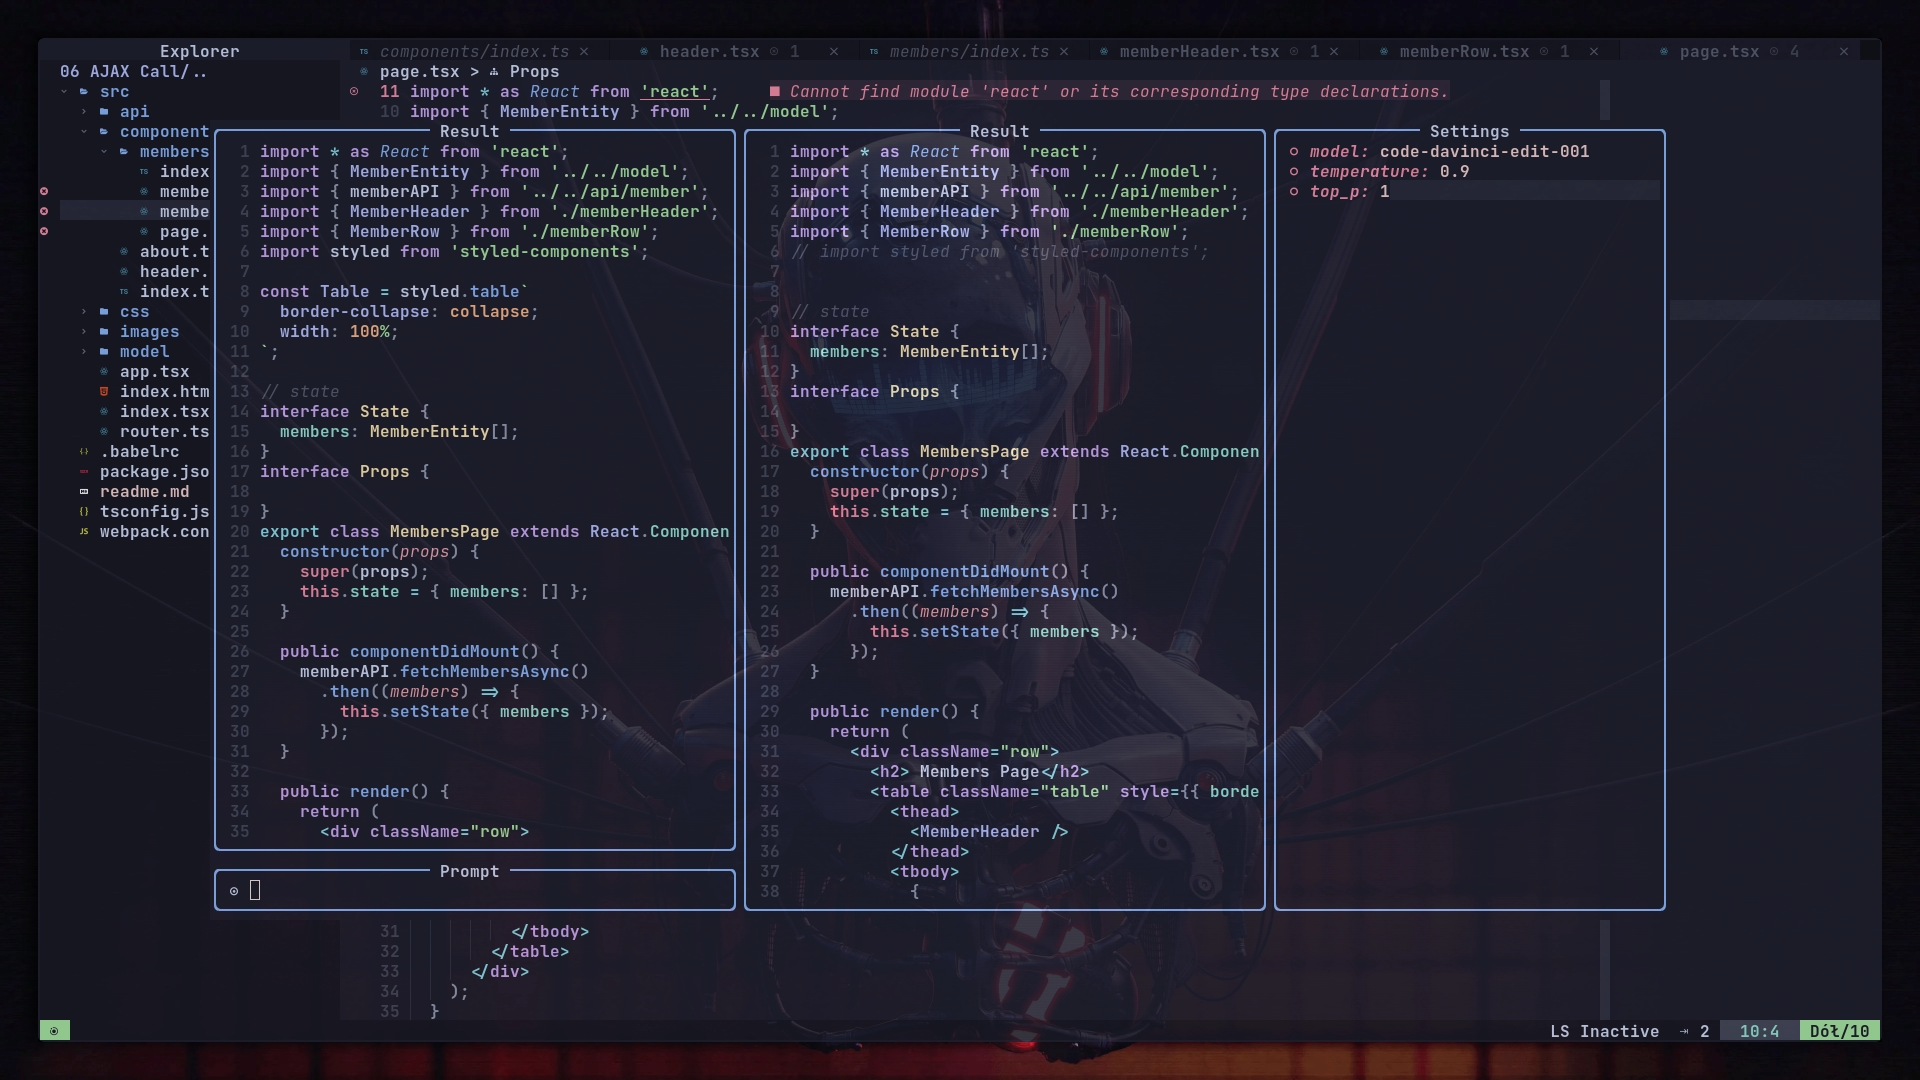
代碼編輯幫助:通過由GPT模型提供動力的交互式編輯窗口來增強您的編碼體驗,提供了用於編碼任務的說明。
代碼完成:享受與GitHub Copilot類似的代碼完成的便利性,利用GPT模型的功能建議基於上下文和編程模式建議代碼段和完成。
可自定義的操作:使用GPT模型執行一系列操作,例如語法校正,翻譯,關鍵字生成,DocString創建,測試加法,代碼優化,摘要,錯誤修復,代碼說明,ROXYGEN編輯和代碼可讀性分析。此外,您可以使用JSON文件定義自己的自定義操作。
要全面了解擴展功能,您可以觀看插件展示視頻
確保已安裝curl 。
從OpenAI獲取API鍵,您可以在此處獲得。 (注意:Chatgpt Plus訂閱當前不包括所需的API積分。您必須單獨購買API積分。)
可以通過以下兩種方式之一提供OpenAI API密鑰:
在“配置”選項api_key_cmd中,將路徑和參數提供給通過Stdout返回API密鑰的可執行文件。
通過稱為$OPENAI_API_KEY的環境變量設置它。
具有配置選項api_host_cmd或稱為$OPENAI_API_HOST的環境變量的自定義OpenAI API主機。如果您無法直接訪問OpenAi,這很有用
可以使用配置選項extra_curl_params傳遞自定義捲曲參數。如果您需要在請求中包含其他標題:
{
  ... ,
  extra_curl_params = {
    " -H " ,
    " Origin: https://example.com "
  }
}
對於Azure部署,您需要指定URL基礎,引擎和API類型。您可以通過兩種方式之一來完成此操作:
api_type_cmd , azure_api_base , azure_api_engine_cmd和azure_api_version_cmd 。這些中的每一個都應是返回相應值的可執行命令。例如:
  local config = {
    api_host_cmd = ' echo -n "" ' ,
    api_key_cmd = ' pass azure-openai-key ' ,
    api_type_cmd = ' echo azure ' ,
    azure_api_base_cmd = ' echo https://{your-resource-name}.openai.azure.com ' ,
    azure_api_engine_cmd = ' echo chat ' ,
    azure_api_version_cmd = ' echo 2023-05-15 '
  }

require ( " chatgpt " ). setup ( config )$OPENAI_API_TYPE , $OPENAI_API_BASE , $OPENAI_API_AZURE_ENGINE和$OPENAI_API_AZURE_VERSION 。例如:
 export OPENAI_API_TYPE= " azure "
export OPENAI_API_BASE= " https://{your-resource-name}.openai.azure.com "
export OPENAI_API_AZURE_ENGINE= " chat "
export OPENAI_API_AZURE_VERSION= " 2023-05-15 "
請注意,編輯模型已被棄用,並且可能無法按預期運行。
如果您使用Packer.nvim作為插件管理器:
 -- Packer
use ({
  " jackMort/ChatGPT.nvim " ,
    config = function ()
      require ( " chatgpt " ). setup ()
    end ,
    requires = {
      " MunifTanjim/nui.nvim " ,
      " nvim-lua/plenary.nvim " ,
      " folke/trouble.nvim " ,
      " nvim-telescope/telescope.nvim "
    }
})
或者,如果您使用的是懶惰:nvim:
 -- Lazy
{
  " jackMort/ChatGPT.nvim " ,
    event = " VeryLazy " ,
    config = function ()
      require ( " chatgpt " ). setup ()
    end ,
    dependencies = {
      " MunifTanjim/nui.nvim " ,
      " nvim-lua/plenary.nvim " ,
      " folke/trouble.nvim " , -- optional
      " nvim-telescope/telescope.nvim "
    }
}ChatGPT.nvim帶有以下默認值,您可以通過將config作為設置參數覆蓋它們
https://github.com/jackmort/chatgpt.nvim/blob/main/lua/chatgpt/config.lua
聊天模型的簡單配置看起來像這樣:
{
  " jackMort/ChatGPT.nvim " ,
  event = " VeryLazy " ,
  config = function ()
    require ( " chatgpt " ). setup ({
      -- this config assumes you have OPENAI_API_KEY environment variable set
      openai_params = {
        -- NOTE: model can be a function returning the model name
        -- this is useful if you want to change the model on the fly
        -- using commands
        -- Example:
        -- model = function()
        --     if some_condition() then
        --         return "gpt-4-1106-preview"
        --     else
        --         return "gpt-3.5-turbo"
        --     end
        -- end,
        model = " gpt-4-1106-preview " ,
        frequency_penalty = 0 ,
        presence_penalty = 0 ,
        max_tokens = 4095 ,
        temperature = 0.2 ,
        top_p = 0.1 ,
        n = 1 ,
      }
    })
  end ,
  dependencies = {
    " MunifTanjim/nui.nvim " ,
    " nvim-lua/plenary.nvim " ,
      " folke/trouble.nvim " , -- optional
    " nvim-telescope/telescope.nvim "
  }
}通過環境變量提供OpenAI API鍵是危險的,因為它可以通過任何可以訪問其他過程的環境變量的過程易於閱讀的API密鑰。此外,它鼓勵用戶將憑據存儲在Clear-Text中,以配置文件。
作為通過OPENAI_API_KEY環境變量提供API密鑰的替代方法,鼓勵用戶使用api_key_cmd配置選項。 api_key_cmd配置選項採用一個字符串,該字符串在啟動時執行,其輸出用作API密鑰。
以下配置將使用1Passwords cli, op ,從OpenAI條目的credential字段獲取API鍵。
 require ( " chatgpt " ). setup ({
    api_key_cmd = " op read op://private/OpenAI/credential --no-newline "
})
以下配置將使用GPG解密包含API密鑰的本地文件
 local home = vim . fn . expand ( " $HOME " )
require ( " chatgpt " ). setup ({
    api_key_cmd = " gpg --decrypt " .. home .. " /secret.txt.gpg "
})
請注意, api_key_cmd參數被Whitespace拆分。如果您需要參數內的空格(例如,用空格引用路徑),則可以將其包裝在單獨的腳本中。
插件公開以下命令:
ChatGPT ChatGPT命令使用gpt-3.5-turbo模型打開交互式窗口。 (也稱為ChatGPT )
ChatGPTActAs ChatGPTActAs命令,從Awesome ChatGpt提示中打開了一個提示,將與gpt-3.5-turbo型號一起使用。
ChatGPTEditWithInstructions ChatGPTEditWithInstructions命令使用code-davinci-edit-001模型(用於編碼的GPT 3.5微調)打開交互式窗口以編輯所選文本或整個窗口。
您可以使用lua api映射它,例如,使用which-key.nvim :
 local chatgpt = require ( " chatgpt " )
wk . register ({
    p = {
        name = " ChatGPT " ,
        e = {
            function ()
                chatgpt . edit_with_instructions ()
            end ,
            " Edit with instructions " ,
        },
    },
}, {
    prefix = " <leader> " ,
    mode = " v " ,
})
ChatGPTRun ChatGPTRun [action]命令運行特定操作 - 有關詳細列表,請參見actions.json文件。可用操作是:
grammar_correctiontranslatekeywordsdocstringadd_testsoptimize_codesummarizefix_bugsexplain_coderoxygen_editcode_readability_analysis參見演示上述所有操作均使用gpt-3.5-turbo模型。
可以使用JSON文件定義自定義操作。有關示例,請參見actions.json 。可以在配置中設置自定義操作的路徑(請參見上面的配置示例中的actions_paths字段)。
自定義操作的一個示例可能是這樣的:( #標記註釋)
{
  "action_name" : {
    "type" : "chat" , # or "completion" or "edit"
    "opts" : {
      "template" : "A template using possible variable: {{filetype}} (neovim filetype), {{input}} (the selected text) an {{argument}} (provided on the command line), {{filepath}} (the relative path to the file)" ,
      "strategy" : "replace" , # or "display" or "append" or "edit"
      "params" : { # parameters according to the official OpenAI API
        "model" : "gpt-3.5-turbo" , # or any other model supported by `"type"` in the OpenAI API, use the playground for reference
        "stop" : [
          "```" # a string used to stop the model
        ]
      }
    },
    "args" : {
      "argument" : {
          "type" : "strig" ,
          "optional" : "true" ,
          "default" : "some value"
      }
    }
  }
} edit策略包括與輸入並排顯示輸出,並用於進一步的編輯請求。目前,僅針對chat類型實施edit策略。
display策略顯示了浮子窗口中的輸出。
append並replace直接在緩衝區中修改文本。
使用ChatGPT和ChatGPTEditWithInstructions時,可用以下密鑰限制:
<C-Enter> [兩者]提交。<Cy> [兩者]複製/縮減最後一個答案。<Co> [兩個]切換設置窗口。<Ch> [兩個]切換幫助窗口。<Tab> [兩個]在Windows上循環。<Cf> [CHAT]在模式下循環(中心,堅持右)。<Cc> [兩者]要關閉聊天窗口。<Cp> [CHAT]切換會話列表。<Cu> [聊天]滾動聊天窗口。<Cd> [聊天]向下滾動聊天窗口。<Ck> [CHAT]從最後一個答案中復制/洋基代碼。<Cn> [CHAT]開始新的會話。<Cr> [CHAT]草稿消息(創建消息而不將消息提交給服務器)<Cr> [CHAT]開關角色(在用戶和助手角色之間切換以定義工作流程)<Cs> [兩個]切換系統消息窗口。<Ci> [編輯窗口]使用響應作為輸入。<Cd> [編輯窗口]查看左側和右窗格之間的差異,並使用diff模式命令打開“設置窗口”(使用<Co> )時,可以通過在相關配置上按Enter進行修改設置。設置在各節中保存
將它們添加到您的whatkey插件映射中以方便綁定
 c = {
  name = " ChatGPT " ,
    c = { " <cmd>ChatGPT<CR> " , " ChatGPT " },
    e = { " <cmd>ChatGPTEditWithInstruction<CR> " , " Edit with instruction " , mode = { " n " , " v " } },
    g = { " <cmd>ChatGPTRun grammar_correction<CR> " , " Grammar Correction " , mode = { " n " , " v " } },
    t = { " <cmd>ChatGPTRun translate<CR> " , " Translate " , mode = { " n " , " v " } },
    k = { " <cmd>ChatGPTRun keywords<CR> " , " Keywords " , mode = { " n " , " v " } },
    d = { " <cmd>ChatGPTRun docstring<CR> " , " Docstring " , mode = { " n " , " v " } },
    a = { " <cmd>ChatGPTRun add_tests<CR> " , " Add Tests " , mode = { " n " , " v " } },
    o = { " <cmd>ChatGPTRun optimize_code<CR> " , " Optimize Code " , mode = { " n " , " v " } },
    s = { " <cmd>ChatGPTRun summarize<CR> " , " Summarize " , mode = { " n " , " v " } },
    f = { " <cmd>ChatGPTRun fix_bugs<CR> " , " Fix Bugs " , mode = { " n " , " v " } },
    x = { " <cmd>ChatGPTRun explain_code<CR> " , " Explain Code " , mode = { " n " , " v " } },
    r = { " <cmd>ChatGPTRun roxygen_edit<CR> " , " Roxygen Edit " , mode = { " n " , " v " } },
    l = { " <cmd>ChatGPTRun code_readability_analysis<CR> " , " Code Readability Analysis " , mode = { " n " , " v " } },
  },

