taller lora sat groundstation
1.0.0
This repository contains the code, information and documentation necessary to set up a satellite signal mini-receptor with LORA modulation.
The type of receiver is based on the standards of the Tinygs project created by:
Tinygs is defined as an open network of land stations distributed throughout the world to receive and operate LORA satellites, weather probes and other flying objects, using cheap and versatile modules. Unlike others, great knowledge is required in telecommunications or radio amateur licenses. It is oriented on the one hand to the participation of people in the Maker world without great technical demands. And on the other to serve the satellite operators receiving telemetry and other data in real time thanks to the world deployment of the stations network.
The Tinygs network is growing exponentially and is intended to play an important role in the strategy of public and private mini-satellites projects.
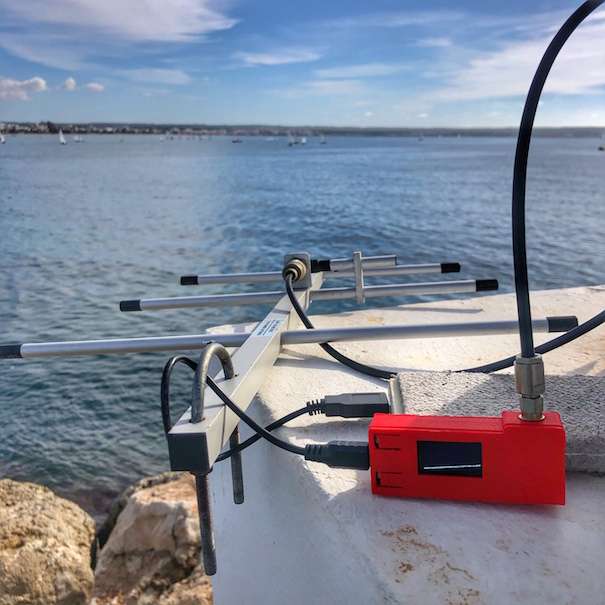
In the choice of microcontroller there are many options. For the workshop we have chosen the TTGO LORA32 V2 (433MHZ) In addition to this plate you will need the following:
The installation procedure is constantly evolving, so we are going to point out the main blocks without going into details. Details that you can consult in the corresponding links.
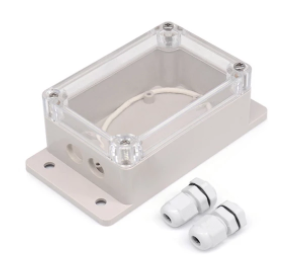
As a support for microcontroller plaque we have two options:
The antenna is the key piece you will have to pay attention frequently. Because it will require common reorientations and changes based on the satellite that you have as a priority of reception. There are multiple options, from the most DIY to calibrated commercials that you can buy online:
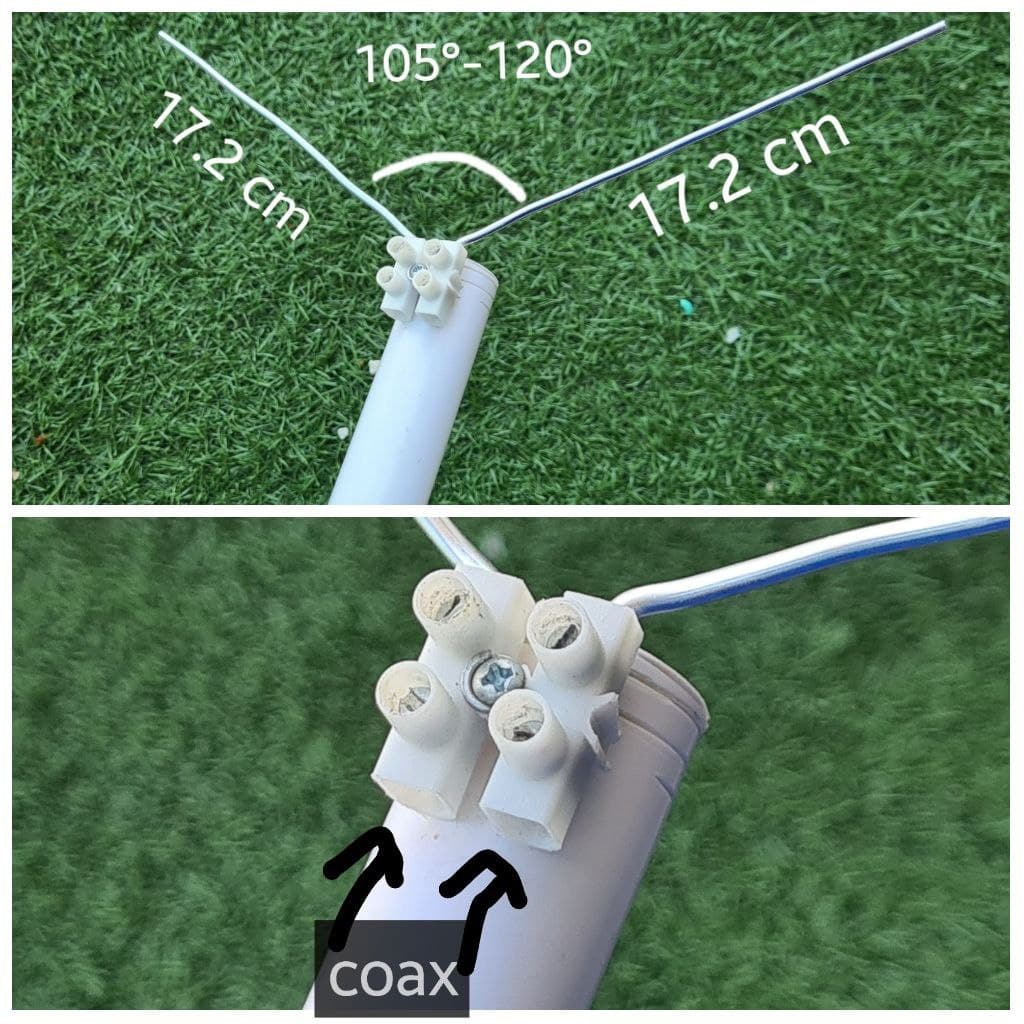
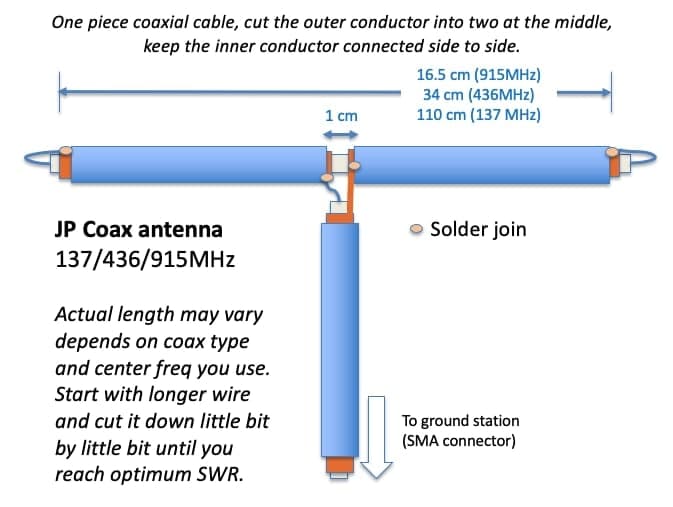
Dipolo, is a simple antenna composed of two elements and easy to build:

Wave room antenna (AKA Land flat)
DENNNA MOBILE, GENERALEMENT OF DUAL BAND OF RADIOAFICIATED 2M/70CM
Directional: Yagi antenna from UHF430-450MHz
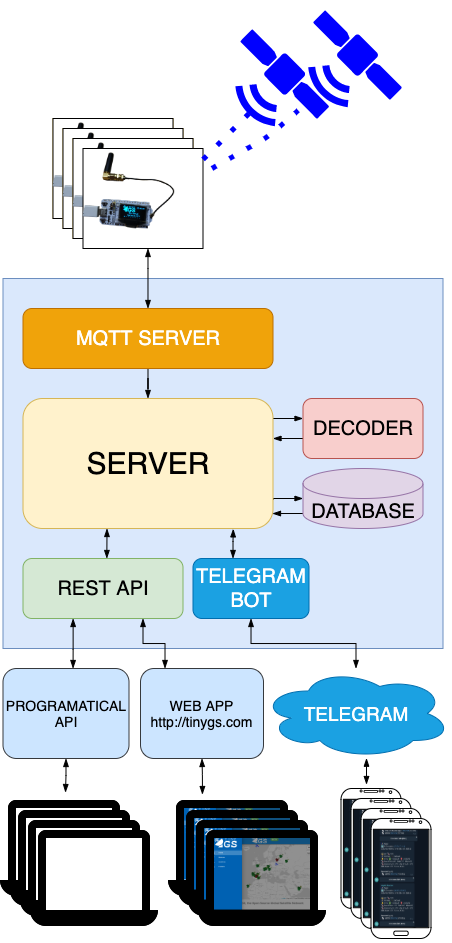
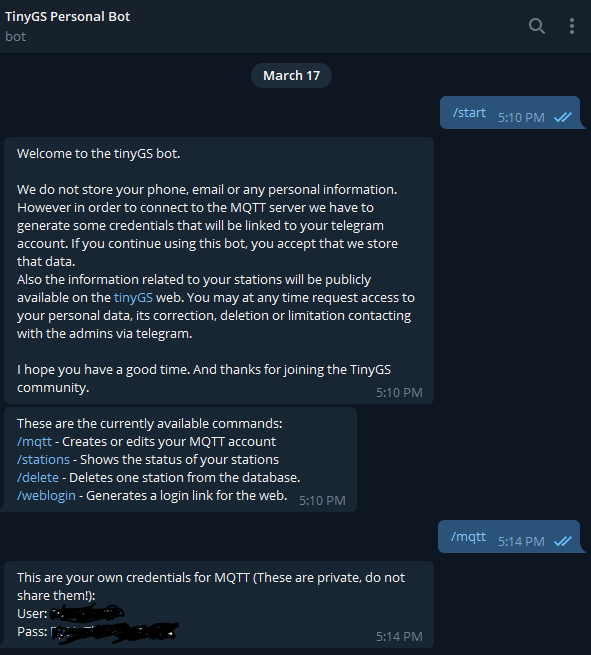
The TinyGS backoffice publishes two topics with information from your station. This control application is based on subscription to them:
 tinygs/[user]/[nombre de la estación]/cmnd/begin
tinygs/[user]/[nombre de la estación]/cmnd/frame/0
Node -red is a visual programming tool. Graphically show relationships between objects (nodes) that are functions that transform the message that comes from the preceding nodes. Using standard nodes, the user does not need to program. Although if you want, you can create functions programming in JavaScript. In short, it allows, from a web browser, to build flows to process information and communicate it through countless integrations.
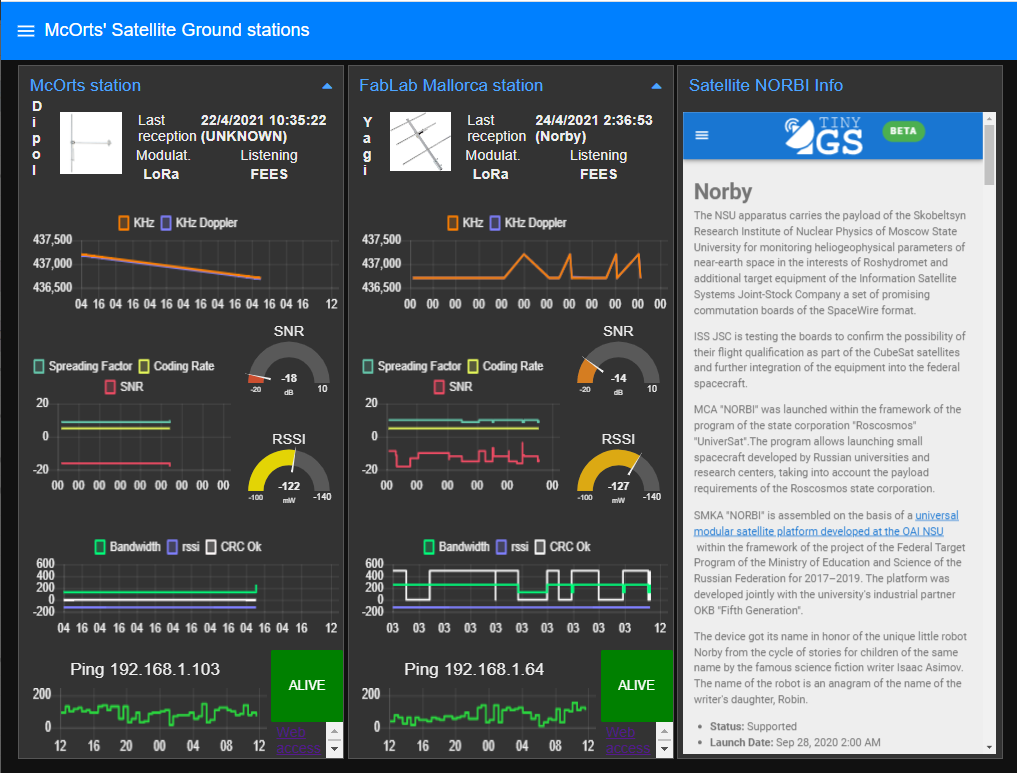
We are going to set up a dashboard that will allow us to monitor up to two Tinygs stations. It is our personal noc that will allow us:
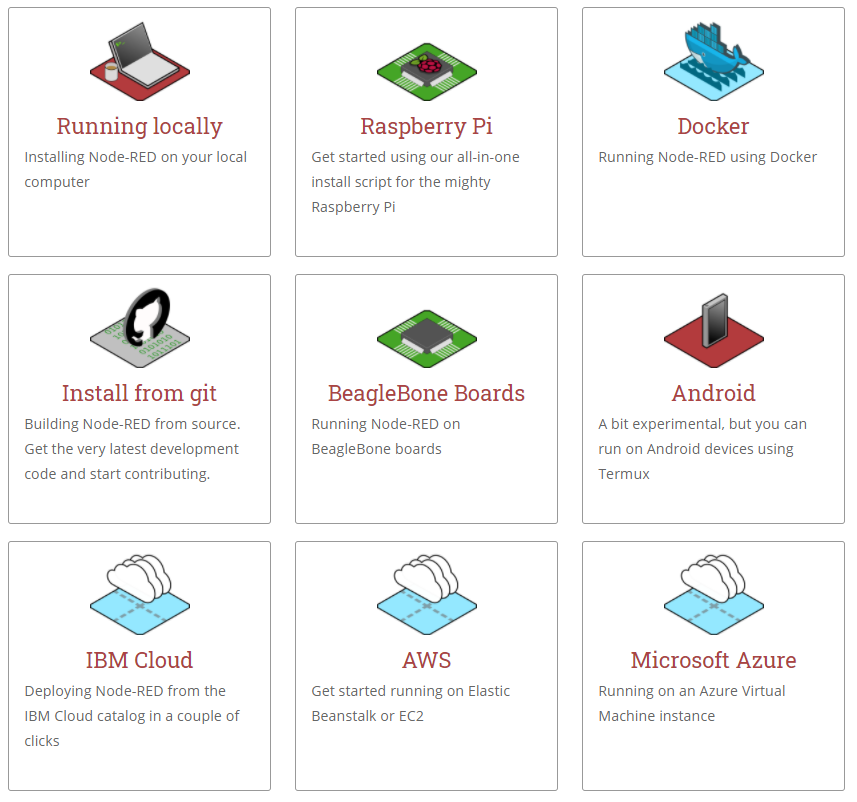
In the first place we will need to have an instance of NODE-RED installed. The most current recommendation is to do it in a Docker container. But using a single Board Computer such as the Raspberry Pi is very suitable because the process and memory capacity requirements are very low.
We will also need some additional 'nodes' to which the installation includes.
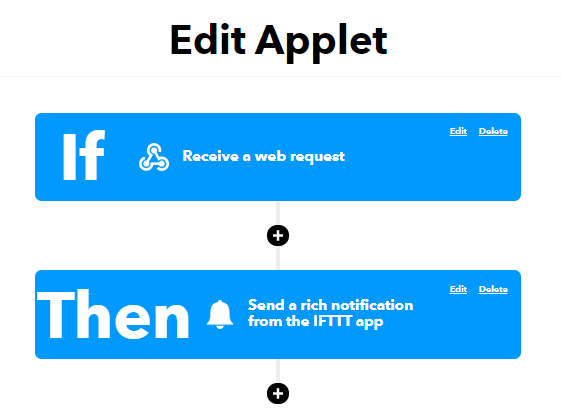
To receive the notices we are going to use the IF This The That service that will be easily integrated into Node -red using the HTTP petition node.
https://maker.ifttt.com/trigger/TinyGS/with/key/[clave de IFTTT]?value1={{{payload}}}
The service to configure is simple. We will use the webhooks component to capture the event and notifications to skip the notice on our device: mobile, smartwatch ...
Once the NODE-RED server and our event in IFTTT are configured. We have three last steps:
 CREATE TABLE ` tinygs ` (
  ` dtg ` timestamp NOT NULL DEFAULT CURRENT_TIMESTAMP ,
  ` station_id ` varchar ( 30 ) CHARACTER SET utf8 COLLATE utf8_spanish_ci NOT NULL ,
  ` frame ` varchar ( 512 ) CHARACTER SET ascii NOT NULL
) ENGINE = InnoDB DEFAULT CHARSET = latin1 COMMENT = ' Opens of the house ' ' s main door ' ;
ALTER TABLE ` tinygs `
  ADD PRIMARY KEY ( ` dtg ` , ` station_id ` );
Import in Node -red the nodered_dashboard4gs.json file that contains all flows. 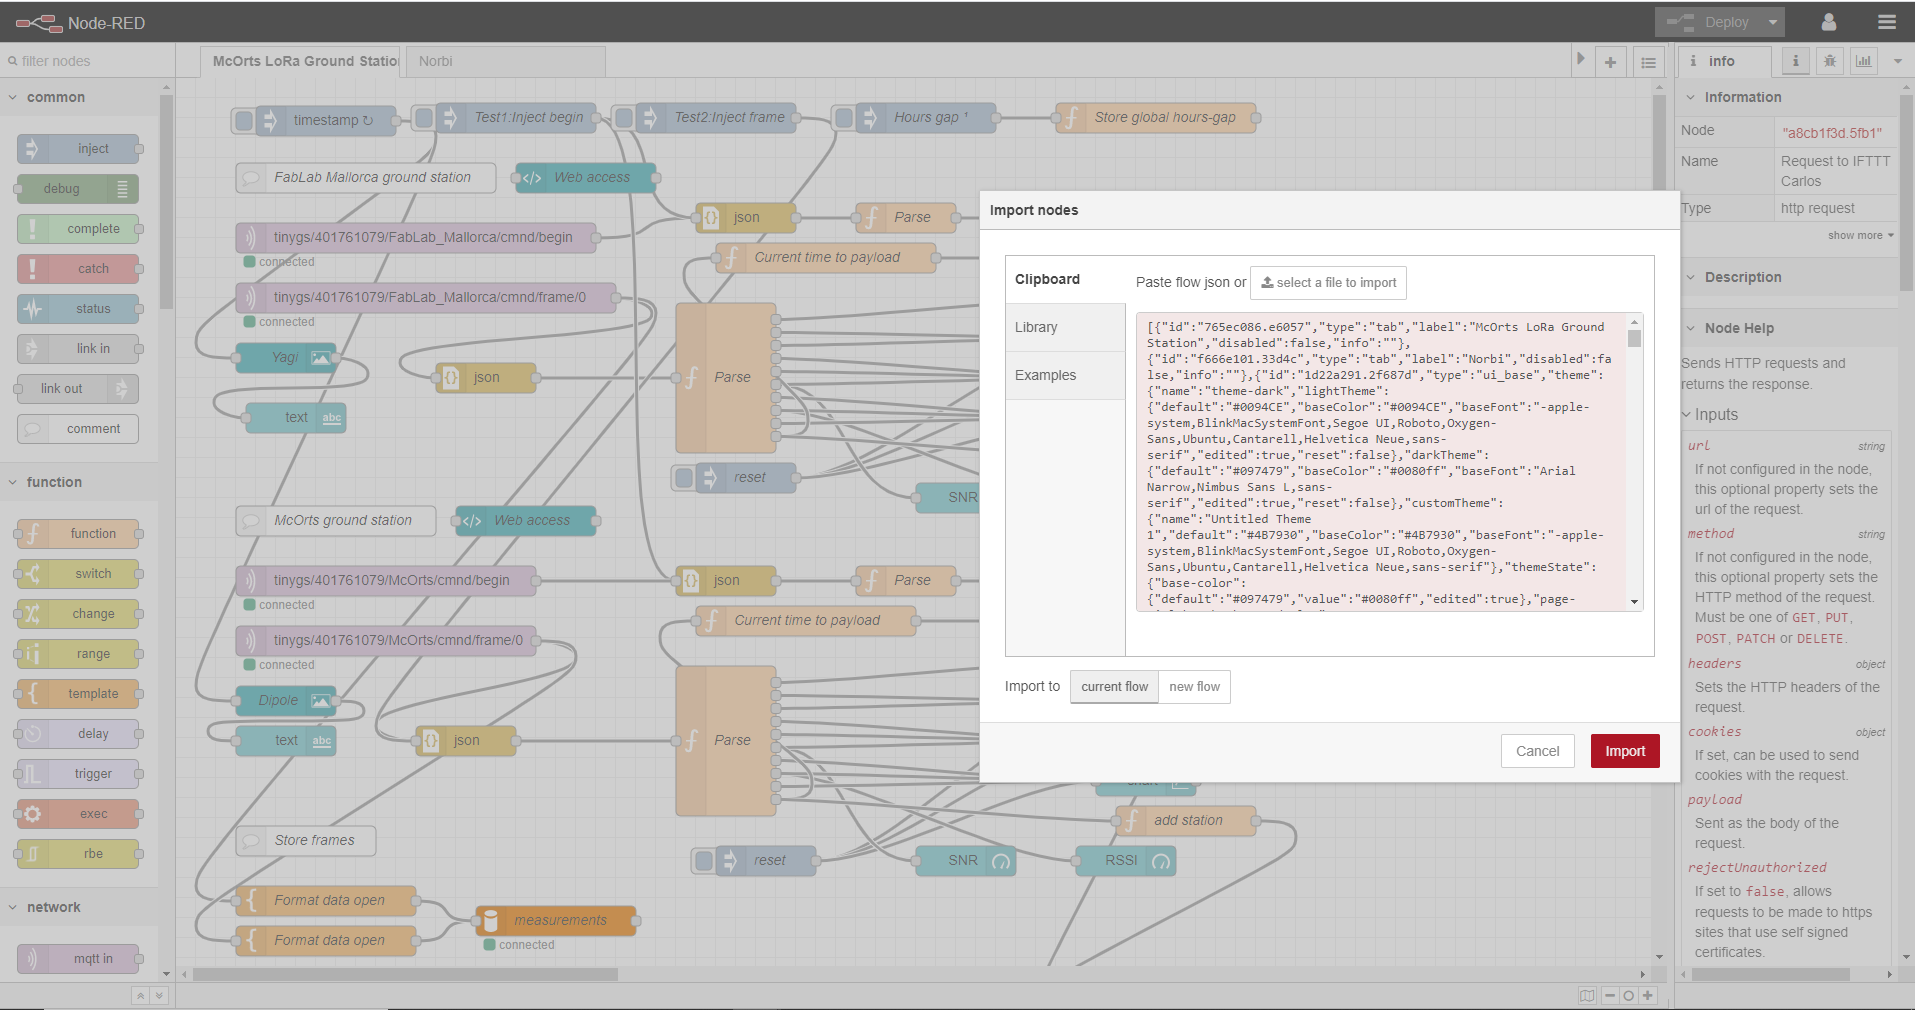
Configure credentials and hash to access:


