robotics ui
1.0.0
Robotics UI is a web interface solution for ROS 2 powered robots using React and ROS 2 Iron.
Our vision is to create software that allows you to instantly add a web interface to every ROS 2 robot by configuring a simple JSON file.
The tool consists of two parts: a Python backend, which acts as a translation layer between ROS 2 and the React frontend. To achieve this, we are translating ROS 2 messages into JSON and back.

In the frontend, we use a window-based design where each window is its own micro program interfacing with the JSON data from the backend. This allows us to take a plugin-style approach and for the user to customize their dashboard. The goal is for users to create their own custom plugins.
There is also phone support featuring a more compact design.
ROS 2 Iron Setup we use
To use the ROS 2 packages, you need to install the following packages:
Setup ROS
export ROS_DISTRO=ironSetup FastAPI
sudo apt install python3-pip
pip install fastapi

pip install uvicorn
Other Dependencies
pip install pyyamlInstall NVM
sudo apt update
curl -o- https://raw.githubusercontent.com/nvm-sh/nvm/v0.35.3/install.sh | bash
nvm install nodeNavigate to your ROS 2 workspace src folder and download the package
cd ~/ros2_ws/src
git clone https://github.com/sciotaio/robotics-ui.gitNavigate to your workspace folder and install the ros2_webinterface package
cd ~/ros2_ws
colcon build --packages-select ros2_webinterface && source install/setup.bashNavigate to the React Project folder
cd ~/ros2_ws/src/robotics-web/react/robotics_ui/Install the dependencies with npm
npm install# test launch
ros2 launch ros2_webinterface test.launch.py
# main launch (only the webinterface)
ros2 launch ros2_webinterface webinterface.launch.py
# waypoint_manager launch (Backend for the OpenStreetMap Plugin)
ros2 launch ros2_webinterface waypoint_manager.launch.pycd ~/ros2_ws/src/robotics-web/react/robotics_ui/
npm startTODO: Explain how to change the Host and Proxy settings and how to change the backend address
The user guide explains how to customize the application and how to use it in your project.
This guide explains how to create and configure the JSON configuration file to create your custom dashboard.
Start the frontend and open it in a web browser (default address http://localhost:3000/)
The following page should open:
Go to the section JSON Editor.
In the JSON Editor, you have multiple options:
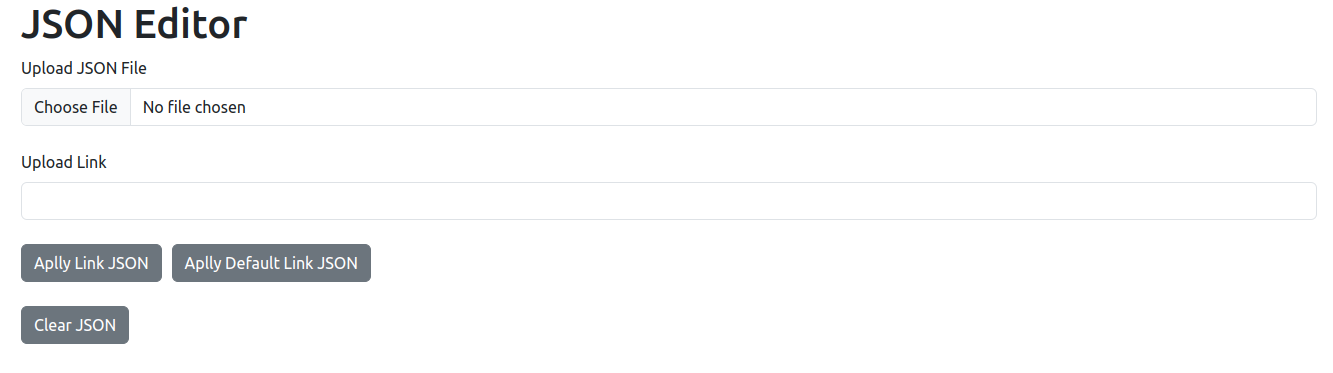
You can either upload a JSON configuration file or a Dashboard Link.
Dashboard Links include the configuration JSON as link parameters. For example: http://localhost:3000/dashboard/settings?component=[{"id":"StringTopic","state":false,"render_type":"String","position":{"x":0,"y":0},"size":{"width":200,"height":200},"topic":[{"name":"topic1","topic":"/topic1","type":"String","route":"/subscriber/topic1"}]}]&preset_list=undefined
To apply the Link JSON, you can then click the "Apply Link JSON" button.
Or you can use the "Apply Default Link JSON" button to choose the pre-saved demo link.
To configure the JSON file, you can use the web form.
As an introduction, let's add a simple component:

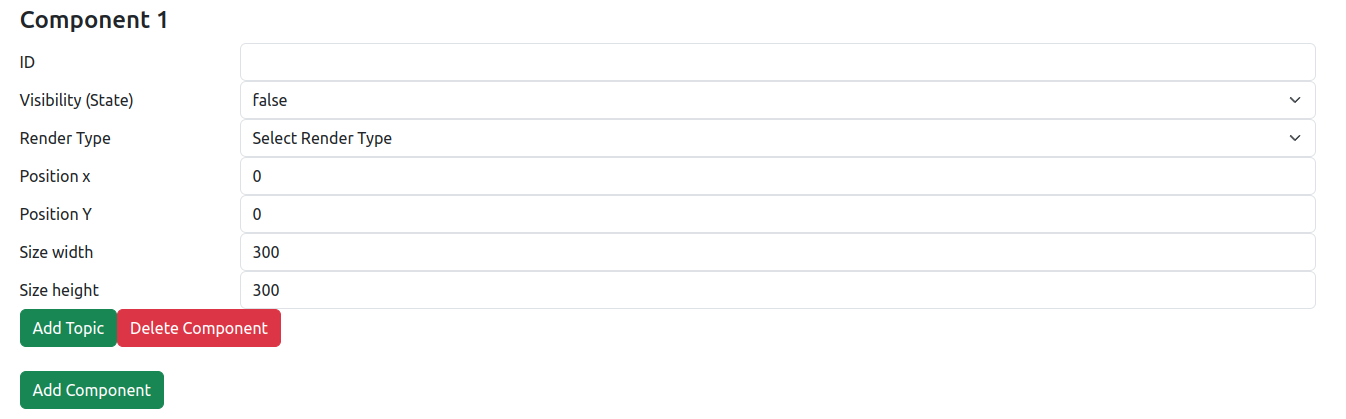
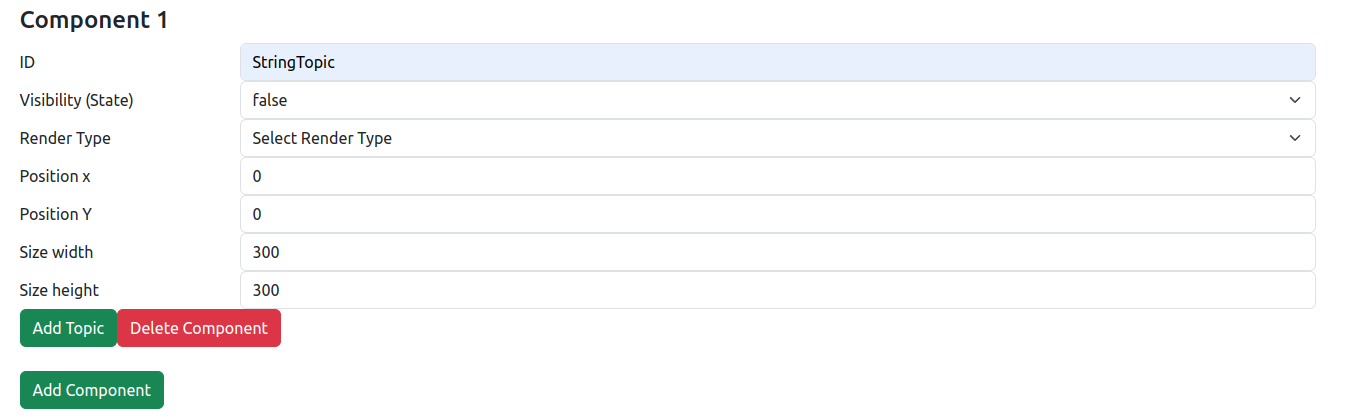
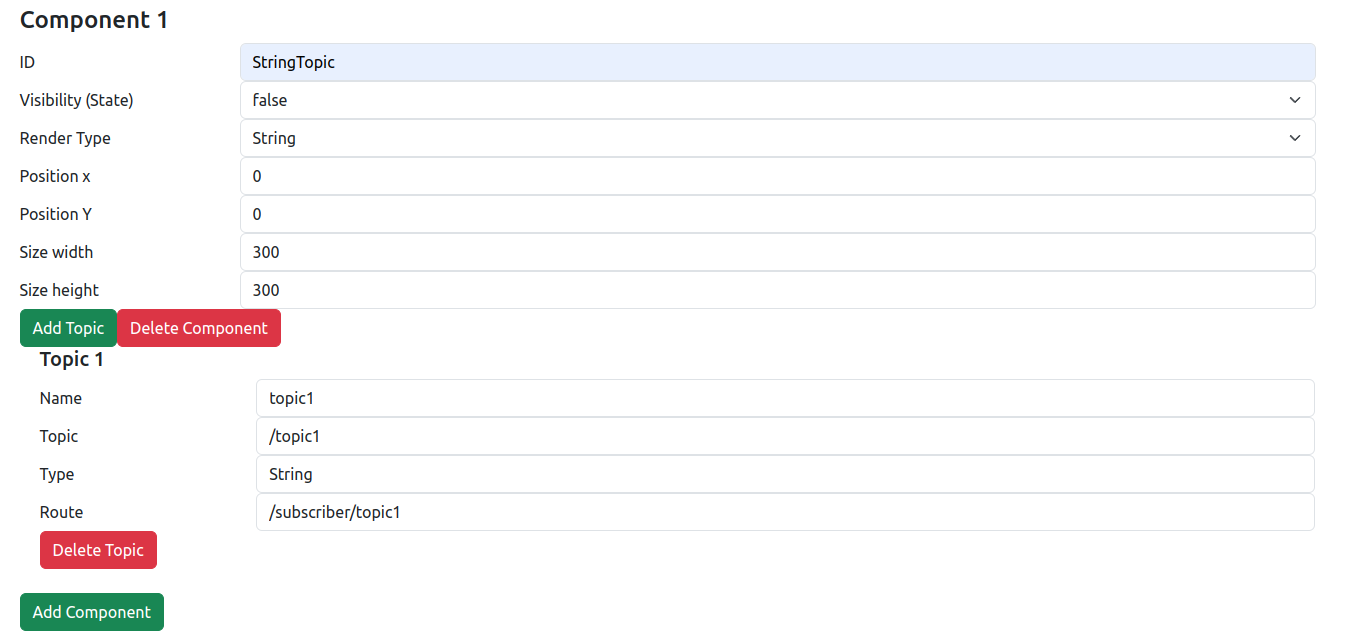
In our case, the String Render Type comes with a preconfigured Topic.
Next, we have to configure the topics of the component. Topics give the frontend the information needed to make API calls to the backend, and they each have 4 properties:
The number and order of topics is defined by the type of plugin we are using, so consult the plugin documentation for that information.
If we want to delete or add topics, we can use the "Add Topic" or "Delete Topic" buttons.
To use the configuration, we have multiple options:
With the "Generate JSON" button, we can print the JSON file to the Dev Tool console.
With the "Download JSON" button, we can download the JSON file.
With the "Use JSON" button, we can directly open the dashboard with the configured settings.
If you want to access the same exact dashboard in the future, you can also simply copy the link in the Link section.
To use a custom configuration file in the backend, you have to set this as a property in your custom launch file.
An example launch file could look something like this:
import os
from launch import LaunchDescription
from launch_ros.actions import Node
from launch.actions import IncludeLaunchDescription
from launch.launch_description_sources import PythonLaunchDescriptionSource
from ament_index_python.packages import get_package_share_directory

def generate_launch_description():
    share_dir = get_package_share_directory('ros2_webinterface')
    launch_dir = os.path.join(share_dir, 'launch')

    webinterface = IncludeLaunchDescription(
        PythonLaunchDescriptionSource(
            os.path.join(launch_dir, 'webinterface.launch.py')
        ),
        launch_arguments={
            "yaml_config": "topic_list.yaml", # Name of the YAML config

 file
            "json_config": "topic_list.json", # Name of the JSON config file
            "config_folder": 'default',       # Path to the folder
                                              # or 'default' to use the
                                              # standard config folder
        }.items(),
    )

    ld = LaunchDescription()
    ld.add_action(webinterface)
    return ld
The YAML file can be empty—it gets automatically overwritten with the correct config on launch.
Plugins allow you to customize your dashboard even further.
The app currently comes with 3 different plugins.
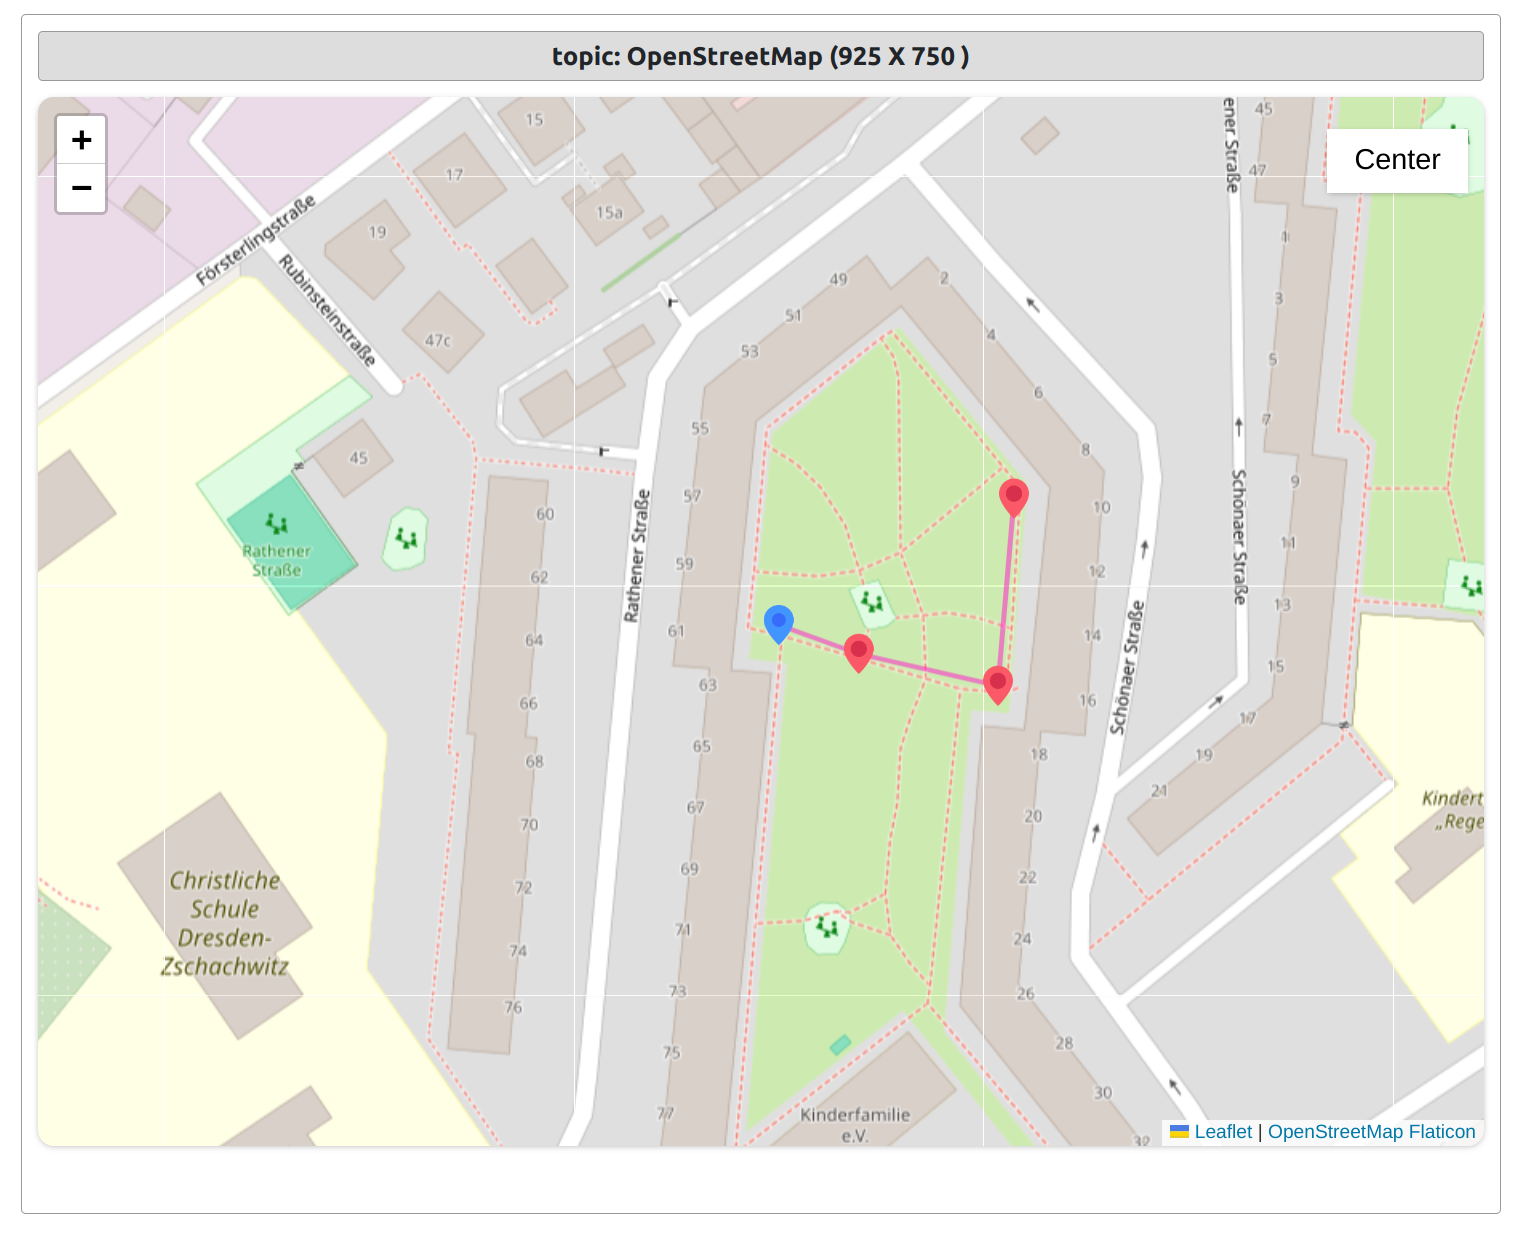
Open Street Map Plugin Guide
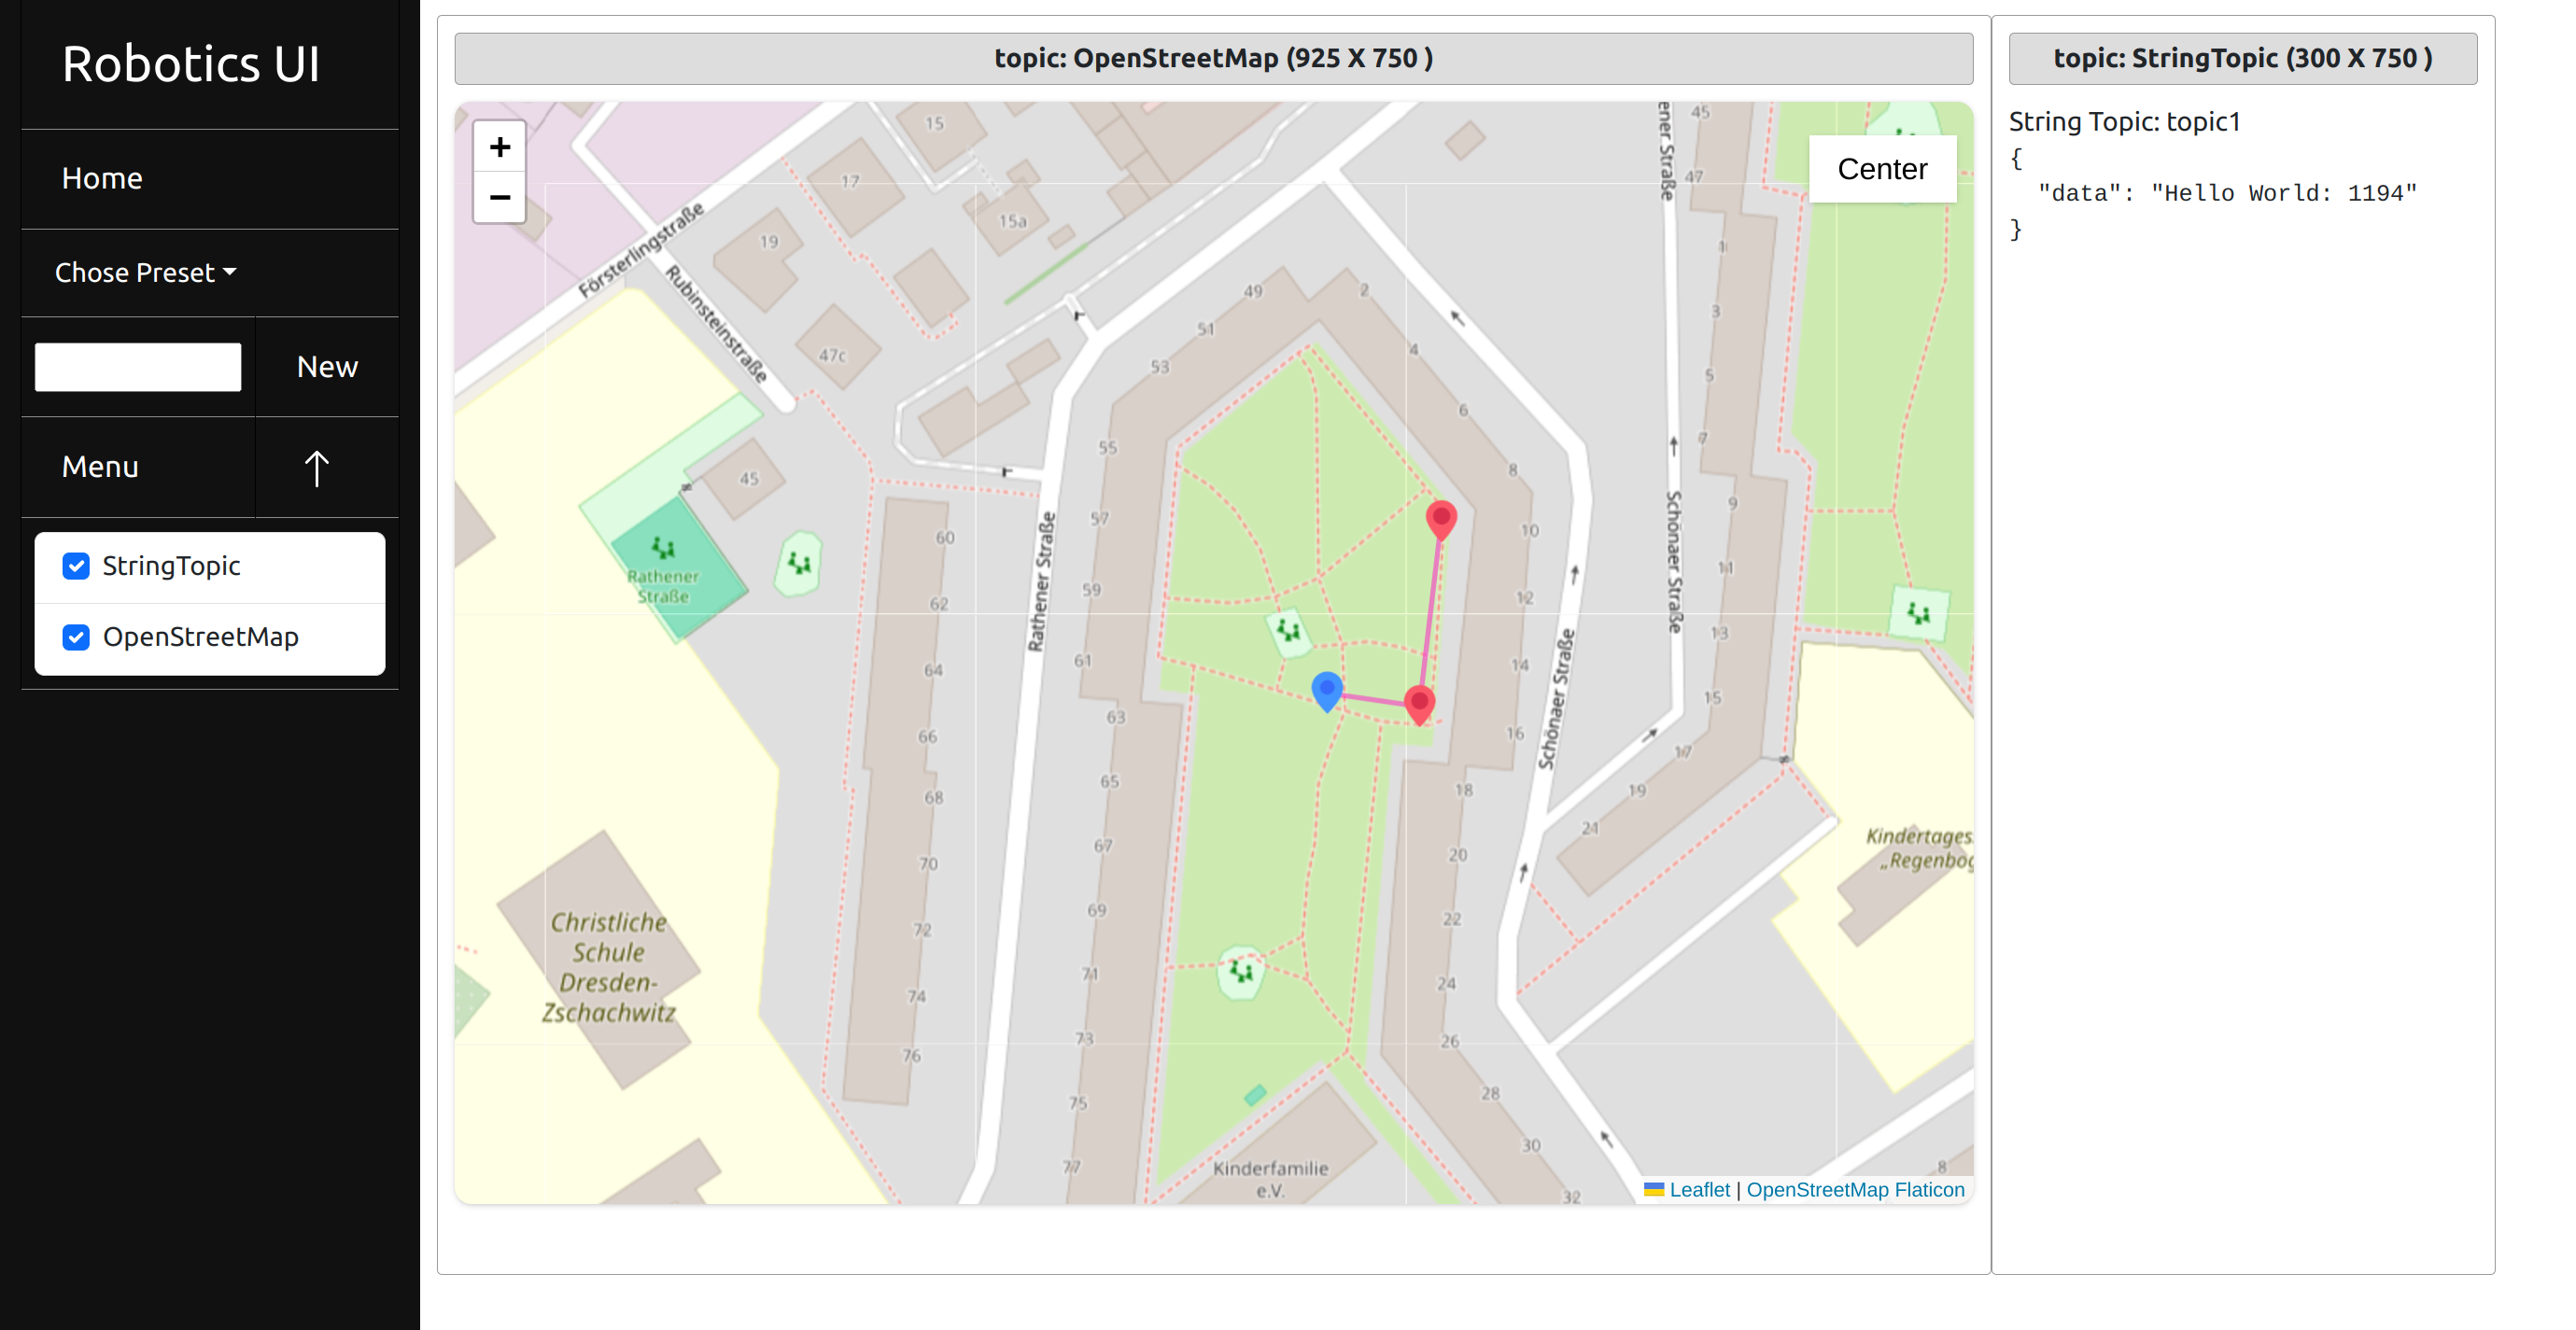
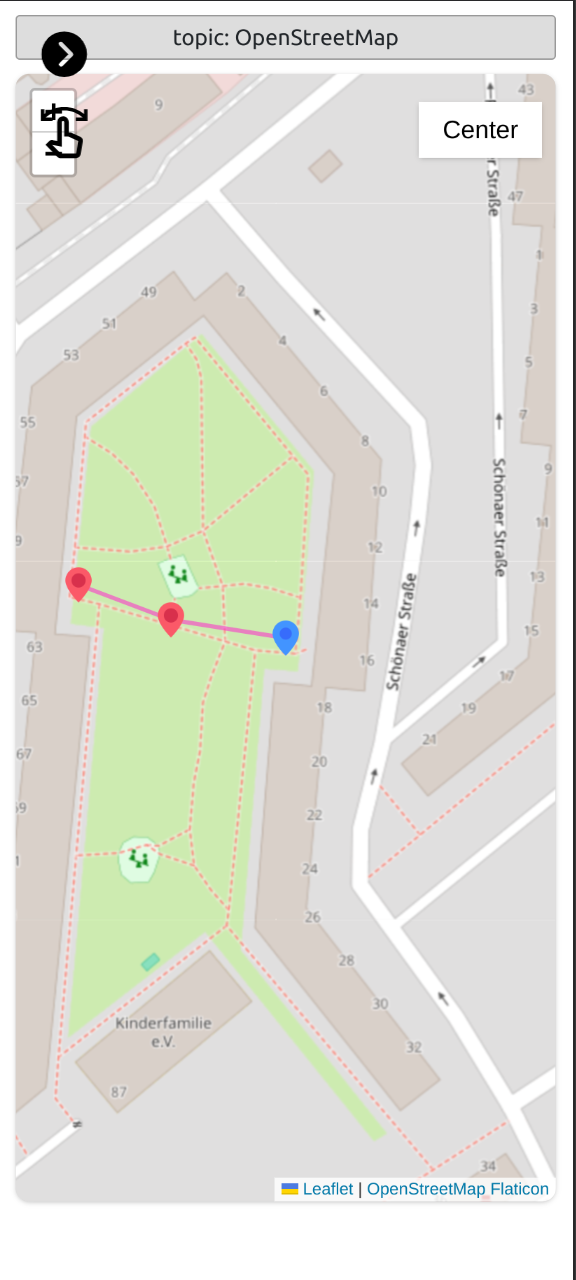
The Open Street Map Center allows you to track your robot on the map and send GPS waypoint instructions with a simple click.
You can also center on the robot with the center button as well as delete and set waypoints.
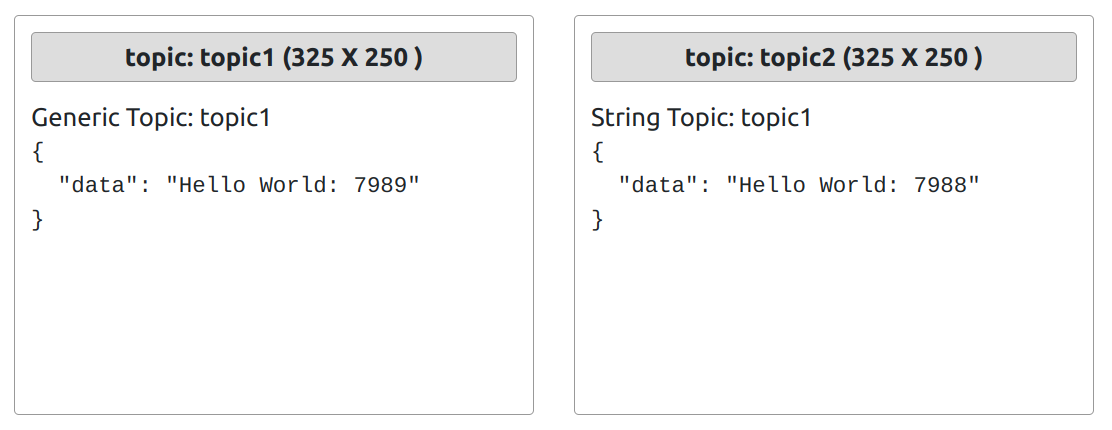
This plugin allows you to simply display the incoming JSON data.
Please send us your suggestions for plugins.
Guide on how to install and configure plugins:
Plugin Guide
std_msgs.msg
sensor_msgs.msg
std_msgs.msg
More formats coming in future updates.


