Bittoin Telegram Bot
1.0.0

This multifunctional bot can do a little of everything! It is a poked, URL shortens and even gets to you bored if you have no idea what to do. It was developed on my Twitch channel live with the purpose of all learning various techniques, functions and implementation of ideas within just one project. In addition, it does not collect any data from the user who interacts with him on Telegram, only responds with requests made.
Below you can see which APIs and technologies were used in the project, instructions to install the necessary packages and use of the application. The project has been completed and placed to work in the cloud, ensuring that everyone can usurfr at any time. Just add @bittoinlivebot on telegram and have fun!
The platform used to run the bot in the cloud was Heroku, as it is fast, simple and efficient. Using this platform is not mandatory for Bot Bot and cloud execution, as it can run locally on your machine or other platforms can be used, such as AWS, Google, among others.
List of APIs used in the development of the bot:
Source: Public API List at Github
Main python packs used in the development of the bot
Python version used in the project: Python 3.8
To install the packages that were used in this project and replicate it on your machine or create another based on this, some information is needed to work out! First, if you want to replicate in its own bot, you will need to create your bot on the Telegram, using the @BotFather chat. In this chat you can create a bot, edit commands, add description, etc. But most importantly, to replicate the project, it is to save the token API generated in its creation. This token can be placed in the bot.py file in the project, in the bot_token variable, so that all features run straight to your bot.
There are two ways to install everything needed to execute the code, you must choose the one you find best. Through requirements.txt or Pipenv . Bot configuration in the cloud will not be addressed here, as the platform documentation itself (Heroku) has the step by step to put the code running there, but it is worth noting that at least one of these package installation methods is necessary for the configuration of the environment in the cloud as well as on your computer.
Installing by RequirMents.TXT is simple, as you just need to have the pip installed on the machine and run the following command:
pip install requirments.txt
The advantage of installing this way is fast, simple and easy. However, it should be noted that this method only ensures that the main libraries used in the project are installed in their correct versions, but not their subsidiaries. From now on a few years maybe go wrong for it, but you don't have to worry.
To install the packets using Pipenv is simple, first ensure that Pipenv is installed on your machine, with the following command:
pip install pipenv
Then install the packages through the pipfile.lock file, with the command:
pipenv install --ignore-pipfile
With everything installed, you will only need to run the Pipenv Shell command within the project folder and as soon as it is inside the virtual environment with everything installed, it runs the code normally.
pipenv shell
python main.py

In this topic it will be explained how the project is structured, between the files and how the codes connect, so that everyone understands and can modify the way necessary. The way of implementing is explained already in the documentation of libraries itself, so the focus will be on the way it was organized in this project. In the following figure it is possible to observe how the files are structured and from this we will enter the connections between them (IMG IMG Folder ignored as it contains only the images used in this readme).
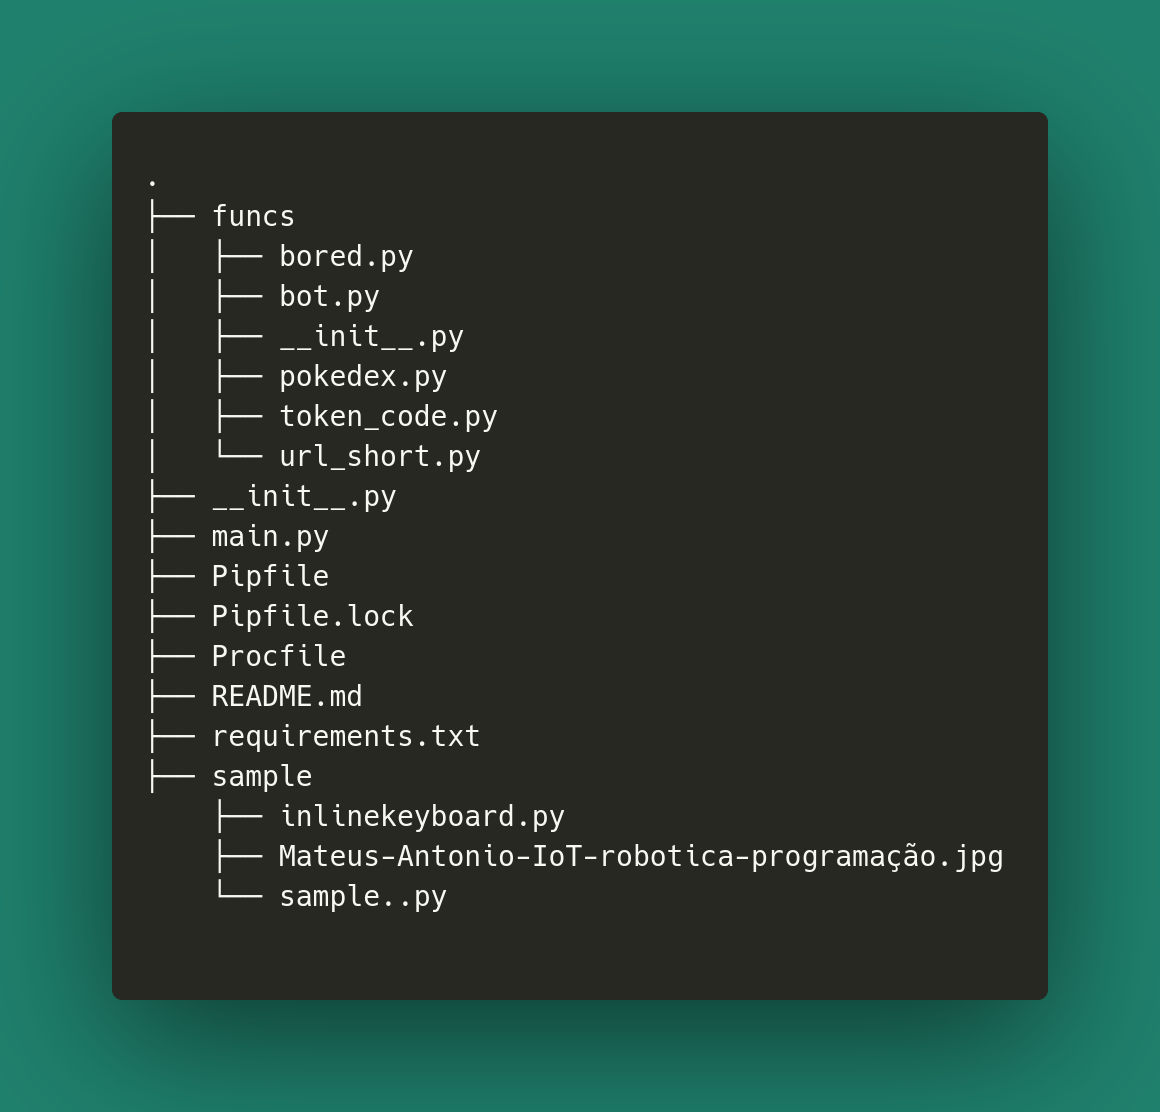
The project can be divided into three sections:
The entire bot organization and functionality codes are within the funcs/ . The Python main.py file contains only the creation of the BOT class object that is inside bot.py to perform the Bot execution with the run() .
Each functionality created for this project has its own class, class Pokedex() , class Bored() and class Urlshort() . To keep the code organized and easy for maintenance, each command existing in the bot is crowded in the class methods. In the Bot use section you should note that the names of the methods are the same as the names of the Bot's own commands, so that there is no confusion regarding the implementation of each thing. As some APIs were used for the collection of Bot data, so each class also has its base URL, in order to separate each API well and organize their respective requests and particularities. An example of command implementation can be seen below, with the most basic command of the bot, using the send_message() function with the written text, for the own person who called the command.
 def start ( self , update , context ):
    context . bot . send_message ( chat_id = update . effective_chat . id , text = "Bem vindo ao bot da transmissão (Ao vivo, não de covid) n Acesse twitch.tv/bittoin para mais informações!" )
Lastly we have the main class of the bot, in the bot.py file, which matters all previously mentioned functionality classes, creates their respective class objects and uses the methods to manage the implemented and used commands in the online bot chat. After we have an object of the class of our functionality, we create a handler, where the method that will be called by the bot and its command will be passed, as can be seen below:
pokedex_handler = CommandHandler ( 'pokedex' , self . pokedex . pokedex ) The first argument is the name of the command that will be called in the chat and the second the method that will be called when operated. After that we use Bot's dispatcher , which is responsible for managing and making all created handlers work in order to respond to all user requests and maintain the internal organization of calls.
self . dispatcher . add_handler ( pokedex_handler ) At the end of the process we have the execution of the bot itself, with all its features added to the dispatcher and is waiting for the completion.
 # Inicia a execução do bot
self . updater . start_polling ()

# Roda o bot até apertar CTRL + C ou receber um SIGNAL
self . updater . idle ()If there is any error in project execution related to requests involving error in translation, access this link with the solution.
The sample/ has the Sample.py and Inlinekeyboard.py files. Sample.py has the first tests performed on the Bot at the beginning of Live to test how the functions of the Telegram Library for Python work in order to discover and validate some properties. You may notice that as everything is in just one file, it is messy and difficult to separate, so the organization of funcs/ has been adopted. In InlineKeyboard.Py the example was taken straight from the library documentation, with the objective of testing keys/buttons on the Telegram chat to implement the function of Bored API.
Package installation has already been explained earlier in the installation section, so the focus will be on the Procfile file. Procfile is what will be executed in the cloud through the Heroku platform. It is a simple file and contains the simple command:
Worker: Python Main.py
This command simply allocates an instance of the server in the cloud (Worker) to run our bot through the main.py file, which activates the execution.

Here are listed all the features that were discussed during the written and filled lives. Each of these topics was implemented and tested live. The idea is that during the lives the public helps to create the features, determining the requirements and how it will be at the end.

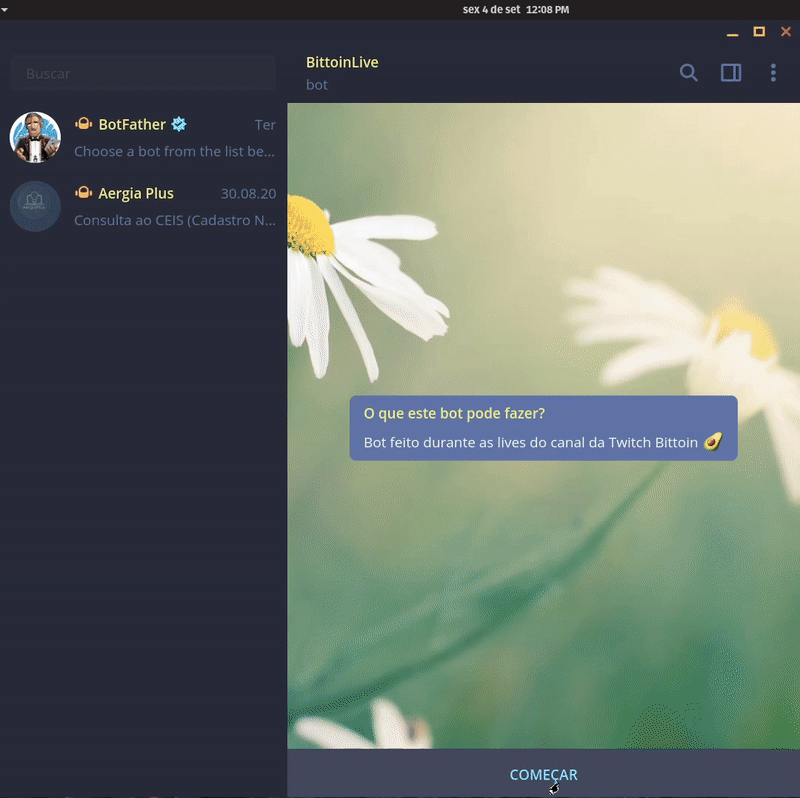
In this section will be shown the results obtained with the bot and use cases for each functionality. Enjoy and add the bot to the telegram and test too! Just look for @BittoinLiveBot and start typing the commands on the chat.
If you want to see a complete and more explained demonstration of how everything works, visit my Instagram or my youtube channel that will have videos on IGTV/channel with everything and a little more!
/start The /start command displays only a welcome message.

Here all commands of Pokédex functionality are presented.
/pokedex nome_pokemon 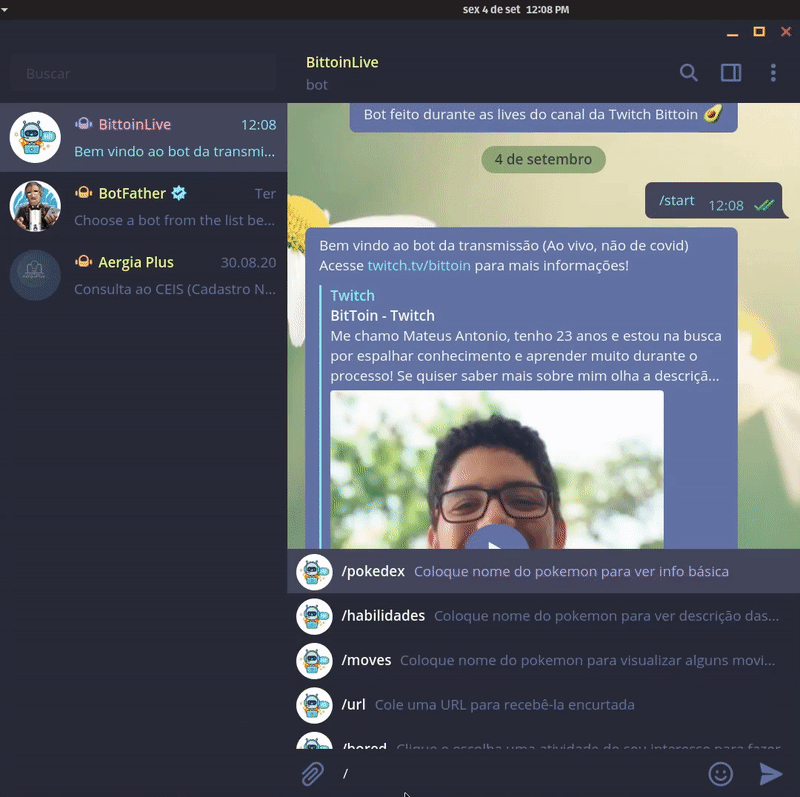
/pokedex numero_pokemon 
/habilidades nome_num_pokemon 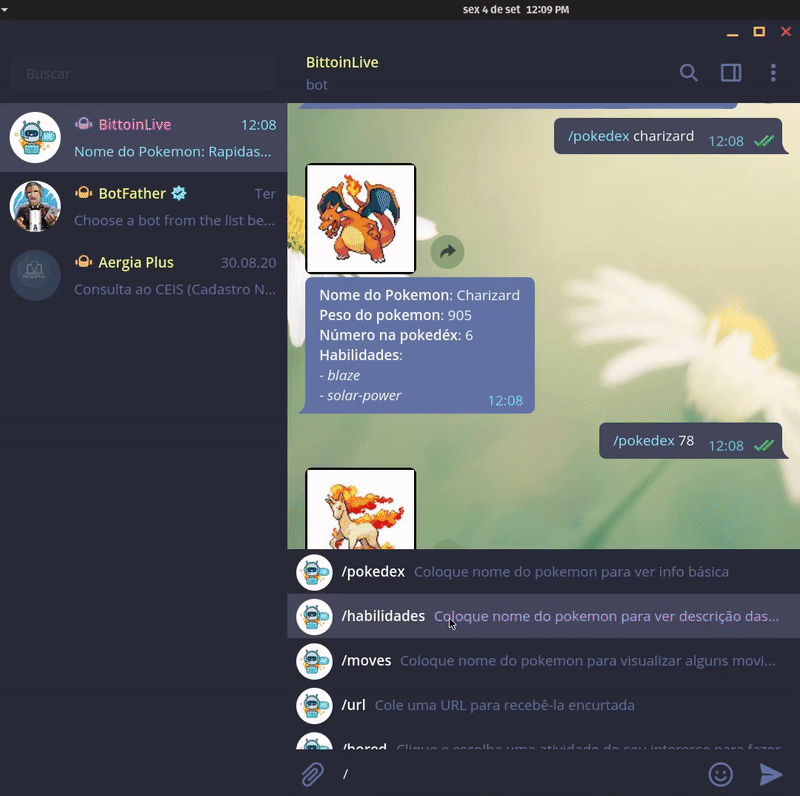
/moves nome_num_pokemon 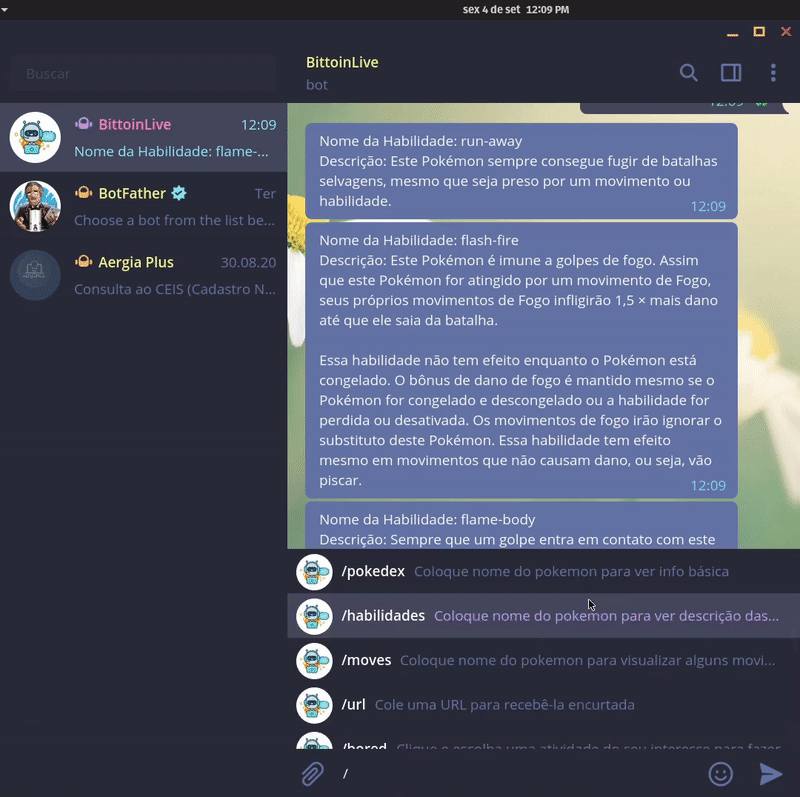

Here all commands of the URL shortered functionality are presented.
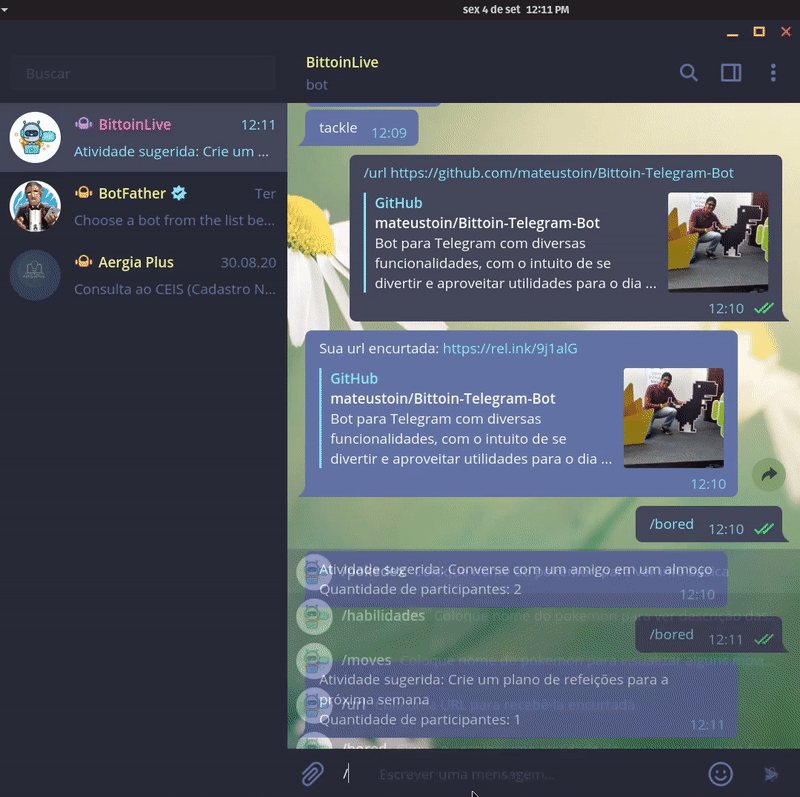
/url link 
Here all commands of the tool that takes you from boredom are presented here.
/bored 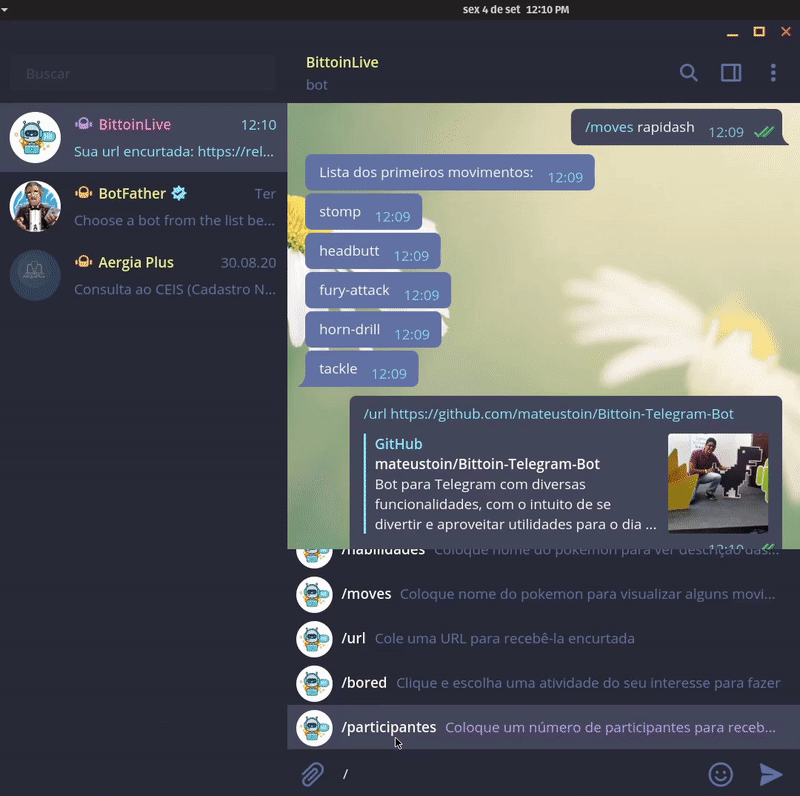
/participantes num_participantes