photoview
vements!

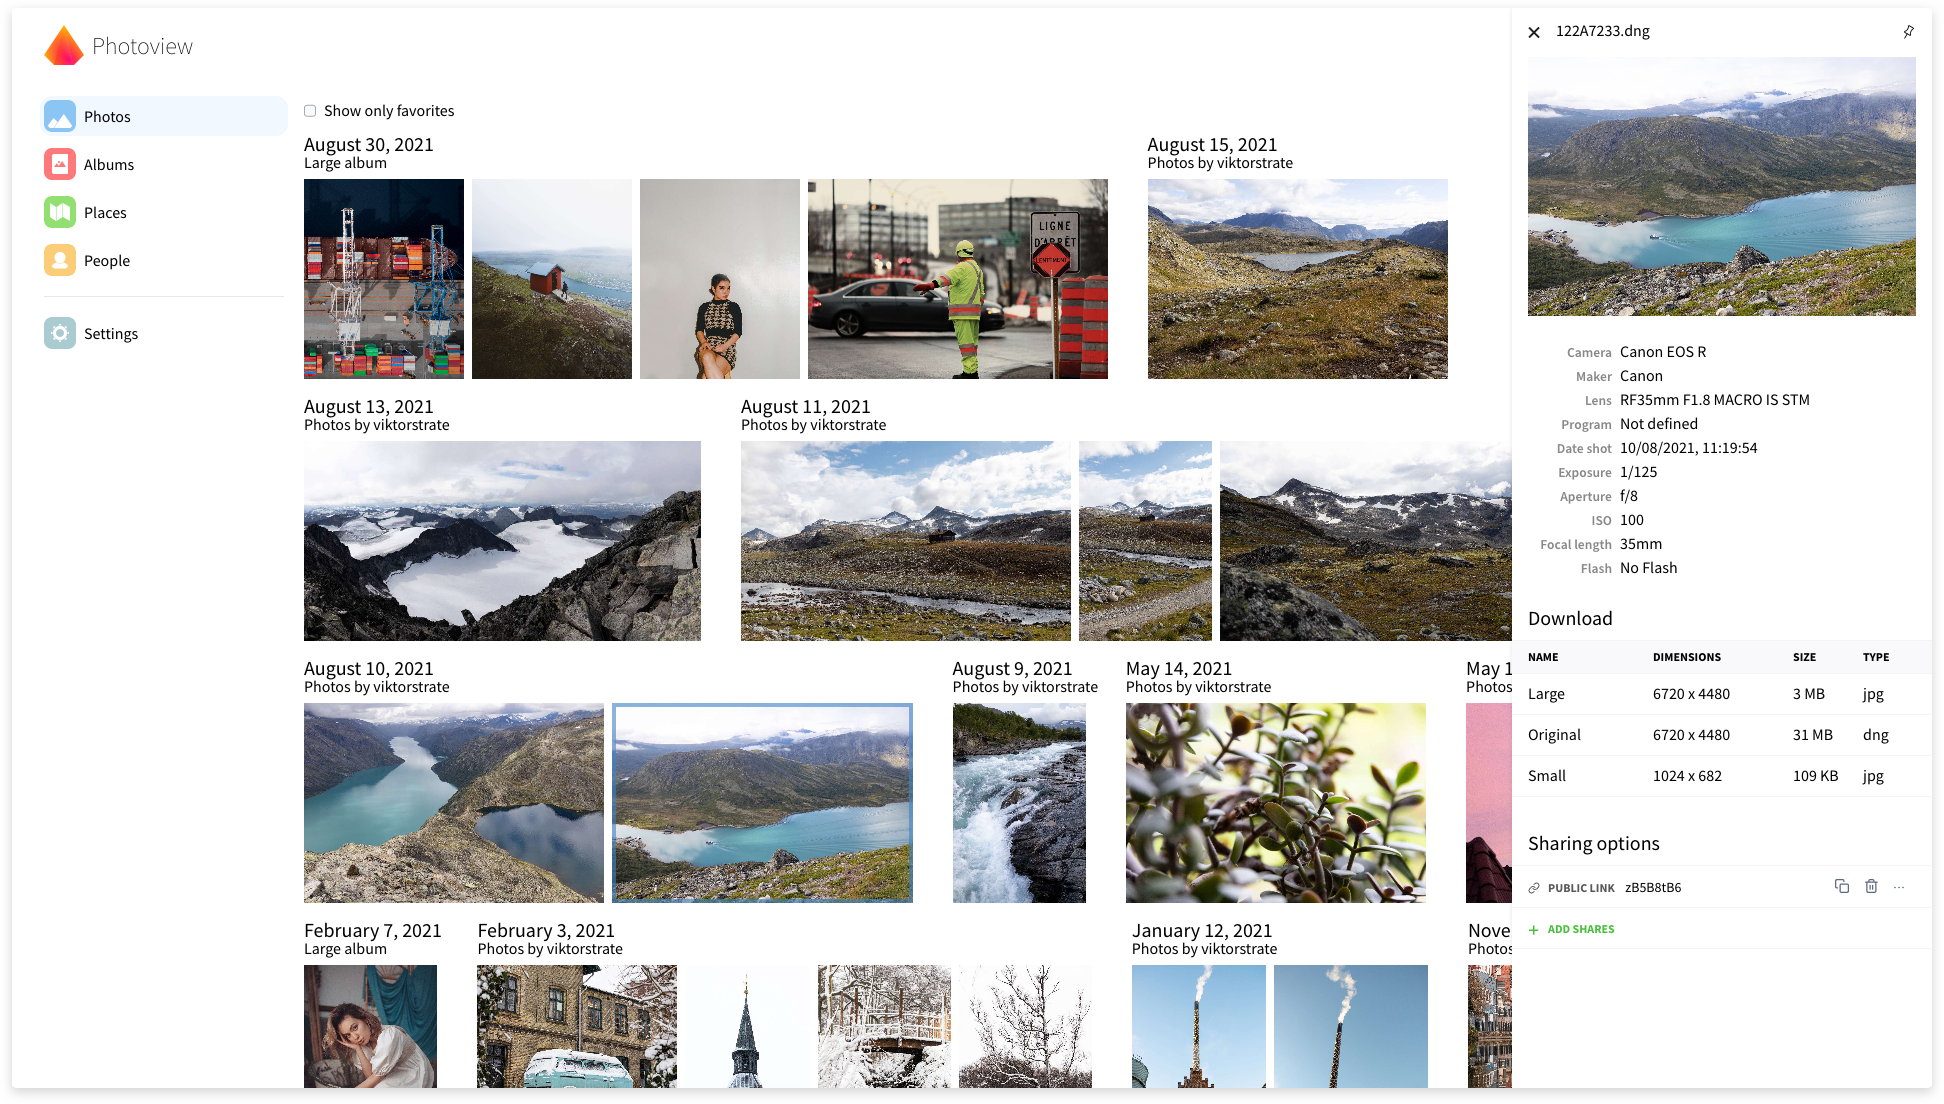
Photoview is a simple and user-friendly photo gallery that's made for photographers and aims to provide an easy and fast way to navigate directories, with thousands of high-resolution photos.
You configure Photoview to look for photos and videos within a directory on your file system. The scanner automatically picks up your media and starts to generate thumbnail images to make browsing super fast.
When your media has been scanned, they show up on the website, organised in the same way as on the filesystem.
If you have questions regarding setup or development, feel free to join the Discord server https://discord.gg/jQ392948u9
We migrated to the new Docker registry https://hub.docker.com/r/photoview/photoview and all new images for the master tag, as well as future releases are going to be published there instead of the previously used registry. Old images will be still accessible in the old registry https://hub.docker.com/r/viktorstrate/photoview, so if you want to use 1 of those old images, you need to revert back to the old registry.
Please update your docker-compose.yml file to use the new registry for the photoview image, as shown in the corresponding example of the compose file: https://github.com/photoview/photoview/tree/master/docker-compose%20example
Visit https://photos.qpqp.dk/
Username: demo
Password: demo
There exists a lot of open-source self-hosted photo galleries already. Here are some, just to mention a few.
So why another one? I love taking photos, and I store all of them on my local fileserver. This is great because I can organize my photos directly on the filesystem, so it's easy to move them or take backups. I want to be able to control where and how the photos are stored.
The problem is, however, that RAW images are extremely tedious to navigate from a fileserver, even over the local network.
My server holds a lot of old family pictures that I would like my family to have access to as well. And some of the pictures I would like to easily be able to share with other people without the hassle of them having to make an account first.
Thus, I need a solution that can do the following:
All the photo galleries can do a lot of what I need, but no single one can do it all.
This section describes how to get Photoview up and running on your server with Docker. Make sure you have Docker and docker-compose installed and running on your server.
makeshould be installed as well if you'd like to use providedMakefile, which is optional (see step 4 for more details).7zzshould be installed in case, you'd like to use it in scope of the backup scenario instead of the default .tar.xz format. Read the comment in theMakefile, located on top of thebackupsection for more details.
Download the content of the docker-compose example folder to the folder on your server, where you expect to host the Photoview internal data (database and cache files).
Please note that this folder contains 2 versions of the docker-compose file:
docker-compose.example.yml - the fully-functional and recommended for the most cases configdocker-compose.minimal.example.yml - the minimal and simple config for those, who find the previous one too complex and difficult to understand and manageWhen downloading files, you need to choose only one of them.
Rename downloaded files and remove the example from their names (so, you need to have .env, docker-compose.yml, and Makefile files). If you choose the docker-compose.minimal.example.yml on previous step, make sure to rename it to the docker-compose.yml.
Open these files in a text editor and read them. Modify where needed according to the documentation comments to properly match your setup. There are comments of 2 types: those, starting with ##, are explanations and examples, which should not be uncommented; those, starting with #, are optional or alternative configuration parts, which might be uncommented in certain circumstances, described in corresponding explanations. It is better to go through the files in the next order: .env, docker-compose.yml, and Makefile.
If your
PGSQL_PASSWORDorMARIADB_PASSWORDcontain special characters (e.g.@), make sure to URL-encode them.
Make sure that your media library's root folder and all the files and subfolders are readable and searchable by other users: run the next command (or corresponding sequence of commands from the Makefile):
make readableIf command(s) return Permission denied error, run them under the user, owning corresponding files and folders. Alternatively, run them adding sudo before the command: this will switch the execution context to root user and ask for the root password. You have to have permission to run sudo in the system.
If you don't want to give required permissions to others group for your files, alternatively, you can:
photoview service being owned by this group; then set the appropriate permissions to the group section.photoview service to this user; then set the appropriate permissions to the user section.If you configured other mounts with media files from other locations on the host (like HOST_PHOTOVIEW_MEDIA_FAMILY or anything else), you need to run the same commands, as in the Makefile readable target, for each media root folder on your host manually: copy each command to your shell and replace the variable with the absolute path to an additional media root folder without the trailing /. Run both commands for each additional root folder.
In case, you don't have make installed in your system or don't want to use it for the Photoview management activities, you could use the same commands from the Makefile and run them in your shell directly, or create your own scripts. Make sure to apply or replace the variables from your .env first in this case. Makefile is provided just for your convenience and simplicity, but is optional.
Start the server by running the following command (or corresponding sequence of commands from the Makefile):
make allIf the endpoint or the port hasn't been changed in the docker-compose.yml file, Photoview can now be accessed at http://localhost:8000
If everything is set up correctly, you should be presented with an initial setup wizard when accessing the website the first time.
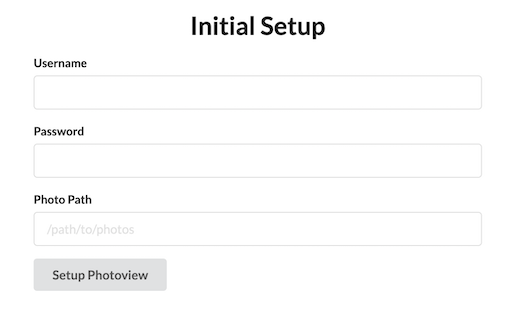
Enter a new username and password.
For the photo path, enter the path inside the docker container where your photos are located.
This can be set from the docker-compose.yml file under photoview -> volumes.
The default location is /photos.
A new admin user will be created, with access to the photos located at the path provided under the initial setup.
The photos will have to be scanned before they show up, you can start a scan manually, by navigating to Settings and clicking on Scan All
We suggest securing the Photoview instance before exposing it outside your local network: even while it provides read-only access to your media gallery and has basic user authentication functionality, it is not enough to protect your private media from malicious actors on the Internet.
Possible ways of securing a self-hosted service might be (but not limited to):
Setting up and configuring of all these protections depends on and requires a lot of info about your local network and self-hosted services. Based on this info, the configuration flow and resulting services architecture might differ a lot between cases. That is why in the scope of this project, we can only provide you with this high-level list of possible ways of webservice protection. You'll need to investigate them, find the best combination and configuration for your case, and take responsibility to configure everything in the correct and consistent way. We cannot provide you support for such highly secured setups, as a lot of things might work differently because of security limitations.
It is possible to run the FFmpeg with a codec supproting the hardware acceleration, by defining PHOTOVIEW_VIDEO_HARDWARE_ACCELERATION. The value should be one of qsv, vaapi, nvenc.
We only verified the hardware acceleration with qsv on an Intel chip. To let it work, it must map /dev/dri devices and set a ENV PHOTOVIEW_VIDEO_HARDWARE_ACCELERATION=qsv. See [docker-compose.example.yml](./docker-compose example/docker-compose.example.yml).
If you verify other hardware accelerations working well, let us know.
? First off, thanks for your interest in contribution! ?
This project is a result of hard work, and it's great to see you interested in contributing. Contributions are not just about code — you can help in many ways!
Before you start, please take a moment to read our Contributing guide. It includes information on our code of conduct, the process for submitting pull requests, and more.
Remember, every contribution counts. Let's make this project better together! ?
Docker development environment is easy to set up. It only requires Docker and Docker Compose Plugin locally. All dependencies are installed in a container but not in the host.
It also has some shortcomings. In macOS, Docker is running in a Linux VM. The fs notification doesn't work well in this case. You can't use reflex or nodemon to relaunch servers when code changes. The compiler runs pretty slow too.
We recommend to use Docker development environment. If Docker environment doesn't work well, like on macOS, please use local development environment.
It may take a long time to build dependencies when launching servers first time.
$ docker compose -f dev-compose.yaml build # Build images for development
$ docker compose -f dev-compose.yaml up # Launch API and UI servers
The graphql playground can now be accessed at localhost:4001. The site can now be accessed at localhost:1234. Both servers will be relaunched after the code is changed.
By default, it uses sqlite3 as database. To run servers with other database, please update PHOTOVIEW_DATABASE_DRIVER value in dev-compose.yaml file and run:
$ docker compose -f dev-compose.yaml --profile mysql up # Run with mysql database
or
$ docker compose -f dev-compose.yaml --profile postgres up # Run with postgresql databaseIf you don't want to depend on Docker Compose but only Docker, you can launch server as below.
It may take a long time to build dependencies when launching servers first time.
$ docker build --target api -t photoview/api . # Build image for development
$ docker run --rm -it -v `pwd`:/app --network host --env-file api/example.env photoview/api
    reflex -g '*.go' -s -- go run . # Monitor source code and (re)launch API server
The graphql playground can now be accessed at localhost:4001.
Note
The server runs on the host network as --network host flag. It's easy to communicate between API server and UI server. If you don't want to do that, please check Docker Network to create a new network to run servers.
It may take a long time to build dependencies when launching servers first time.
$ docker build --target ui -t photoview/ui . # Build image for development
$ docker run --rm -it -v `pwd`:/app --network host --env-file ui/example.env photoview/ui
    npm install # Install dependencies
$ docker run --rm -it -v `pwd`:/app --network host --env-file ui/example.env photoview/ui
    npm run mon # Monitor source code and (re)launch UI server
The site can now be accessed at localhost:1234.
Note
The server runs on the host network as --network host flag. It's easy to communicate between API server and UI server. If you don't want to do that, please check Docker Network to create a new network to run servers.
In Linux, we recommend to use Docker Compose or Docker as a local development environment.
We can't keep verifying below commands on each environment. People may need to solve dependencies by their own.
golang >= 1.22g++libc-devlibheif >= 1.15.1dliblibjpeglibblaslibcblas, recommended using libatlas-base in Debian.liblapackreflex: a source code monitoring tool, which automatically rebuilds and restarts the server, running from the code in development.sqlite: the SQLite DBMS, useful to interact with Photoview's SQLite DB directly if you use it in your development environment.node = 18In Debian/Ubuntu, install dependencies:
$ sudo apt update # Update the package list
$ sudo apt install golang g++ libc-dev libheif-dev libdlib-dev libjpeg-dev libblas-dev libatlas-base-dev liblapack-dev # For API requirement
$ sudo apt install reflex sqlite3 # For API optional tools
In macOS, install dependencies:
$ brew update # Update the package list
$ brew install golang gcc pkg-config libheif dlib jpeg # For API
$ brew install reflex sqlite3 # For API optional tools
Please follow the package manager guidance if you don't use apt or homebrew.
For node, recommend to use nvm. Follow Installing and Updating to install nvm locally, then:
$ nvm install 18
$ nvm use 18
You can install node with other package manager if you like.
/api/example.env to .envPHOTOVIEW_SQLITE_PATH if you don't want to put sqlite file under /apiPHOTOVIEW_DATABASE_DRIVER with your driverIf your
PGSQL_PASSWORDorMARIADB_PASSWORDcontain special characters (e.g.@), make sure to URL-encode them.
/ui/example.env to .envThen run the following commands:
# Optional: Set the compiler environment in Debian/Ubuntu
$ source ./scripts/set_compiler_env.sh
# Set the compiler environment with `homebrew`
$ export CPLUS_INCLUDE_PATH="$(brew --prefix)/opt/jpeg/include:$(brew --prefix)/opt/dlib/include"
$ export LD_LIBRARY_PATH="$(brew --prefix)/opt/jpeg/lib:$(brew --prefix)/opt/dlib/lib"
$ export LIBRARY_PATH="$(brew --prefix)/opt/jpeg/lib:$(brew --prefix)/opt/dlib/lib"
# Start API server
$ cd ./api
$ go run .
If you want to recompile the server automatically when code changes:
# Start API server
$ cd ./api
$ reflex -g '*.go' -s -- go run .
The graphql playground can now be accessed at localhost:4001.
In a new terminal window run the following commands:
cd ./ui
npm install
npm start
If you want to recompile the server automatically when code changes:
$ cd ./ui
$ npm run mon
The site can now be accessed at localhost:1234.
|
@ericerkz |
@robin-moser |
@Revorge |
@deexno |
@FKrauss |
@jupblb |


