dev case
1.0.0
DevCase was designed for developers and IT professionals. It is a tool to help you get your own blog and portfolio online quickly and easily.
Demo/Example: rburkhardt.com
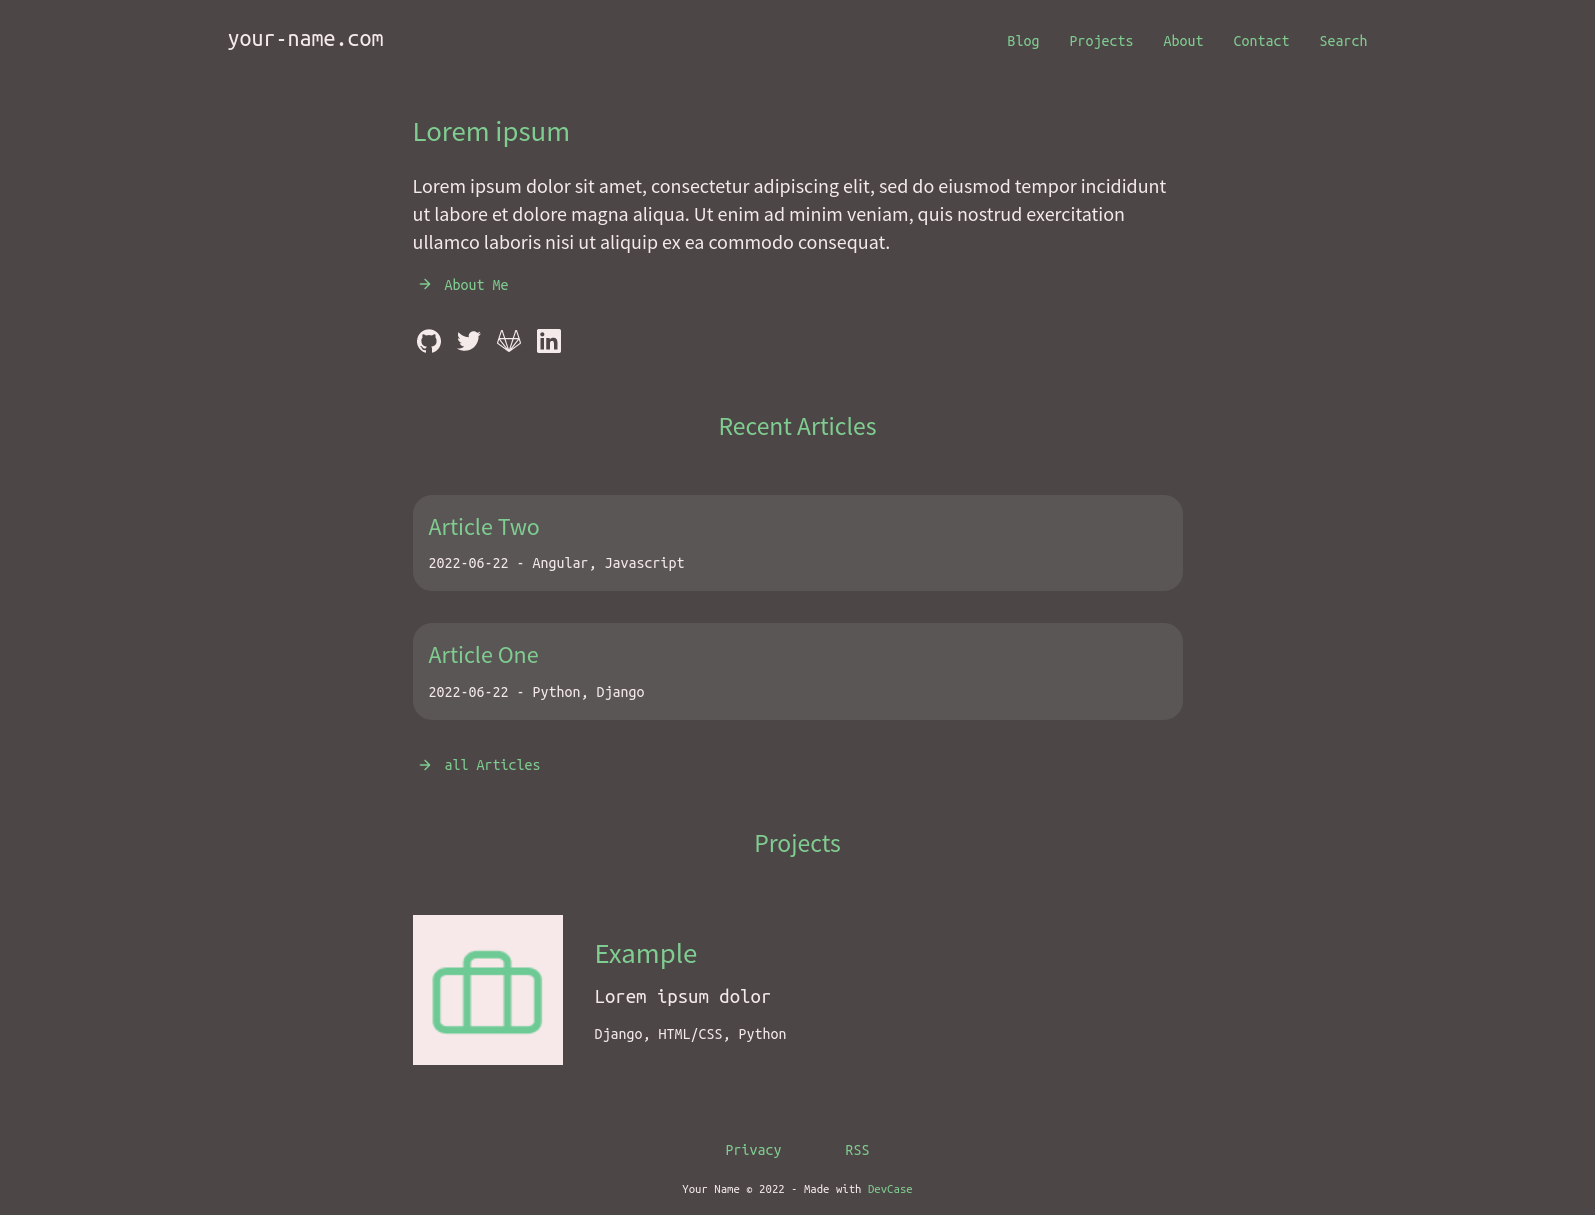
Home
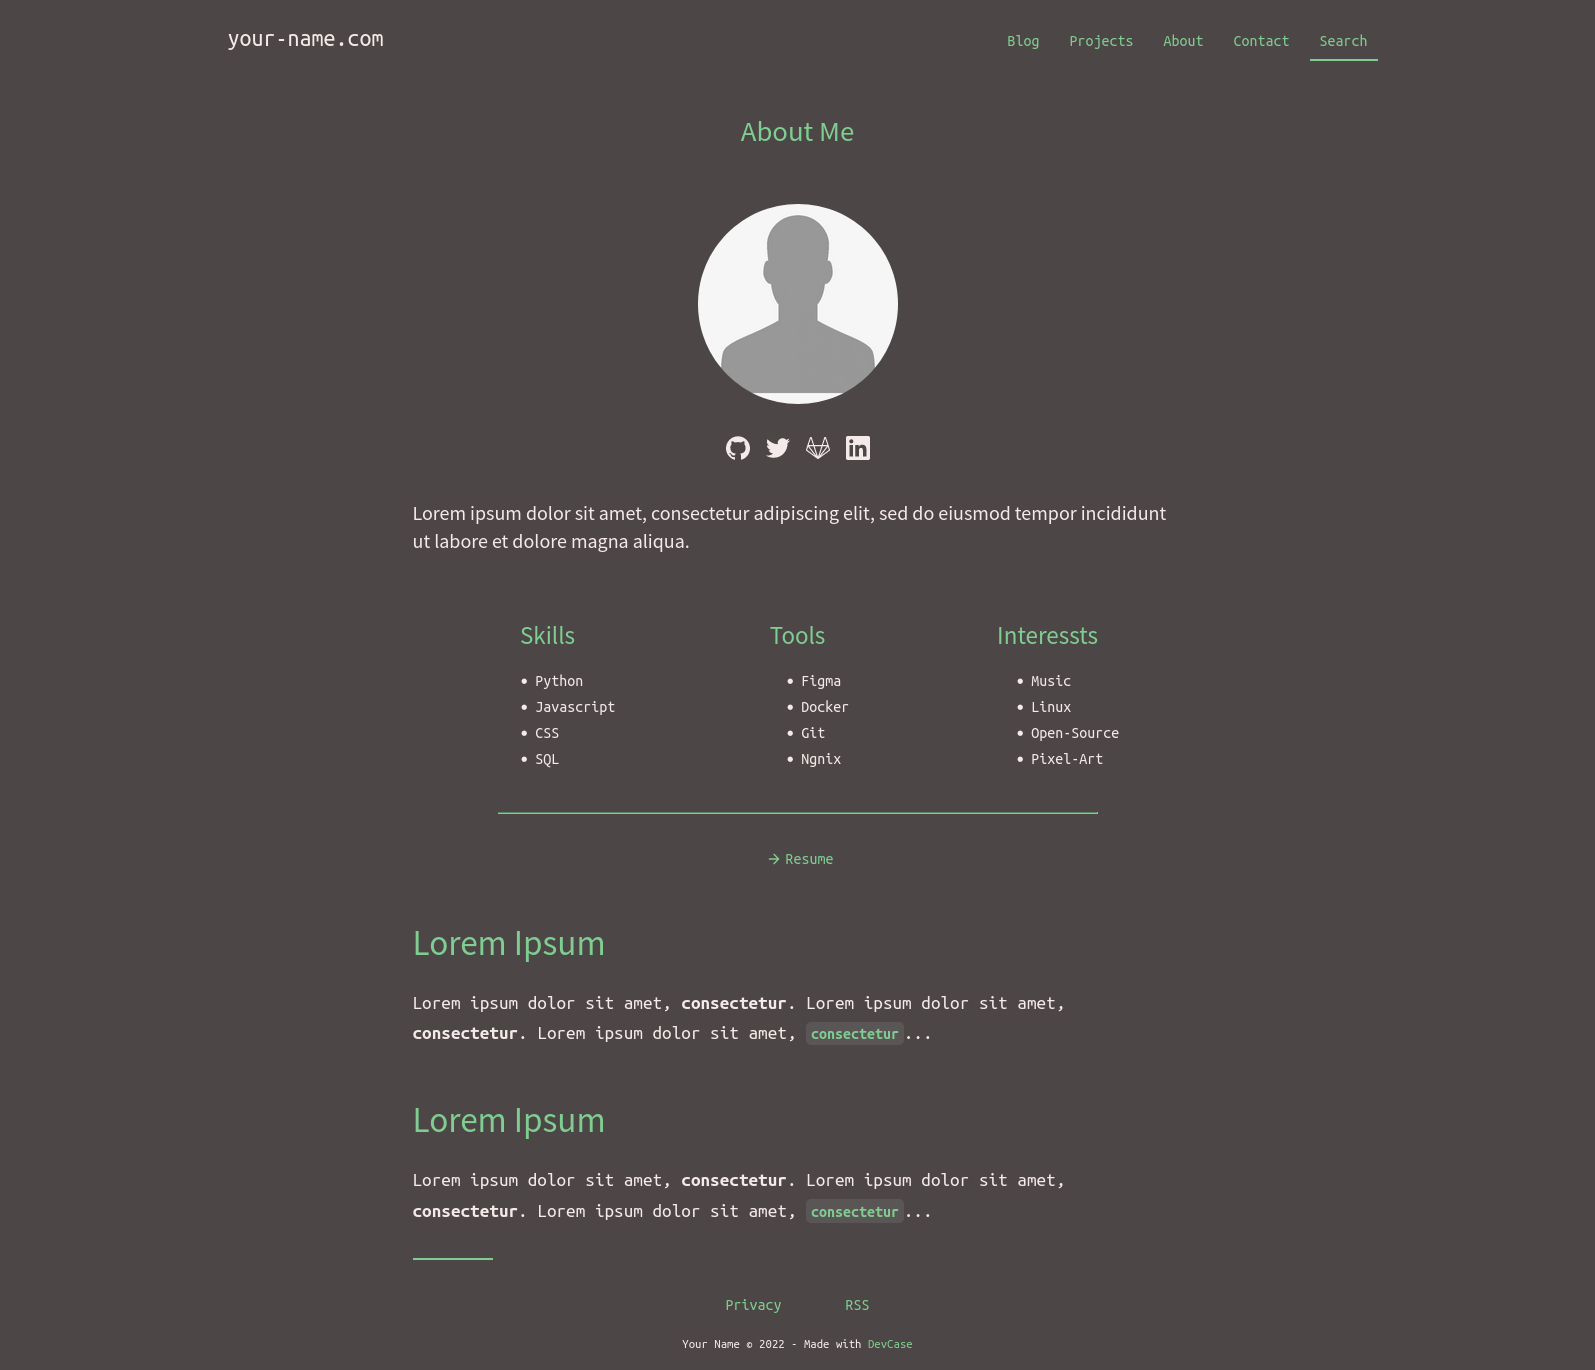
About
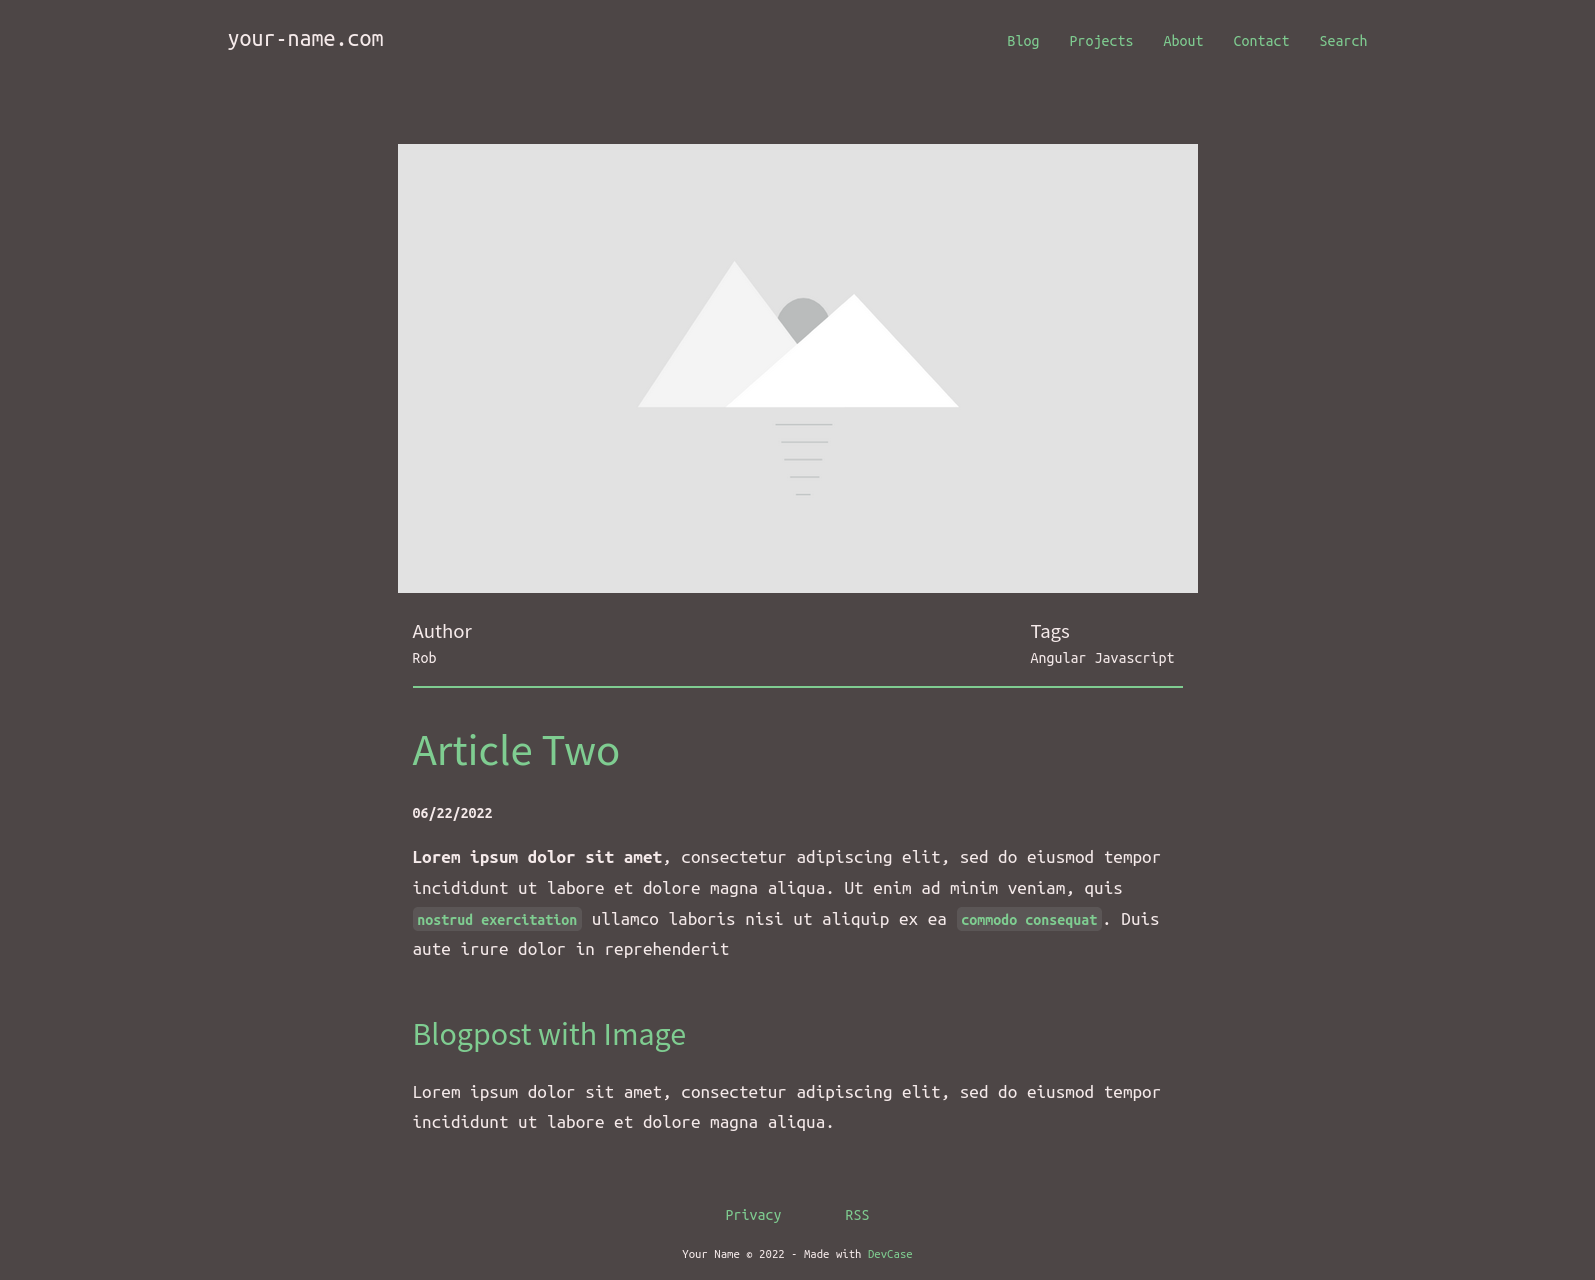
Blogpost with image (new version has comments-system)
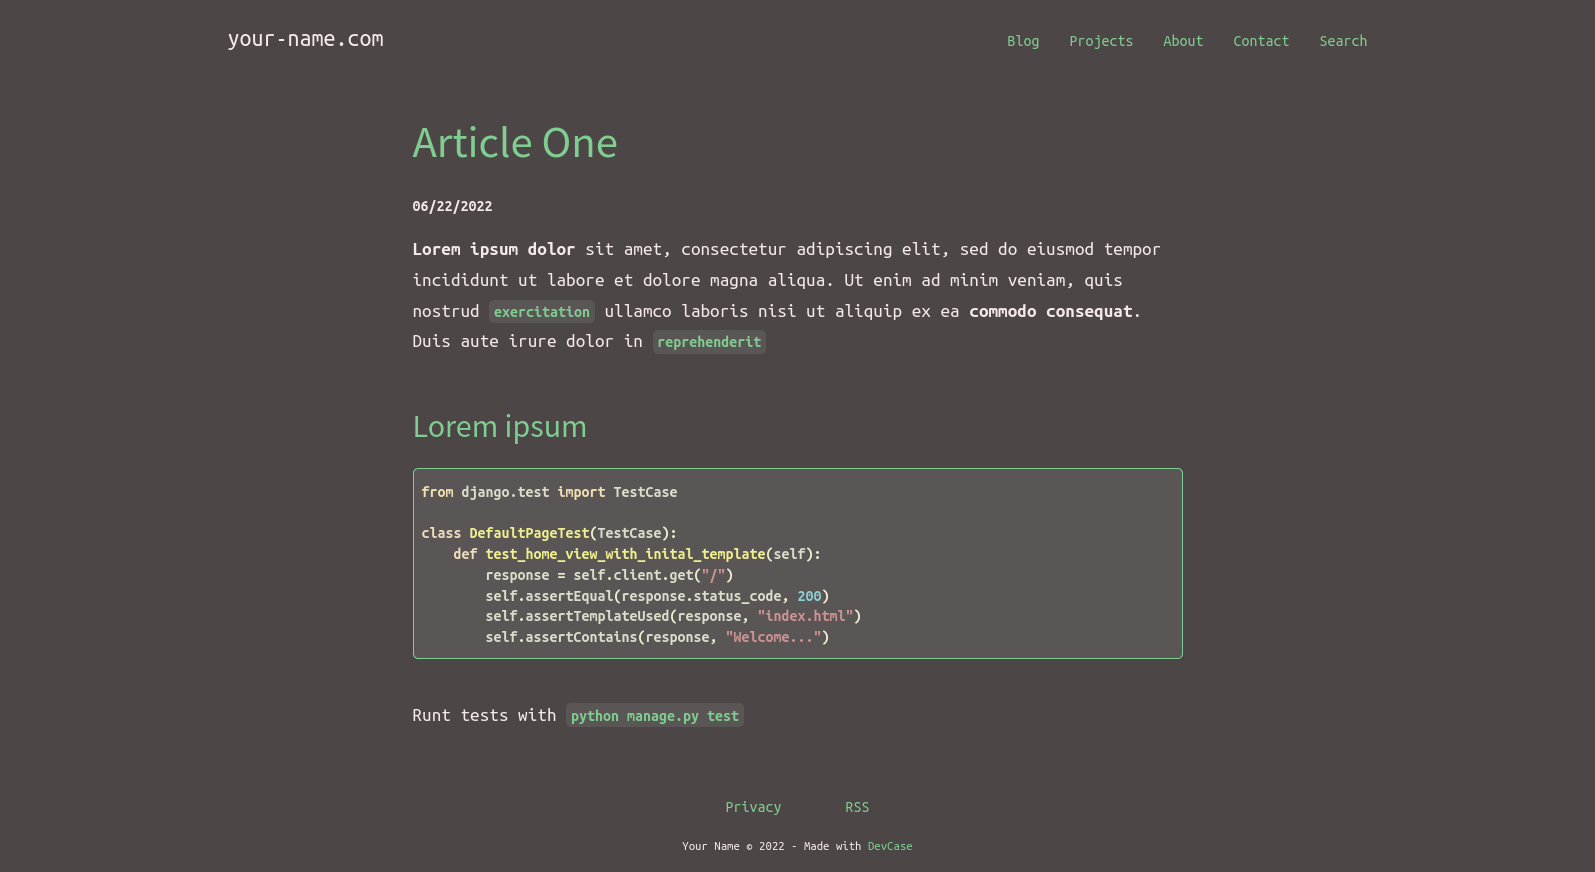
Blogpost without image (new version has comments-system)
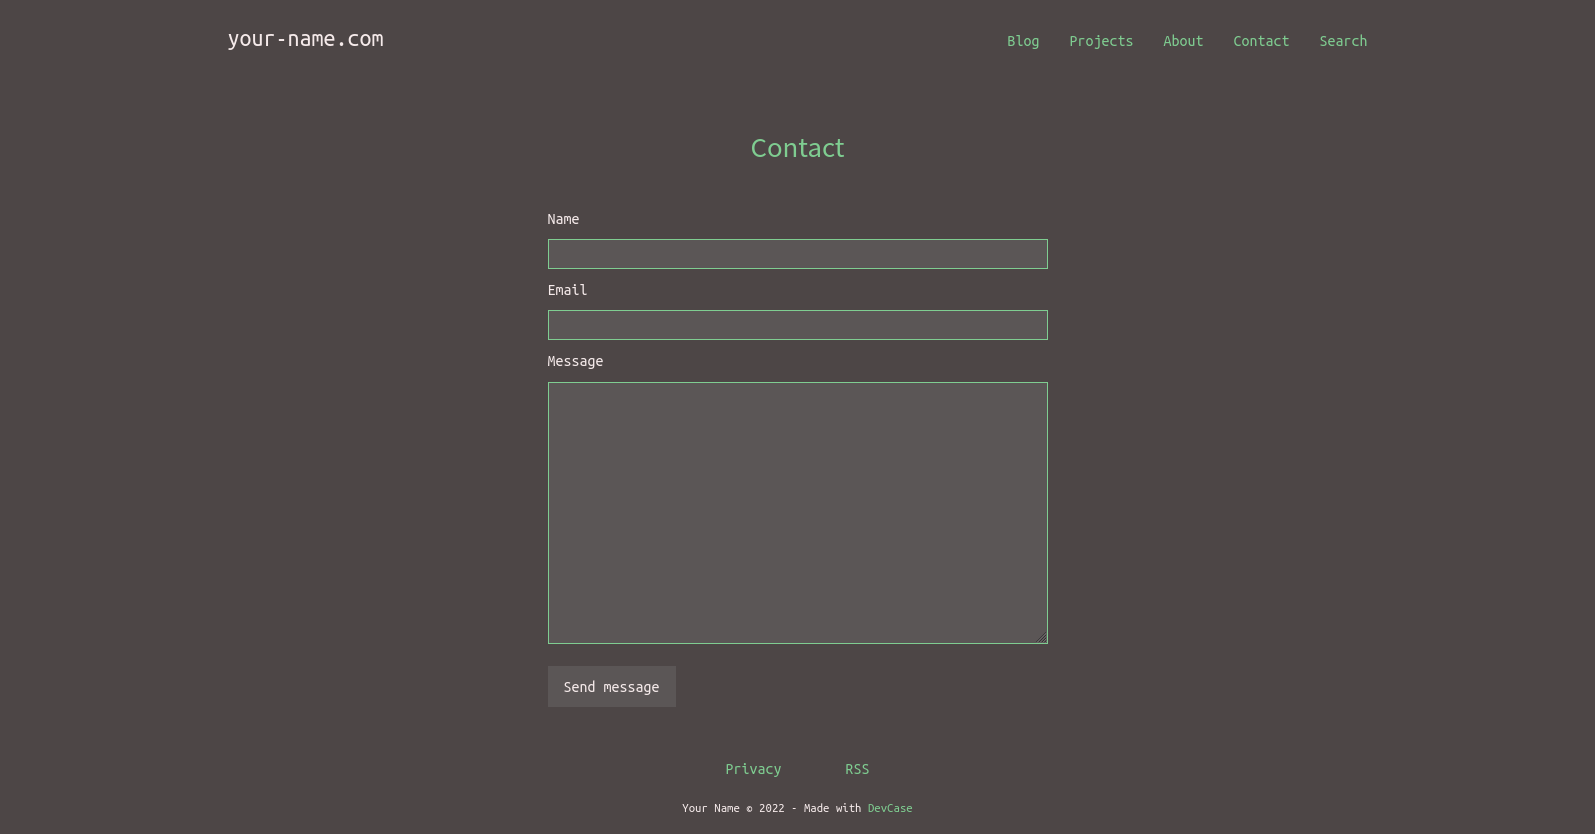
Contact Page (new version has captchas)
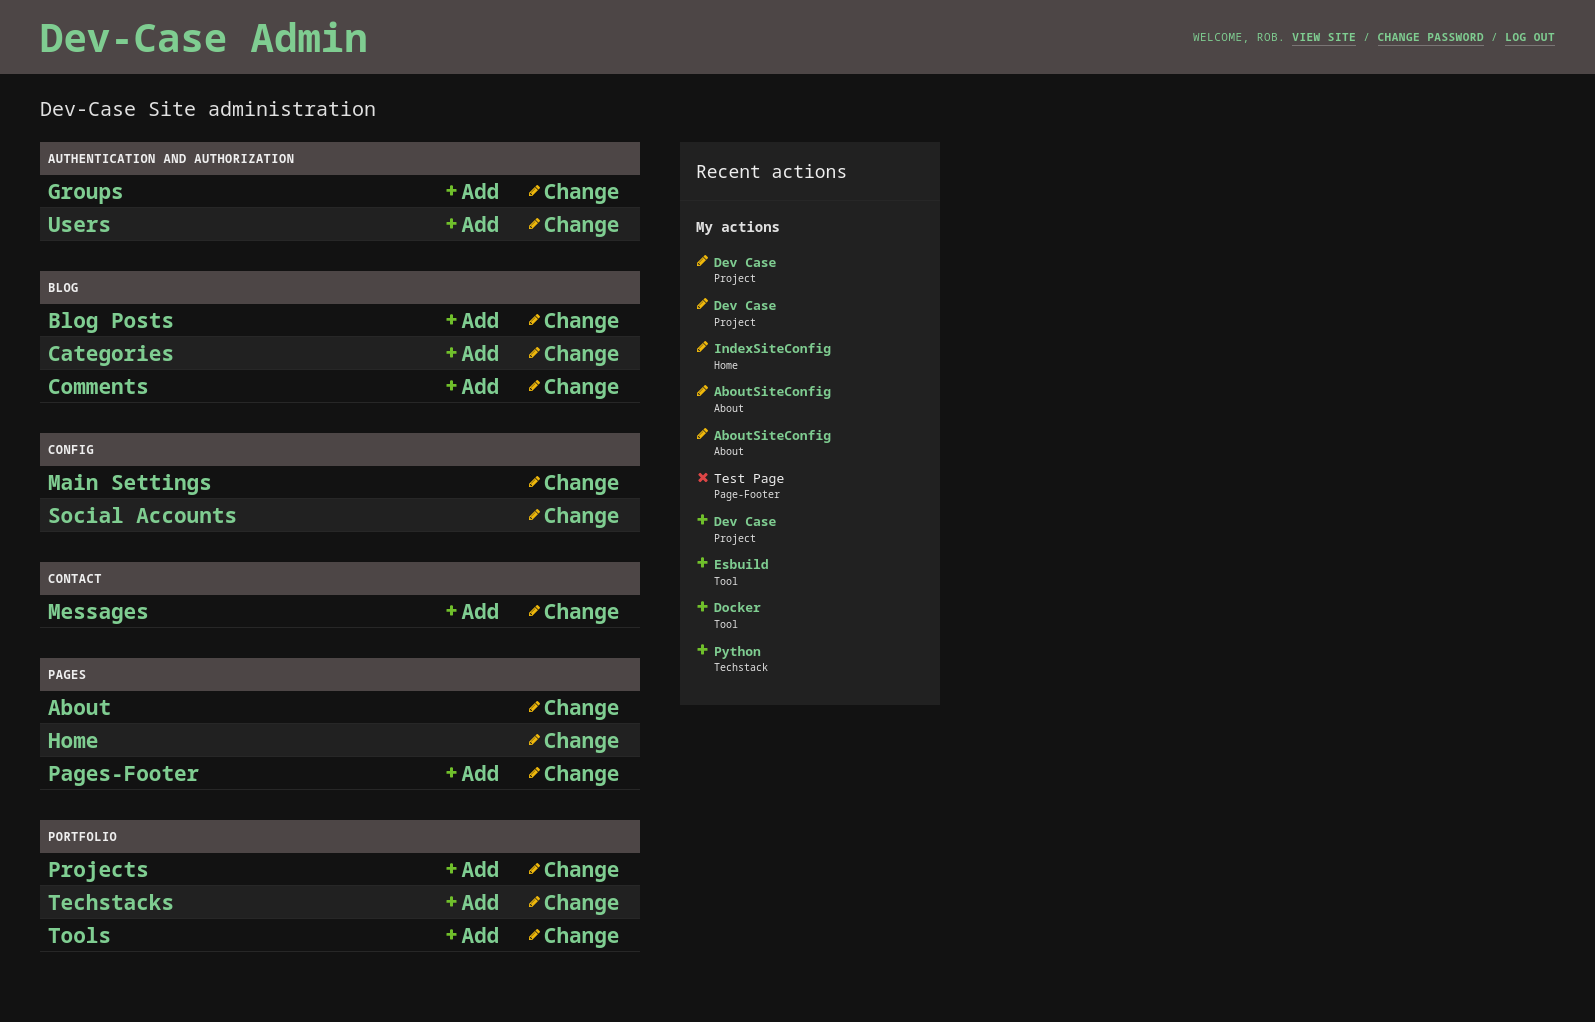
Admin Dashboard
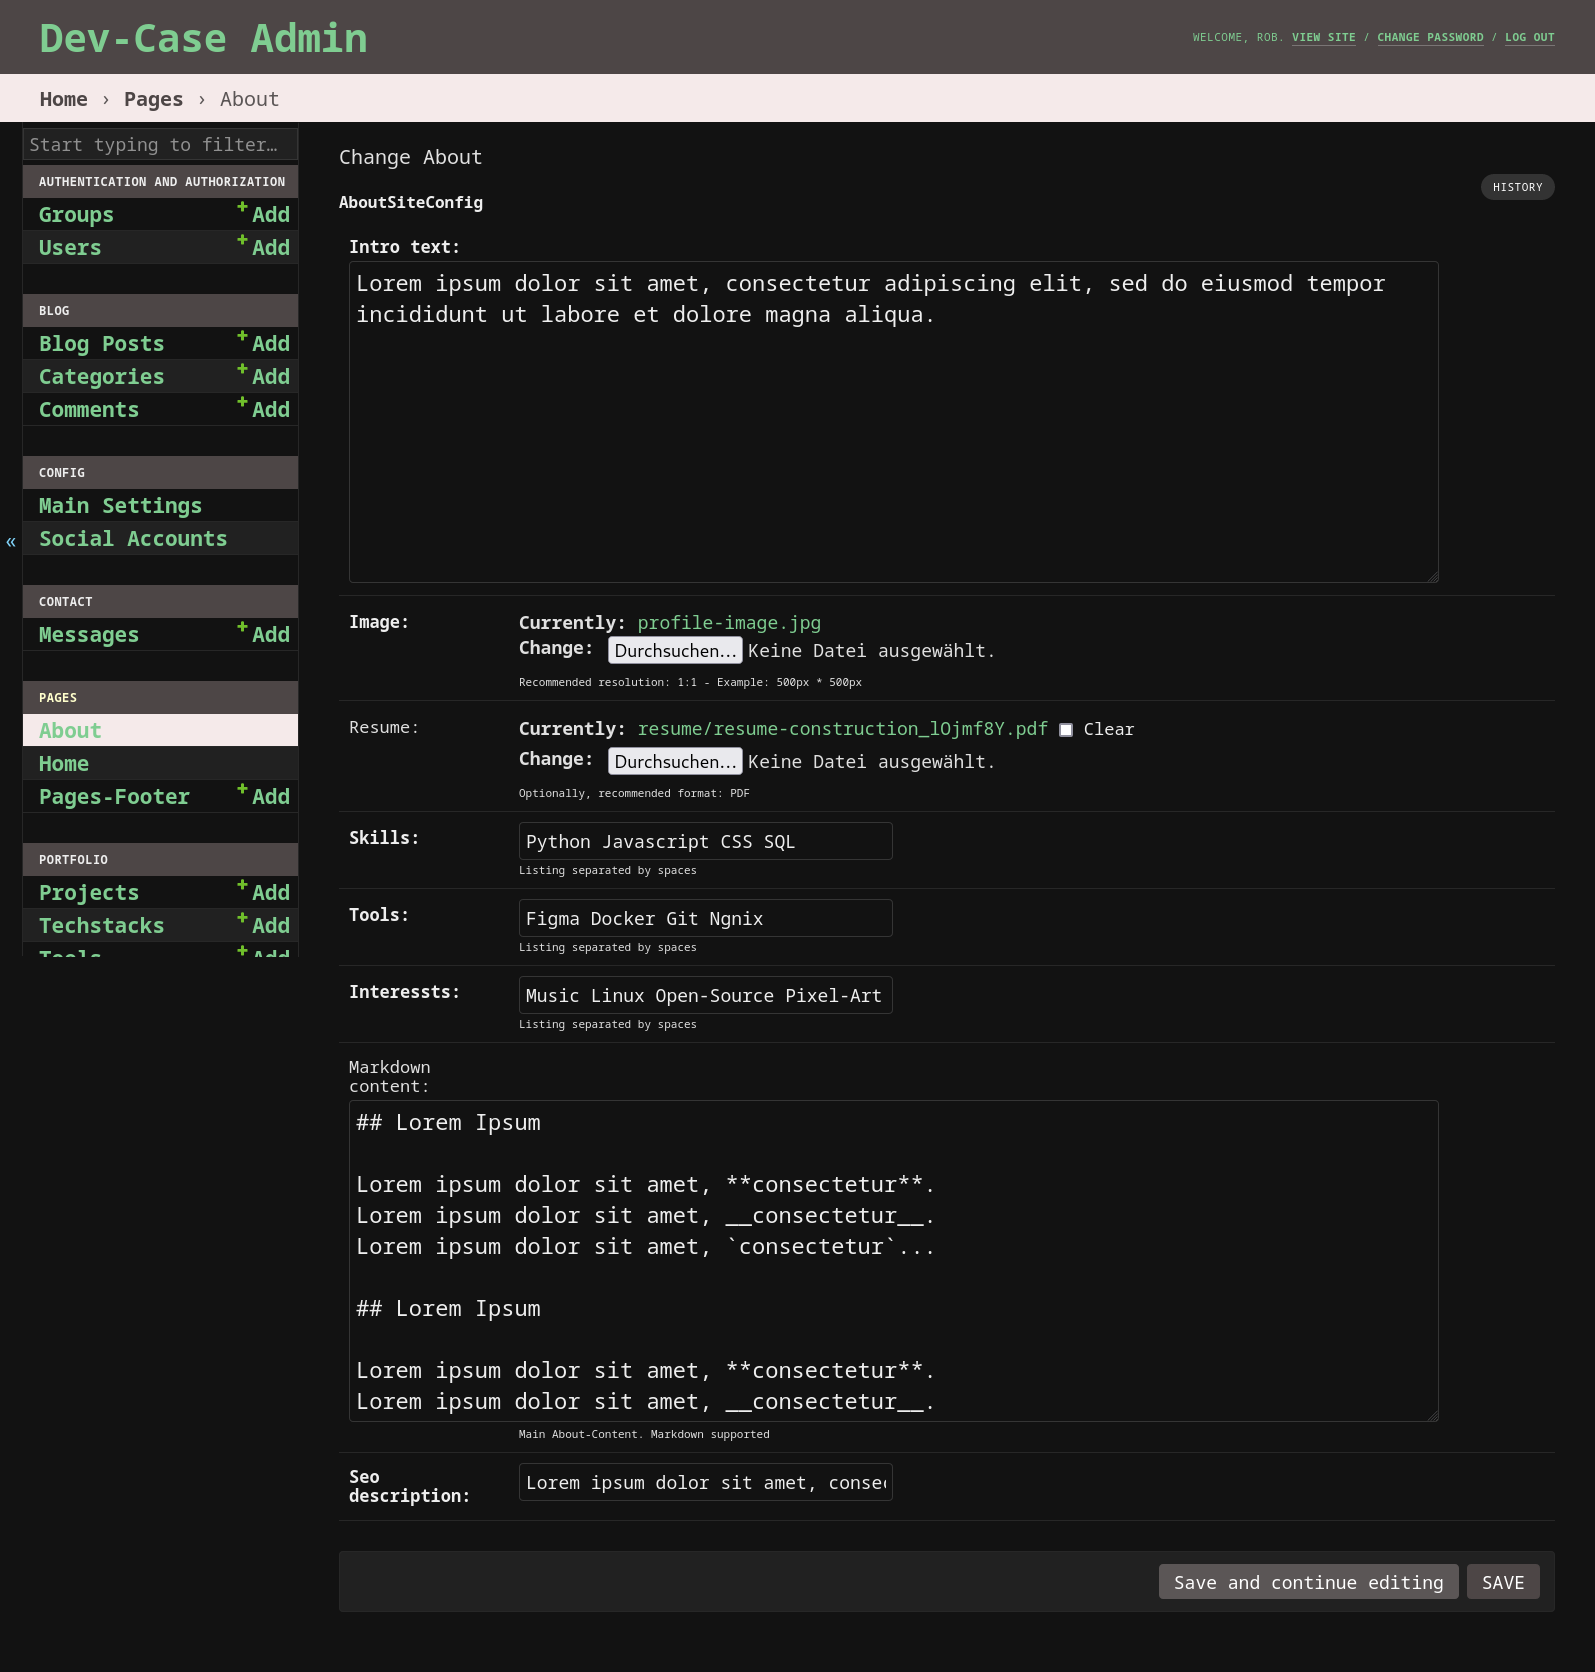
Admin - About Config
The fastest and easiest way to test dev-case locally:
git clone [email protected]:rob32/dev-case.git
cd dev-case
docker-compose up -d --build
docker-compose exec web python manage.py migrate
docker-compose exec web python manage.py createsuperuser
Important:
Create a new .env file with the following content (before docker-compose up -d --build):
DEBUG=True
DATABASE_URL=psql://postgres:postgres@db:5432/postgres
Go to http://127.0.0.1:8000/ and check if all worked.
Development environment with Python (venv) and Node (optional).
Tested with GNU/Linux & Mac:
git clone [email protected]:rob32/dev-case.git
cd dev-case
python3 -m venv venv && source venv/bin/activate
pip install -r requirements-dev.txt
python3 manage.py migrate
pre-commit install
create a .env file with at least the following content:
DEBUG=True
# only if postgres is used, uncomend the next line (example):
# DATABASE_URL=psql://postgres:postgres@db:5432/postgres
Start the Development-Server with python3 manage.py runserver
Go to http://127.0.0.1:8000/
# Install dependecies with:
npm install

# Build "Fronted" manually (uses `rm -rf` for cleaning):
npm run build
Optional: Start Backend-Server and Esbuild in watch-mode at the same time with npm start.
# Unit/Integration Tests:
python3 manage.py test

# Code Quality with the help of pre-commit
pre-commit run -a -v
A selection of possible settings via environment variables:
SECRET_KEY=insecure-secretkey12345
DEBUG=FALSE
ALLOWED_HOSTS=my-domain-name.com
DATABASE_URL=psql://postgres:postgres@db:5432/postgres
ADMIN_LOCATION=dev-case/
ROBOTS_DISALLOW=/contact/,/private-file.html`

FEED_TITLE="My Feed Title"
FEED_DESCRIPTION="My feed description"

USE_UMAMI_ANALYTICS=True
UMAMI_SCRIPT_URL=https://your-umami-app.com/umami.js
UMAMI_DATA_WEBSITE_ID=2323-3232-2323-3232
WIP
For deployment/production there are two branches at the moment:
For DigitalOcean’s App Platform you can use the "Deploy to DigitalOcean" button below. Please make sure you have a working S3 space/bucket with the required credentials. Guide: How To Create a DigitalOcean Space and API Key
After the build process completes:
Access your app’s console through the Console tab and run the following commands:
python3 manage.py migrate for the initial database migrationspython3 manage.py createsuperuser to create an administrative userAs a last step, make the following adjustment in your Space setting:
Your Space -> Settings -> CORS Configurations (Add):
*ondigitalocean.app*example.comThis should solve the problem with the fonts (missing header, Access-Control-Allow-Origin)
Possible settings for production (via environment variables):
SECURE_SSL_REDIRECT=True
SECURE_HSTS_SECONDS=2592000
SECURE_HSTS_INCLUDE_SUBDOMAINS=True
SECURE_HSTS_PRELOAD=True

SESSION_COOKIE_SECURE=True
CSRF_COOKIE_SECURE=True
Make sure that USE_S3_STORAGE is set to True.
Possible settings for S3 compatible storage (via environment variables):
USE_S3_STORAGE (default=False)
AWS_ACCESS_KEY_ID
AWS_SECRET_ACCESS_KEY
AWS_STORAGE_BUCKET_NAME
AWS_S3_REGION_NAME
AWS_S3_ENDPOINT_URL
AWS_S3_CUSTOM_DOMAIN
AWS_LOCATION
AWS_IS_GZIPPED (default=False)
AWS_S3_FILE_OVERWRITE (default=True)
AWS_DEFAULT_ACL (default=public-read)
You can change the location for the admin area using the ADMIN_LOCATION environment variable. Default is admin/.
Change DOMAIN NAME and DISPLAY NAME via Admin-Panel (Sites App) to your actual domain name. Default is set to "example.com".
To add Disallow rules, use the ROBOTS_DISALLOW environment variable. For a valid Sitemap entry change your domain name as described in Sitemap.xml.
Example: ROBOTS_DISALLOW=/contact/,/private-file.html
To receive notifications you can configure the following settings via environment variables:
USE_EMAIL_SMTP (default=False)
EMAIL_NOTIFICATION (default=False)
EMAIL_RECIPIENT (receiver address)

EMAIL_HOST
EMAIL_HOST_USER
EMAIL_HOST_PASSWORD
EMAIL_USE_TLS (default=True)
EMAIL_USE_SSL (default=False)
EMAIL_PORT (default=587)
DEFAULT_FROM_EMAIL
Make sure that USE_EMAIL_SMTP and EMAIL_NOTIFICATION is set to True.
The DEFAULT_FROM_EMAIL variable needs to have a valid value (example: [email protected]).
This will notify you when there are new comments or when you receive a message via the contact page.
If you also want to be notified in case of server errors, set the environment variable DJANGO_ADMINS with your name and email address. Example:
DJANGO_ADMINS=YourName:[email protected]

# or more
DJANGO_ADMINS=NameOne:[email protected],NameTwo:[email protected]
Make sure that the USE_UMAMI_ANALYTICS environment variable is set to True.
Additionally create a UMAMI_SCRIPT_URL and UMAMI_DATA_WEBSITE_ID environment variable with the corresponding values.
Example:
USE_UMAMI_ANALYTICS=True
UMAMI_SCRIPT_URL=https://your-umami-app.com/umami.js
UMAMI_DATA_WEBSITE_ID=2323-3232-2323-3232
Make sure that the USE_PLAUSIBLE_ANALYTICS environment variable is set to True.
Additionally create a PLAUSIBLE_SCRIPT_URL and PLAUSIBLE_DATA_DOMAIN environment variable with the corresponding values.
Example:
USE_PLAUSIBLE_ANALYTICS=True
PLAUSIBLE_SCRIPT_URL=https://plausible.io/js/script.js
PLAUSIBLE_DATA_DOMAIN=example.com
Contributions, Feedback and Feature-Requests are always welcome. To learn more, see the Contributor Guide
A big thanks to the following great projects:
The project is available under GNU GPLv3 Licence.
If you like the project, please give it a star


